


Hardware components | ||||||
| × | 1 | ||||
 |
| × | 1 | |||
| × | 1 | ||||
| × | 1 | ||||
| × | 1 | ||||
Software apps and online services | ||||||
 |
| |||||
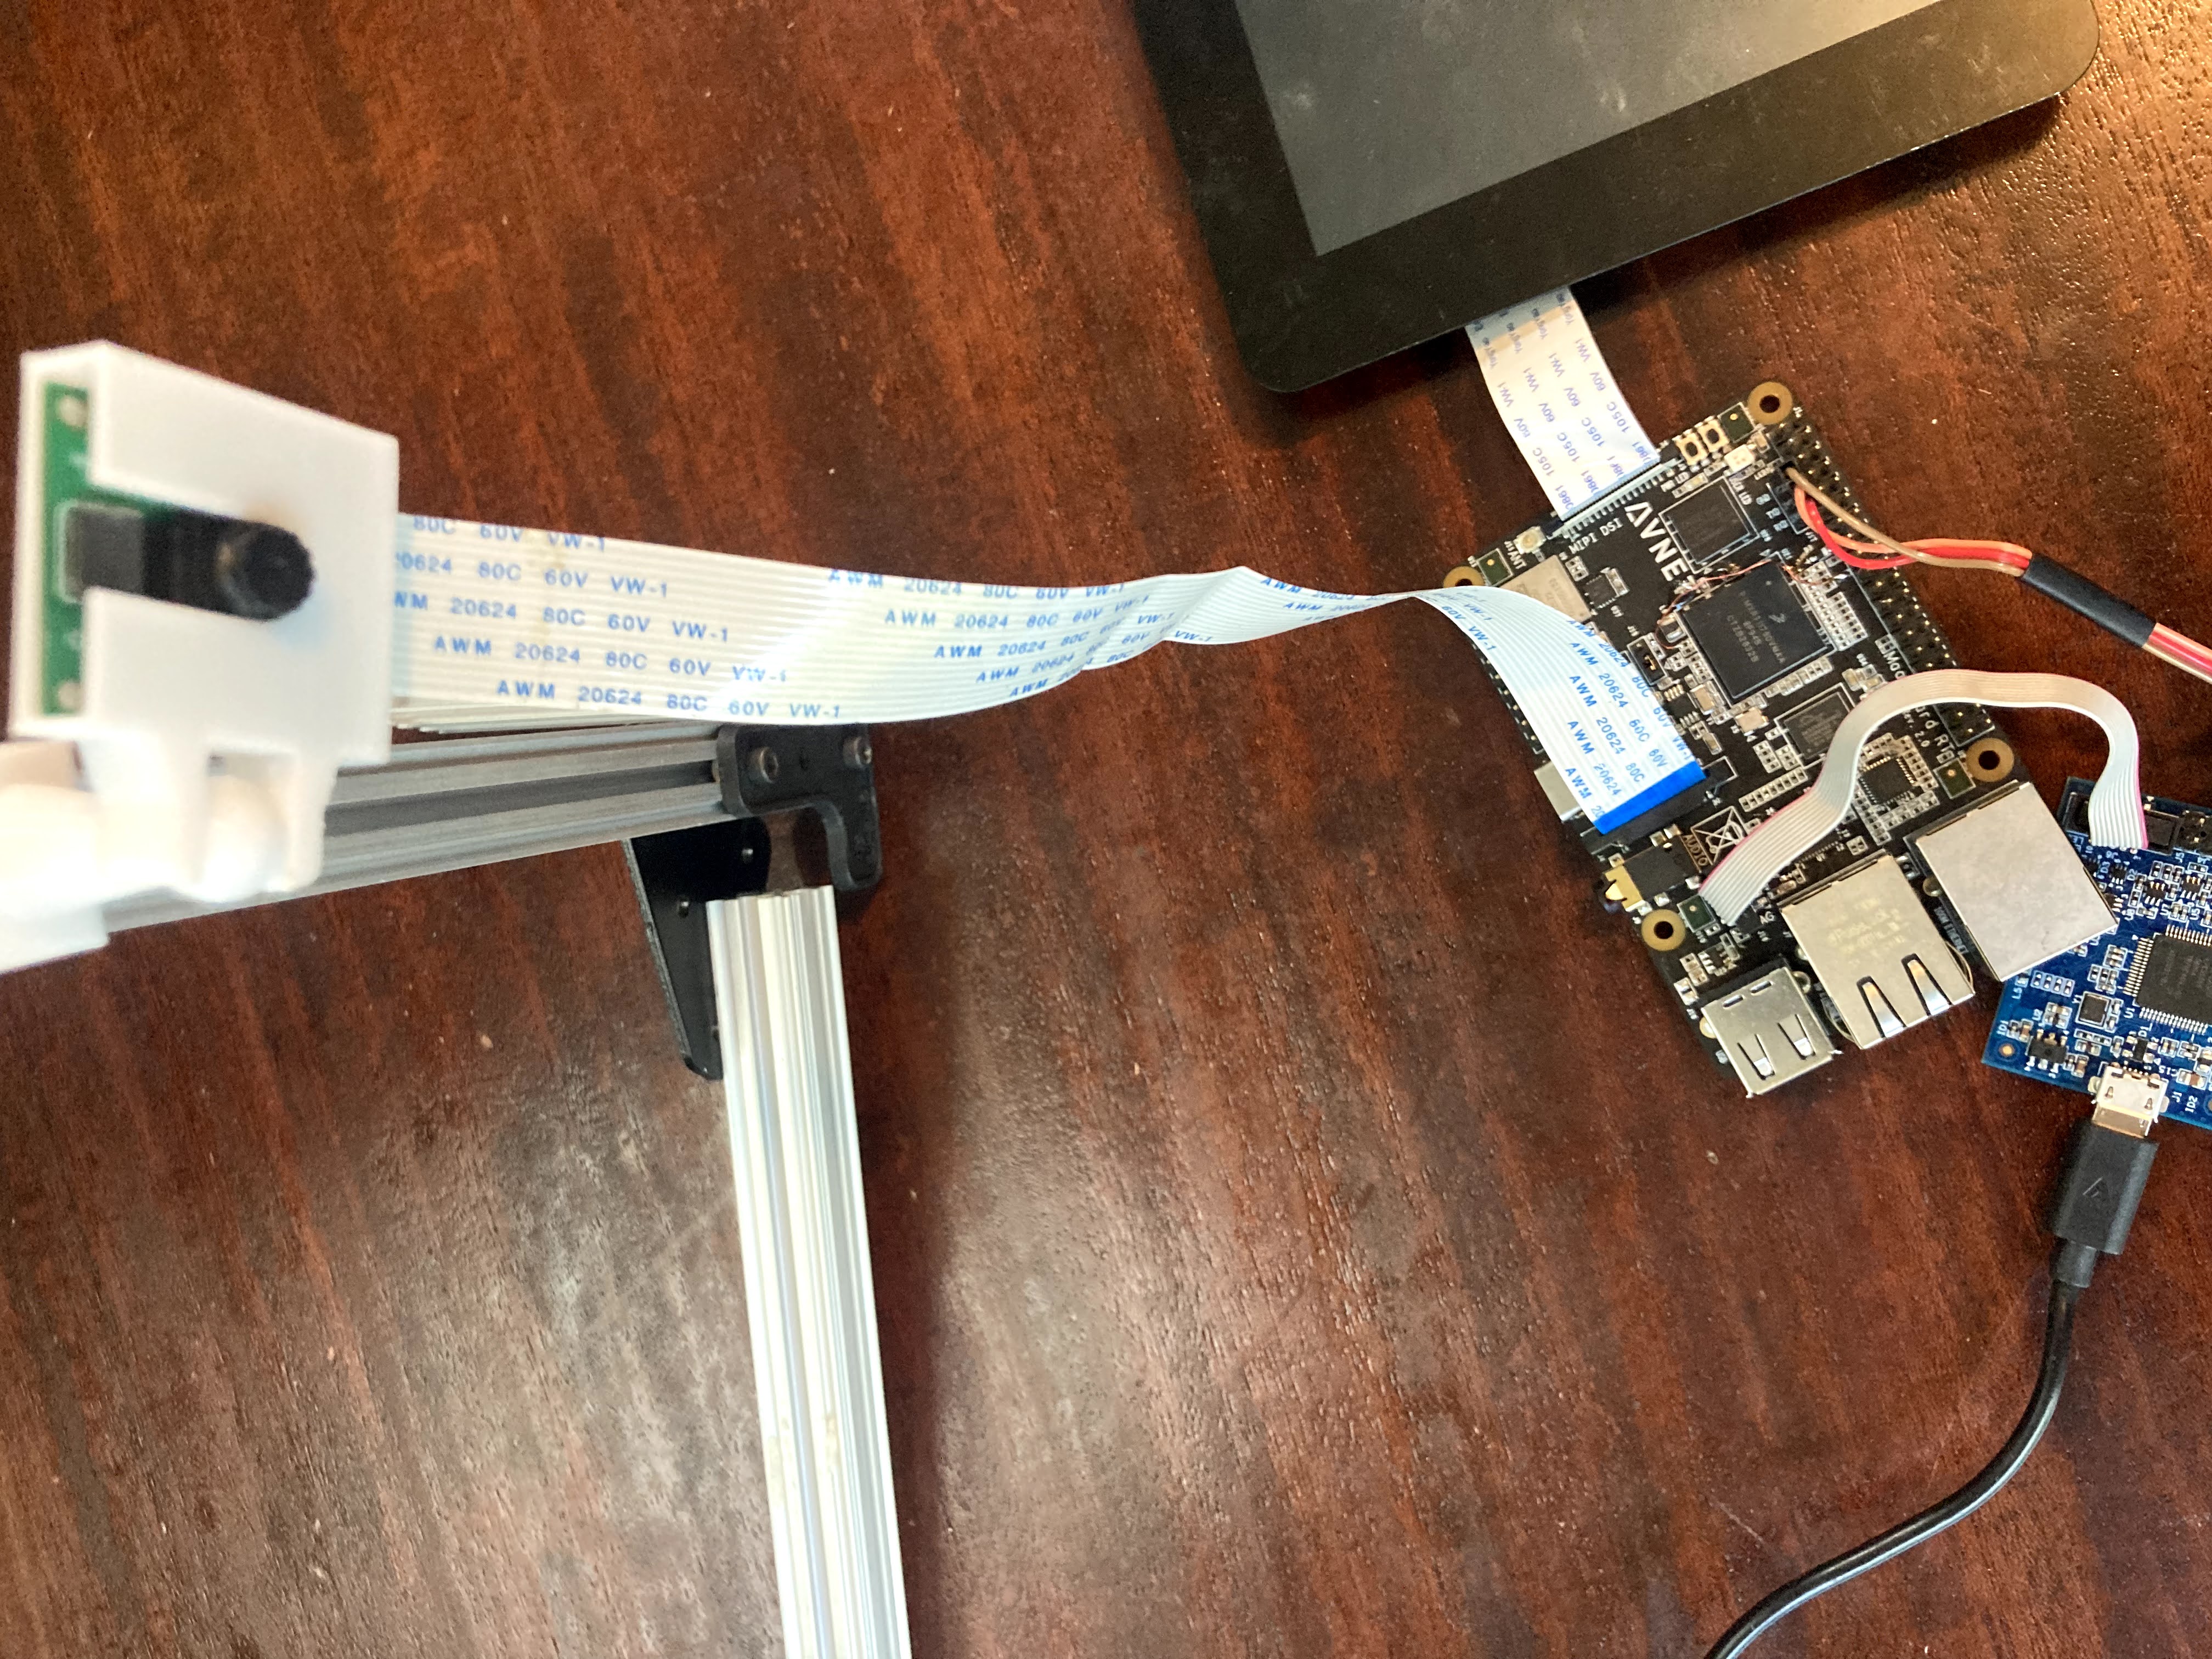
- Plug the MaaXBoard camera into the MIPI-CSA camera connector next to the audio jack.
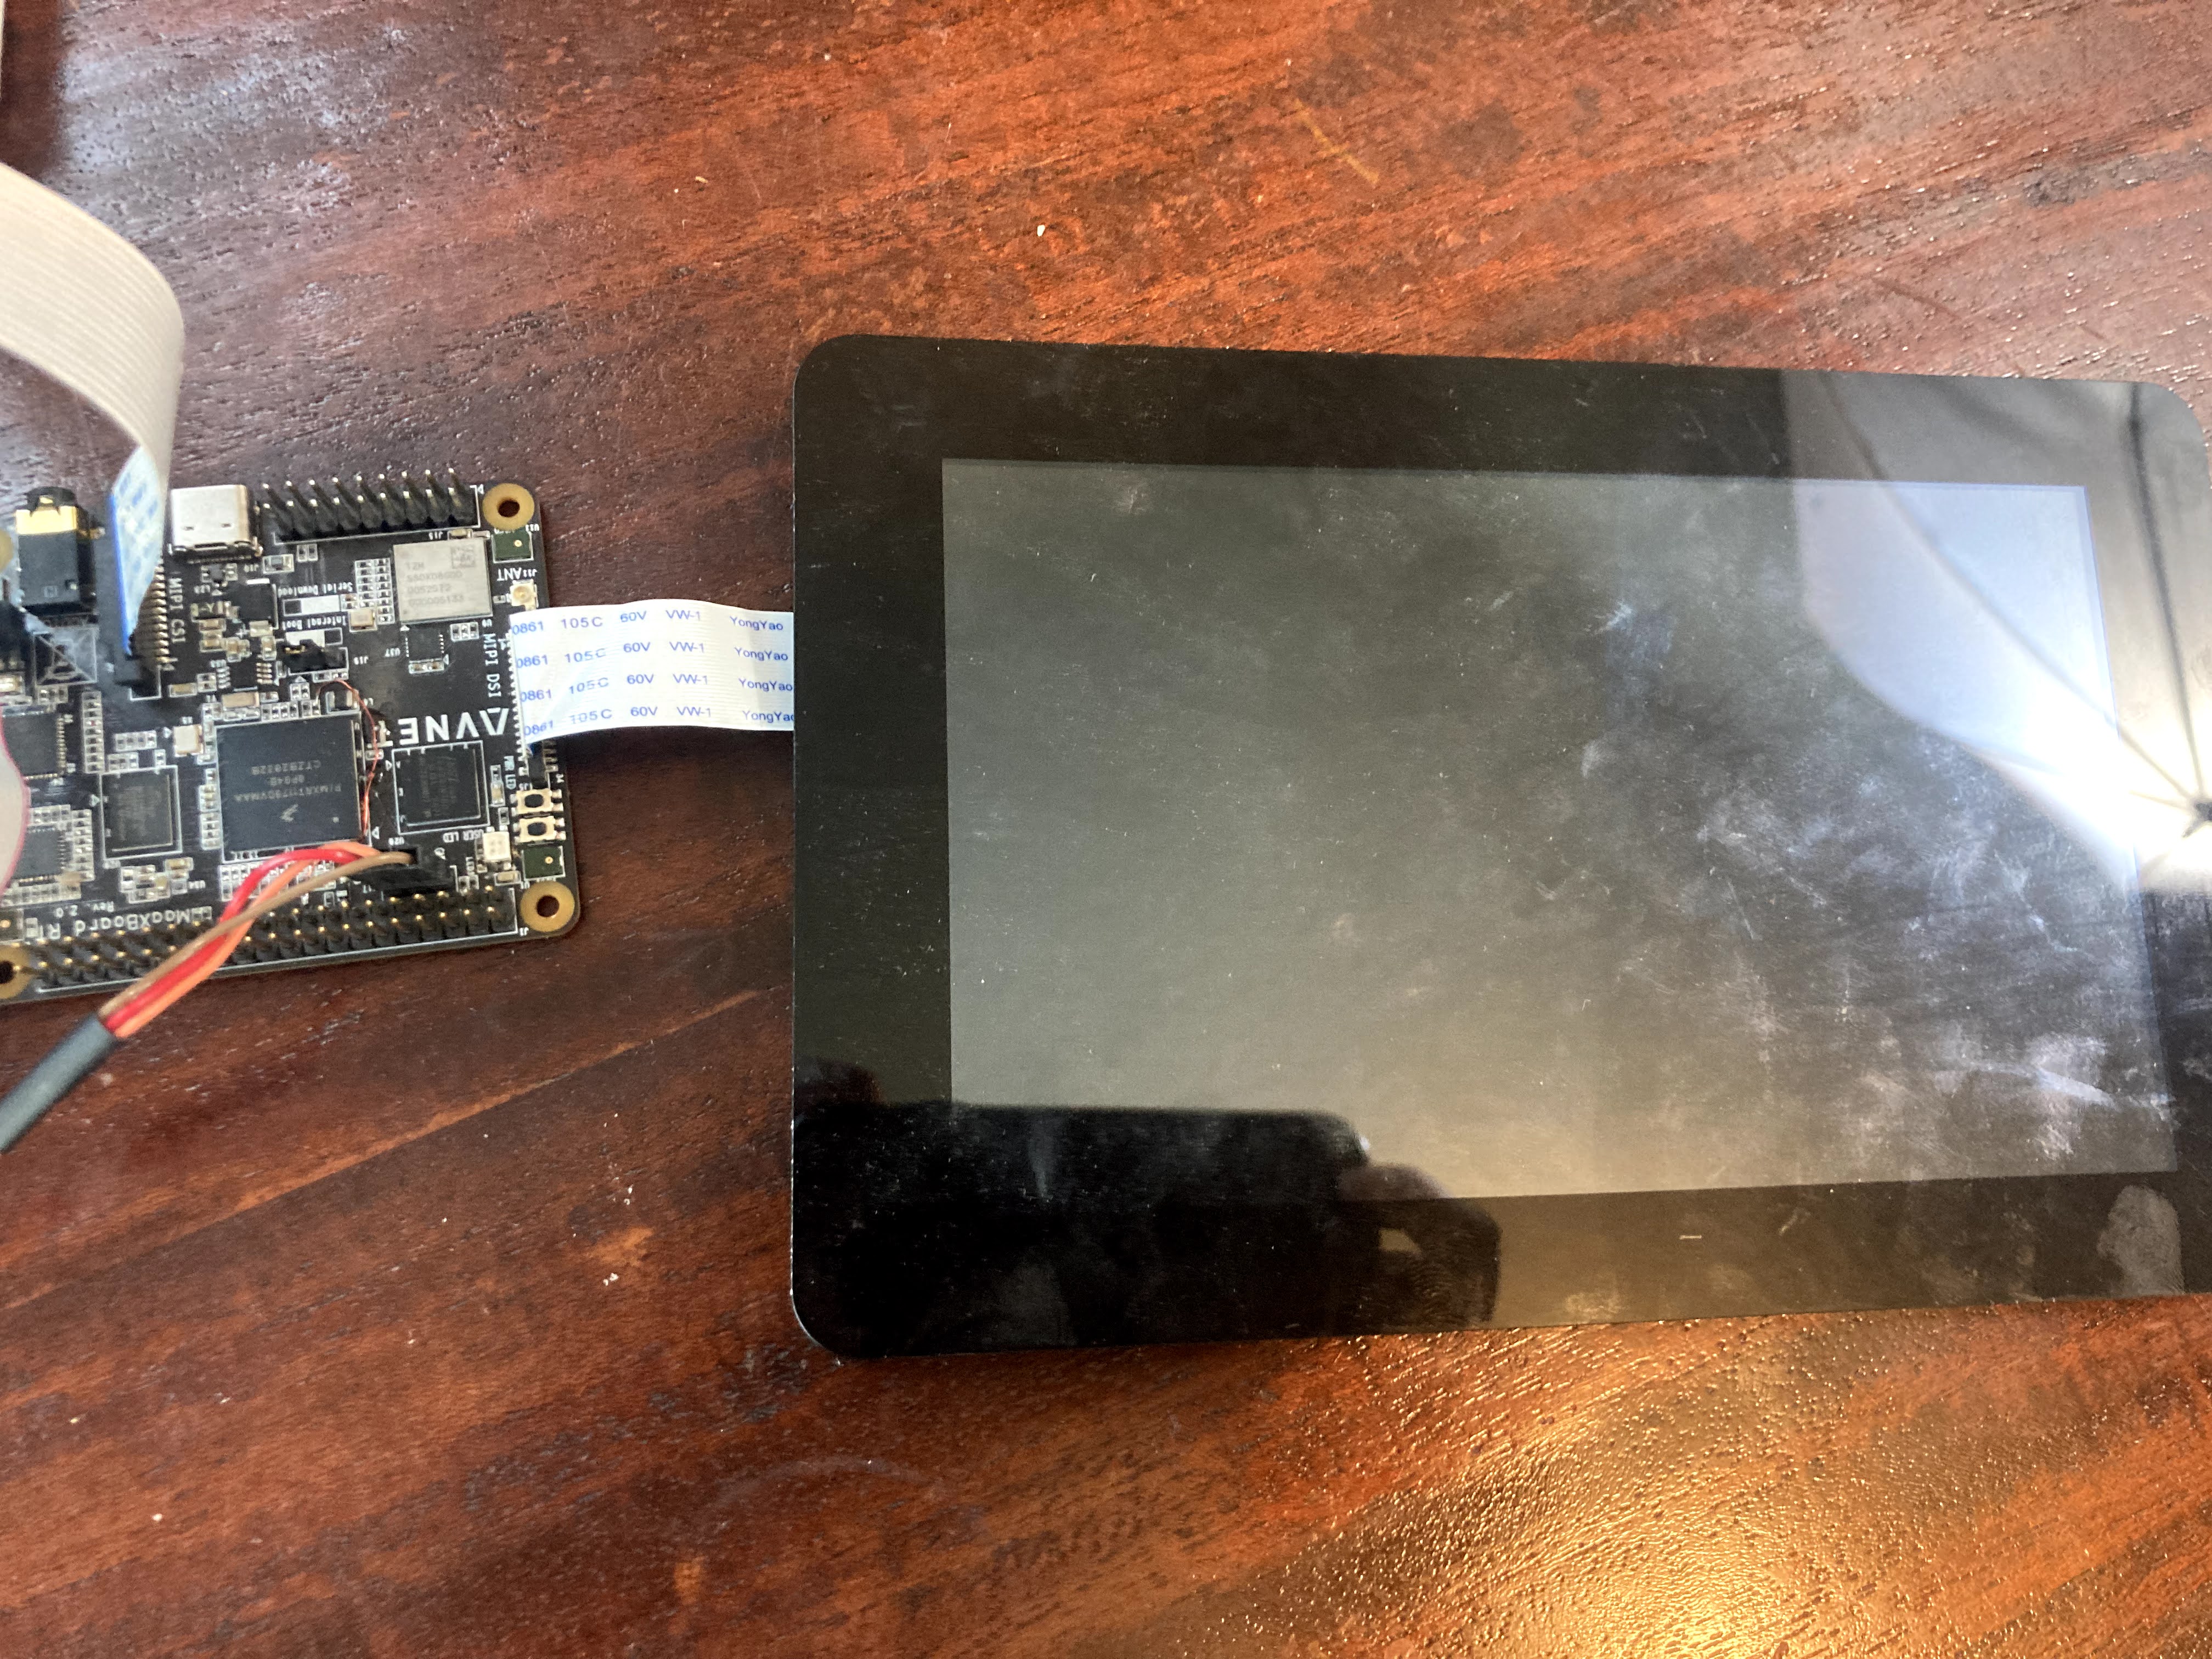
- Plug the display into the MIPI-DSI connector at the back of the board
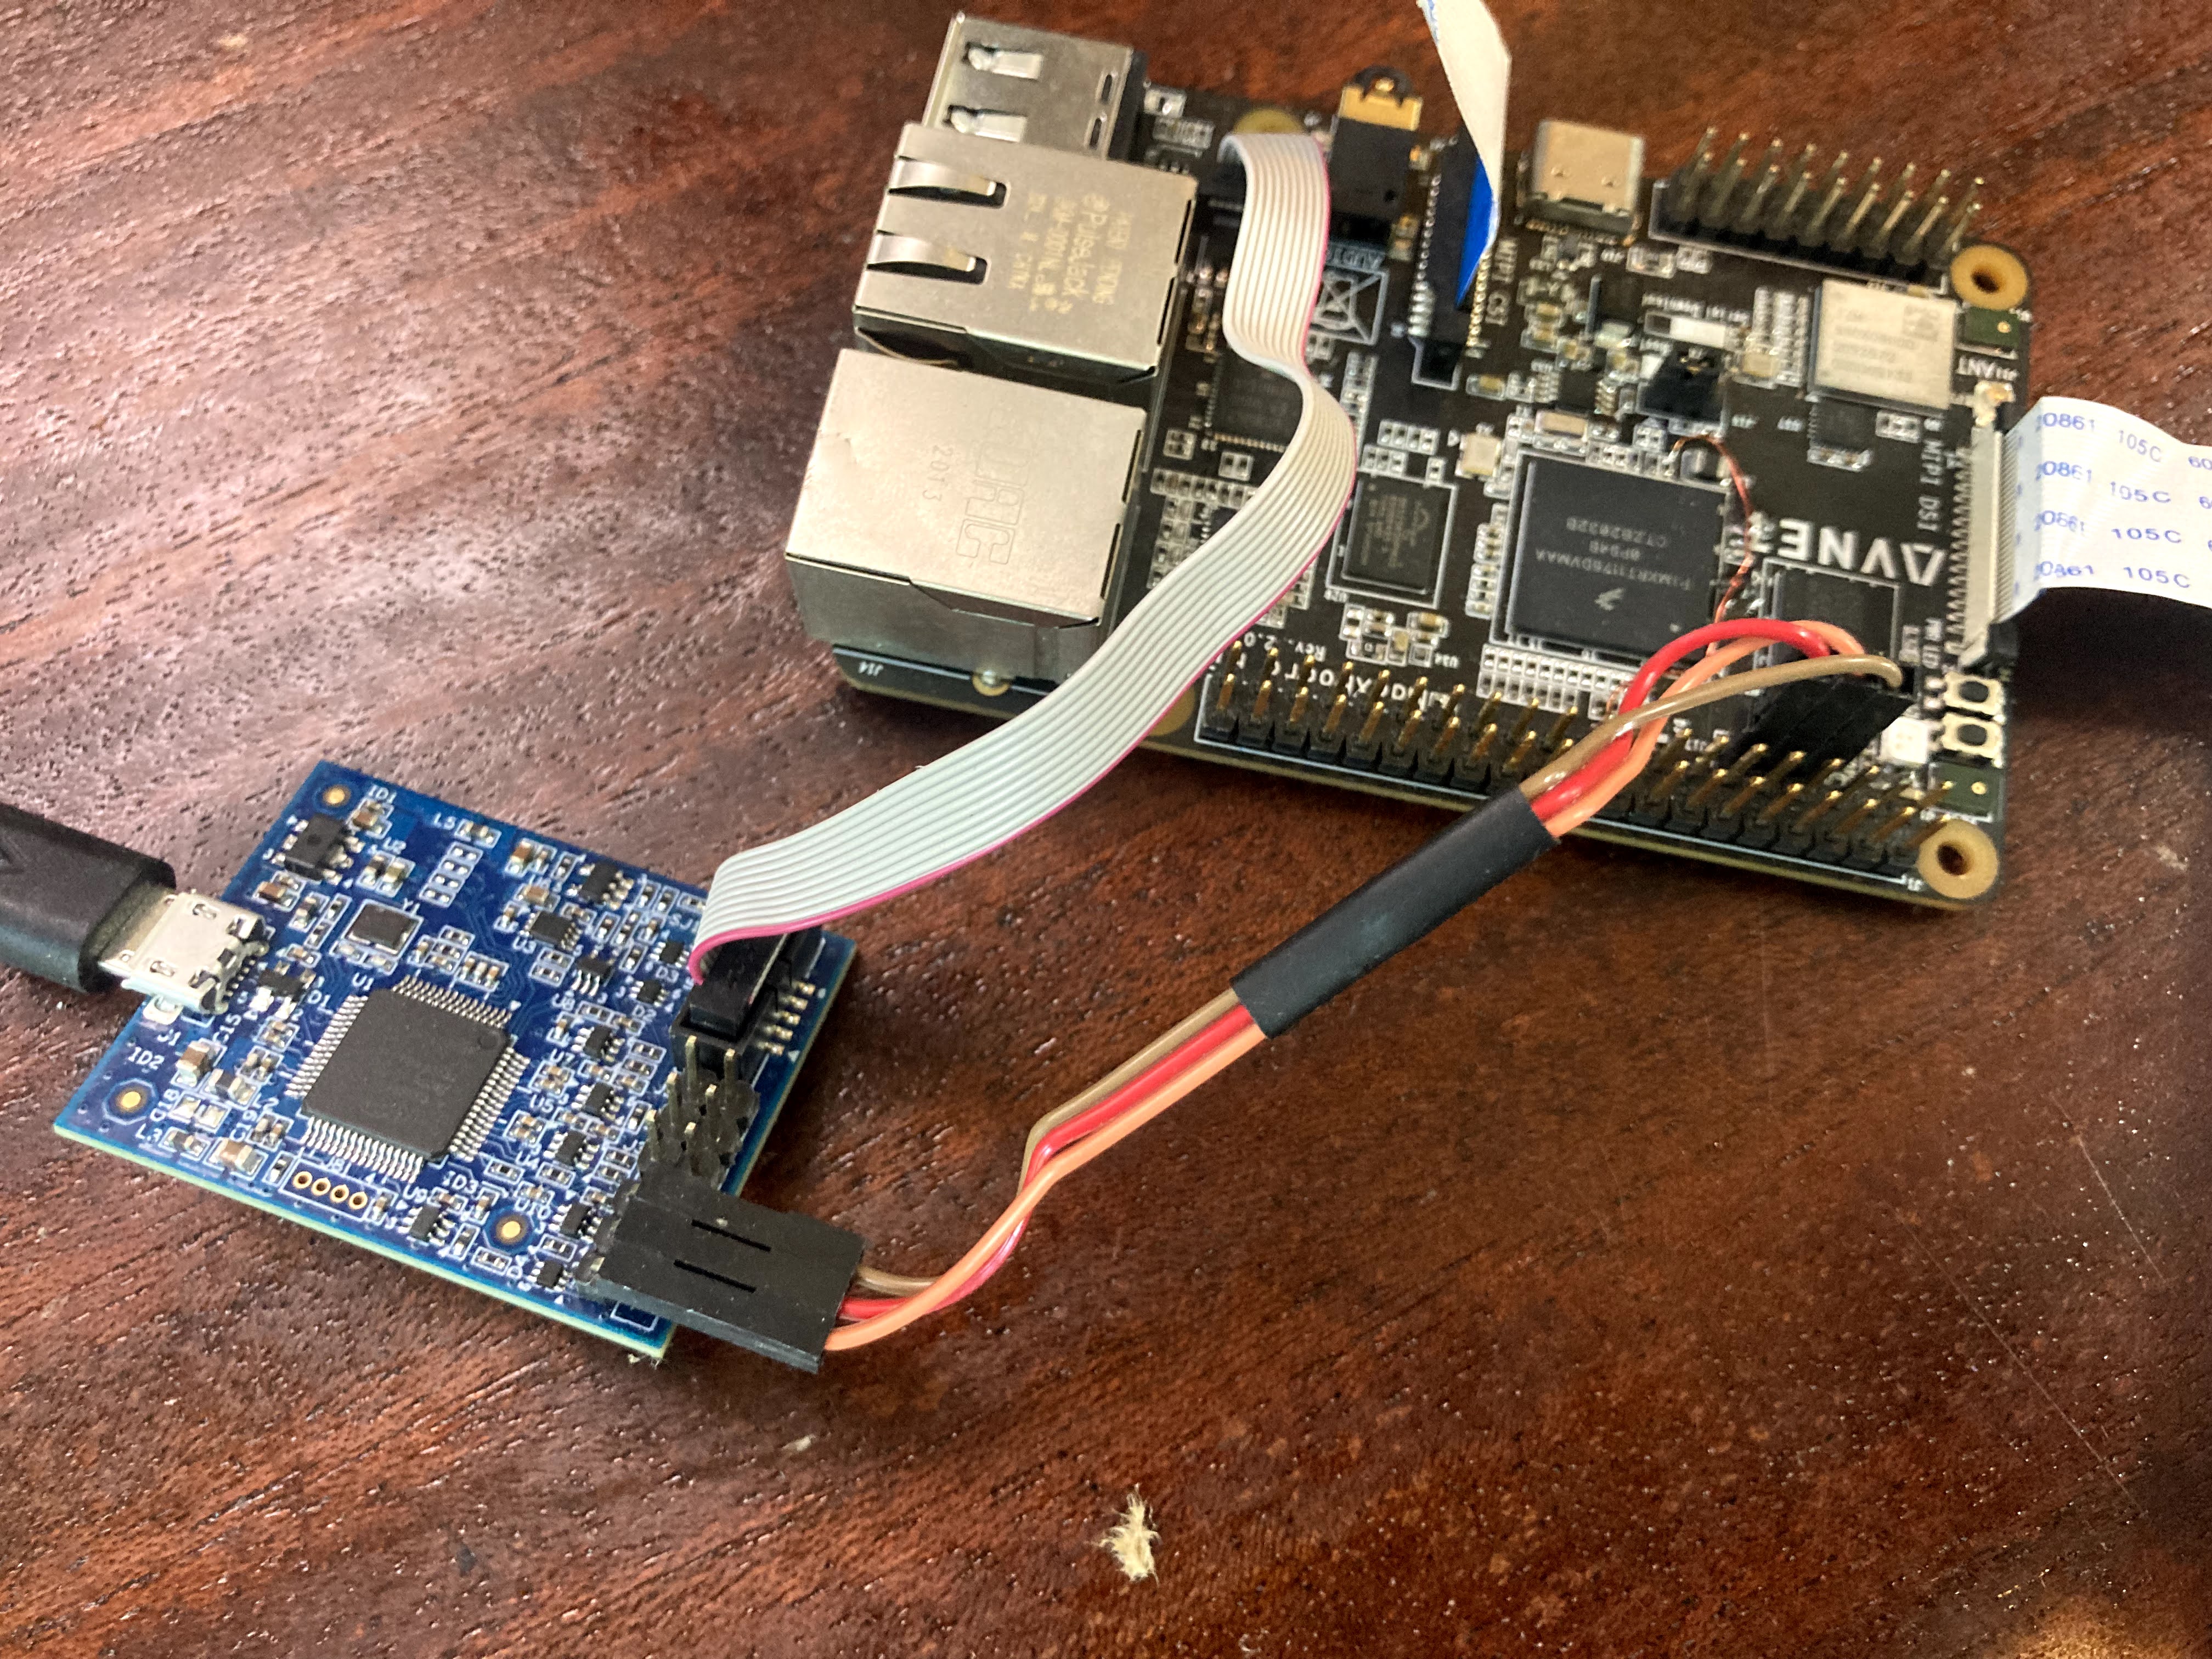
- Plug the MCU link into the JTAG connector. Connect ground, TXD and RXD pins to the Pi header on the MaaXBoard RT as shown. Plug the opposite end of the MCU link into your host PC's USB port.
- Connect your 5V, 3A power supply to the USB-C port on your MaaXBoard to power it up.
I recommend creating a stand for your MIPI camera so it's easy to position to recognize objects. Mine is made from OpenBeam, but you could use wood, popsicle sticks and electrical tape, or whatever you have lying around.
Software Setup- Download and install the latest version of MCUXpresso IDE on your computer. You'll need an NXP account. They have binaries for Windows, Mac, and Linux.
- Log into to the NXP SDK Builder, click "Select Development Board," and search for RT1170 to find the i.MX RT 1170 SDK. Note: the MaaXBoard RT custom SDK will be released soon.
- Install the SDK by dragging and dropping your SDK to the "Installed SDKs" section of MCUXPresso
- Download the code for this project (find it in the code section)
- Click on "import project(s) from file system" in MCUXpresso to import the zipped file you just downloaded
- Select the project, click "Next," and click "Finish" to import the project you just downloaded
- Select "debug" to build and load the code onto your board.
- If this is your first time debugging your project, you'll have to select a "launch configuration" from a list of debug probes found. Once the debug probe is selected and the user clicks ‘OK’, the IDE will automatically create a default launch configuration file for that debug probe.
- Select "run." You should see the camera image appear on your LCD. Try holding objects in front of the camera to see if your model will detect them. You can see a full list of the detectable objects under MaaX_v2_tensorflow_lite_micro_label_image_cm7 > doc > labels.txt. Some of the objects might be hard to come by (I don't happen to have a European Fire Salamander for instance). However, oranges are on the list and they seem to work OK.
The included model is the default version of Mobilenet v.1 included in the i.MX SDK eIQ examples. While fast and lightweight, it is not very accurate. You'll see that it often isn't able to identify anything in the image:
Inference time: 172 ms
Detected: No label detected (0%)
There's a helpful list of Tensorflow Lite image classification models listed here, along with their accuracy, speed (benchmarked on quad core CPU) and size. The default model we're using is most similar to the first model on the list. It has a top-1 accuracy of 39.5%, meaning that model's top prediction is the correct label only about 39.5% of the time.
Select a new model and/or datasetHere, our task is image classification, so we'll only be considering image classification models. There are several different examples of types of models in action with I.MX RT boards:
Depending on your image classification needs, you may need a model that has a certain accuracy or speed. Determining if a particular model can run on a specific device is based on:
- How long will it take the inference to run? The same model will take much longer to run on less powerful devices.
- Is there enough non-volatile memory to store the weights, the model itself, and the inference engine?
- Is there enough RAM to keep track of the model's intermediate calculations and output? You may need to increase the heap size for performance.
Although the MaaXBoard RT has a floating point unit and is capable of running floating point models, it's best to quantize your models in the interest of size and speed.
Size: MaaXBoard comes with 256 Mb hyperflash. The Tensorflow Lite label image project is 35.4Mb, 5.5 of which are the model itself.
I can see from the list of Tensorflow Lite models that quantized MobileNet v2 is much more accurate than V1, while still fairly small and fast:
- Download the model from the Tensorflow hosted models page by clicking on tflite&pb
- You should get a zipped file: mobilenet_v2_1.0_224_quant.tgz, which you can then unzip to access the tflite model.
You can use the model as is, or if you would like it to be trained on a custom dataset, you can use transfer learning to retrain your model.
Full instructions for transfer learning are in NXP's transfer learning lab here, and you can find additional information related to the transfer learning lab on how to gather or select a dataset here. You'll need a labeled image dataset for training (it's best to train on data that is gathered using the MaaXBoard RT camera) and you'll also need to install the correct versions of Python and Tensorflow on your PC.
Convert your model for use in MCUXpressoIn this step, we'll convert our model into C headers that can be added to a project in MCUXpresso and then loaded onto the MaaXBoard RT. This is actually quite simple. It just requires Vim, which should already be available if you're on Mac or Linux.
If on Windows, install Vim 8.1: There is a binary convertor program named xxd.exe located inside that package that will be needed named xxd. xxd is a hexdump utility that can be used to convert back and forth between the hex dump and binary form of a file. In this case, the utility is used to convert the tflite binary into a C/C++ header file that can be added to an eIQ project.
- After installation, add vim to your executable PATH if it's not already:
- Verify the PATH was set correctly by opening a Windows command prompt and typing “xxd -v” into the command prompt. You should not get any errors about an unrecognized command.
- Use the xxd utility to convert the.tflite binary file into a C array that can be imported into an embedded project.
If using Windows Command Prompt:
xxd -i mobilenet_v2_1.0_224_quant.tflite > model_data.hIf using Windows Powershell:
xxd -i mobilenet_v2_1.0_224_quant.tflite | out-file -encoding ASCII mobilenet_v2_1.0_224_quant.h- The model will need to be modified slightly to integrated it into the MCUXpresso SDK. Open up the model_data.h file and make the following changes to the top of the file. Also make note of the array name as it will be used in the next section:
#include <cmsis_compiler.h>
#define MODEL_NAME "mobilenet_v1_0.25_128_quant_int8"
#define MODEL_INPUT_MEAN 127.5f
#define MODEL_INPUT_STD 127.5f
const char model_data[] __ALIGNED(16) = {
It should look like the following when changed:
If you are using an existing model, it should come with a labels.txt file (in the case of mobilenet, it was called mobilenet_labels.txt). The attached python script, replace_label_text.py, should convert a normal line separated labels.txt file to a file that works with C++. Name your file "labels.h"
After conversion, it should look like the following:
The final step is to take the TensorFlow Lite Label Image example and modify it to use the newly retrained model.
Import the model and labels files to MCUXpressoWe need to import both the model file, model_data.h, and labels file labels.h that were generated in the last section into this project.
- Find the directory location that this example was copied to by right clicking on the project name, and select Properties. In the dialog box that comes up, click on the icon to open up that directory inside Windows explorer.
- Go to the “source” directory inside the MaaX_v2_tensorflow_lite_micro_label_image_cm7 folder that you just opened. It should be something like: C:\Users\nxp_training\ MCUXpressoIDE_11.3.0_0522\workspace\MaaX_v2_tensorflow_lite_micro_label_image_cm7\source\model
- Inside that model directory, copy the model_data.h file and the labels.h file generated in the previous section. These files will replace the existing model_data.h and labels.h files. Directory should look like the following when finished:
Double click on the model.cpp file under the “source\model” folder in the Project View to open it.
Lines 15 and 16 should bring in the model and your new model, model_data.h:
At around line 26, change the API call to load the default model, and replace it with the new model name (model_data) and model length (model_data_len) from the new header file. It may be a slightly different name than the one listed below. It should match the array name and length found in model_data.h (const char model_data[] __ALIGNED(16) = {):
To reduce the size of the project, the Label Image example only supports the specific operands required by the default Mobilenet model. Our retrained model uses a few new operands. These specific operands can be determined by analyzing the model with an application called netron and then manually add the operands as described in Section 7.1 of the eIQ TensorFlow Lite Library User's Guide. Alternatively, all the TFLite operands can be supported in a project by using the BuiltinOpResolver method. For this lab we’ll use the latter method in order to provide the greatest compatibility with other models. Around lines 33 or 34 in model.cpp, comment out the original resolver lines. Then add a new line
tflite::AllOpsResolver micro_op_resolver;
That's all of the modifications you need to make! The app is now ready to be run.
RUN THE DEMOIn MCUXpresso, make sure the hyperflash driver MaaXBoard_S26KS256.cfx is in the xip folder under the Project Explorer. Then, click "edit project settings," navigate to MCU settings, and make sure the hyperflash driver is selected as the flash driver in both locations.
I selected Debug, since this builds and debugs the project in a single step. Almost immediately (whoa there HyperFlash!) I was able to see the camera's output on the LCD.
I gathered a list of things named in labels.h, like an orange and a glass of wine (next time I will train a model that recognizes types of cocktails, since that will make the testing step more enjoyable).
With the console open at 115200 baud, I was able to see it print the label for each object as I held it up to the camera and it was recognized by the model:
Inference time: 2537 ms
Detected: orange (61%)
----------------------------------------
Inference time: 2536 ms
Detected: red wine (54%)
----------------------------------------
Although it was a bit slower than the MobileNet model provided in the example project, it was quite a bit more accurate, and still fast enough to be useful. I'm impressed by how simple it was to prepare and run the model on this incredible microcontroller.


Comments