Here are abbreviated instructions for how to get setup on Azure Sphere, as well as a cheat to log in every day to be eligible for sweet raffle prizes!
Similar, detailed instructions can be found here, but I've written a very condensed version for those of you who just want to get set up. This guide is if you just want to get setup without getting into the details about what all of this means or how it works.
First, unbox your Azure Sphere. It should come with a USB cable.
Install the softwarePlug it in to a USB port on your computer running Windows 10 with Visual Studio 2019 installed. You'll also need to install the Azure Sphere SDK.
Once that is installed, you can use it by searching for 'Azure Sphere' from your start menu. A terminal window titled 'Azure Sphere Developer Command Prompt Preview' will open.
Update the OS on your Azure Sphere by typing this into the Azure Sphere Developer Command Prompt Preview:
azsphere device recoverIn order to claim the board and login to it, you will need a special type of Azure account with Azure Active Directory (AAD). Basically, this is a type of Azure account that organizations use when they have multiple users.
Set up your Azure Sphere account with AAD here. You don't need to be part of an organization to set one up, and you can use any email account to set it up (gmail, yahoo, whatever). You do need to enter a credit card. You get one month free, and after that you will only be charged if you select paid services to use in your app. Many services are free for a few users.
For instance, Azure IoT Hub is free for the first 500 devices and 8, 000 messages and Azure IoT Central is free for the first 5 devices. Watch out for services like StreamAnalytics though - they can be pricey if you forget and let them run!
To see if your Azure account type is correctly set up, type:
azsphere loginIf you have the wrong kind of Azure account (one without AAD) you will see this screen:
If you do have the correct type of account, once you're logged in, but before you have a tenant (I'll explain what a tenant is below), you'll see this:
Create a tenant in Azure. Tenants are a feature of Active Directory, and this is why you needed to create a special account with AAD in the first step. A tenant represents an organization in Active Directory (I'm not sure why they don't just call it an organization). Creating a tenant and using it to claim the device, so that the device can only be used by people who have access to your organization, is another a way of keeping the device secure.
azsphere tenant create --name <my-tenant>Now claim your device. You can only claim your device once, and it's forever associated with your tenant.
azsphere device claimAdd your network:
azsphere device wifi add –s <your ssid> -k <your ssid password><your ssid> and < your ssid passwork> are your SSID and you SSID password.
Put your device into prep-debug mode. This is another security feature to prevent Over the Air (OTA) updates while you're loading code to it from your PC.
azsphere device prep-debugDuring application development and debugging, you should leave the device in this group so that OTA application updates do not overwrite the application under development.
You can now run the blink sample code found here on your device.
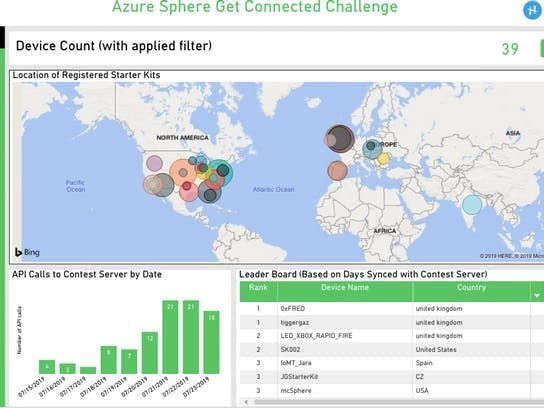
Ping the ServerThe contest Hackster is currently running requires you to ping the server daily so your device will appear on a cool map. The full instructions for pinging the server are here.
1. Download the app to ping the server here: http://avnet.me/azsphere-contest-app
2. Run sk_server_registration.exe
3. Enter your personal information.
4. Click "Read Device"
5. Once the data from your Azure Sphere has populated, click "Send to Server" (note that the app sometimes struggles to get the IP address)
But this is such a pain!
You'll have to click "update" on your device every day in order to be eligible for the prizes. Thankfully, I was able to write a simple script and add it to task scheduler. I've attached the script. It's written in AutoIt v3. Download AutoIt v3 here: https://www.autoitscript.com/site/autoit/downloads/
NOTE: Please only ping once per day!There is no need to ping more often, and you run the risk of being blocked/black-listed if you have excessive registrations per day.
Find the script file in the 'code' section at the bottom of this project. Download it and add it to the folder where sk_server_registration.exe is.
You can test the script out out by double clicking it to run it. It should automatically open sk_server_registration.exe and run through the steps to get the device info and send it to the server. The last part happens so fast that you might not see it, so if you want to be sure it happened you can comment out the last line of the script to be able to view the "URL Response OK" dialog box before it closes.
Compile the script using aut2Exe (included in the AutoIt download).
1. Open the Start Menu and browse to the AutoIt v3 group.
2. Click Compile Script to.exe
3. The main Aut2Exe interface should appear where you can select the cheat file as the source file and hit "convert".
Once it has been turned into a .exe file, open Task Scheduler and select "Create Basic Task." Follow the steps to schedule your exe to run daily.


Comments
Please log in or sign up to comment.