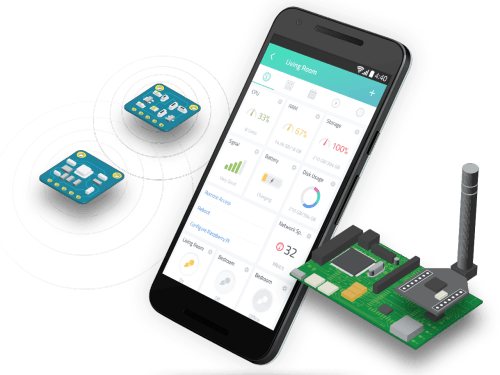
Today I will show you how you can make home automation project using Arduino UNO even if you don’t know how to code Arduino because this project is based on Cayenne Arduino, In my earlier article I explain clearly about Cayenne IOT online dashboard which allows you to create any Arduino project even if you don’t know to write coding. Cayenne is online IOT project builder so not required programming skills just drag and drop to create any IOT project with Arduino and Raspberry.
Cayenne first ever online builder/tool to create IOT projects now much easier to make IOT product and projects for personal use and for business purposes.
IOT dashboard Cayenne by my-Devices is totally free online builder they do not yet make it paid services because they working on it to make more reliable and stable when they release stable version may we have to pay for this cloud service, Currently Arduino in beta version which has Lil bit bugs but not to worried about final version they will make it bugless online portal.
Feature of Cayenne-MyDevice IOT Dashboard :- You can remotely access Pi from Mobile and PC.
- Reboot, Shutdown Pi Remotely.
- You can add sensors, actuator, extensions, and design dashboard (Pi and Arduino)
- You can add widgets with drag and drop feature 🙂
- Remotely monitor live data from sensors and actuator.
- Control your sensors/actuator with dashboard GPIO.
- Best thing is that for you Automation Projects you can make the trigger and add the schedule.
Cayenne did not release stable version of portal yet for Arduino, currently Cayenne Arduino in Beta but available for Raspberry Pi.
Let’s start how it is work with Arduino.
Configuration of Cayenne Arduino for Home AutomationCayenne is IoT based dashboard so you need hardware which can be connected to the internet for this purpose you need Arduino WiFi or Ethernet Shield. The important thing is how to configure Cayenne IoT dashboard for Arduino I make this guide step by step to understand easily who not know much about IoT but want to learn.
Step 1:First of all, you need a working internet connection then Create a free account on Cayenne.
Step 2:After completion of creating the account you have to choose Arduino OR Raspberry Pi board, I choose Arduino because in this project we are using Arduino for this project.
After this now in step 3 we have to work on Arduino side first thing you need Arduino IDE latest version installed on the computer if you do not have then download it from here and you also need to install Cayenne Library for Arduino . If you don’t know how to install the library on Arduino IDE don’t worry read below.
Library Installation:
- Open Arduino IDE
- Go to Sketch
- Select Include Library
- Select Add .Zip file
Connect you Arduino UNO with USB cable to the computer and configure properly. If you don’t know check this link for configuration of Arduino IDE
Step 4:Back to Cayenne Dashboard Select your board and Shield after that, a popup appear with Code for Arduino copy it and upload it to your board with Arduino IDE tool.
NOTE: after uploading, code connects you Arduino UNO with the internet
when you correctly did everything Cayenne Automatically detect your Arduino .
Cayenne Arduino IOT Dashboard SettingsNow you have to add Sensors/Actuators. first, create project give any name to it now you have to add sensors/actuators according to your project. In this project, I used LDR sensor to control garden lights and water tank motor with the relay module.
Wiring Diagram
- LDR sensor at Analog Pin A02
- Relay 1 at Digital Pin D12 ( water pump)
- Relay 1 at Digital Pin D11 (Garden Lights)
How to add sensors and relays?
Select Device/Widget from Add new drop down Menu.
Select sensors/Actuators.
Now select Relay Actuator and add two relay actuators/button one for the water pump and second for LDR light.
To make garden light auto with LDR select Luminosity sensor. When you added sensor and relays you need to configure each which you connected on Arduino board on which pin Digital/Analog. See below images how I configure.
You can also use invert logic in setting of any sensors/actuators. What is inverted Logic? Invert Logic can be used to reverse the high/low signal. The most common use of this is with a LED: if the button on the dashboard turns the light on when it should be turning it off, clicking “invert logic” will reverse the signal to correct the problem.
Now we need to add Trigger go to sensor settings and select trigger option.
Now add trigger drag Arduino board to IF and then section follow instruction as mention below in images
LDR OFF Trigger
LDR ON Trigger
You have done setting for this project Cayenne Arduino home automation project is ready. You can add more sensors like PIR sensor for home security, weather sensor, ultrasonic sensor to measure distance and much more!
Cayenne IOT dashboard also has a feature to schedule your sensors/actuator and also you can add a trigger for notifying for example when the pump on and off .you can get notification via Email and SMS no matter where are you, you can control and manage your project from Mobile app and PC.
Hope you guys like my effort if you have any question just drop comment below.
Don’t forget to share with others, Sharing is caring and stay tuned.


_wzec989qrF.jpg?auto=compress%2Cformat&w=48&h=48&fit=fill&bg=ffffff)

.png?auto=compress%2Cformat&w=48&h=48&fit=fill&bg=ffffff)


Comments
Please log in or sign up to comment.