


Hardware components | ||||||
| × | 1 | ||||
 |
| × | 1 | |||
| × | 1 | ||||
| × | 1 | ||||
| × | 1 | ||||
This project will explain how to get obstacle avoidance working on the open-source modular 3d printed robot, Lily∞Bot, using the Micro:Bit, MotorBit, sonar and 2 DC motors. It will describe, building the robot, wiring the hardware and electronics and programmming the robot. Since this is graphical programming, the project is appropriate for elementary age kiddos, 1st - 4th grade. This same robot can grow with the user by changing the controller and programming language to Circuit Playground Express, Arduino Uno, Raspberry Pi Pico W, and more to come! Learn more about Lily∞Bot at NoireSTEMinist.com/robots and on YouTube at youtube.com/carlottaberry.
RobotroboticsMicroBitMotorBitObstacle Avoidance NoireSTEMinistMakeCode ElecFreaks
The parts list for the Lily∞Bot With Micro:Bit can be found on GITHUB and on Amazon at the following links:
https://www.amazon.com/hz/wishlist/ls/16Q4OHY4E8AF3?ref_=wl_share
Primary components are the 3d printed parts available on GITHUB
Step 1. Build the RobotUse this link to build the Lily∞Bot base robot. Note that there are a few updates for attaching the caster wheels to lower chassis along with battery pack to lower chassis and motor:bit and micro:bit to upper chassis.
Multidisciplinary Educational Robotics Lab at Rose-HulmanThere is a new way to attach the caster wheel to raise it a little above the point of contact for the TT wheels. Please use the following images to attach the caster wheels with 4 M3 7 mm panhead or flathead screws, 4 M3 lock washers and 4 M3 washers.
Insert 4 AA or 9V battery back with red and black leads, attach from under neath lower chassis with two M3 5 mm panhead machine screws
Step 4. Attach sonar to robot upper chassisInsert 5V HC-SR04 in the sonar mount. Drop in front sensor hole facing to robots right and turn counter clockwise to lock in place.
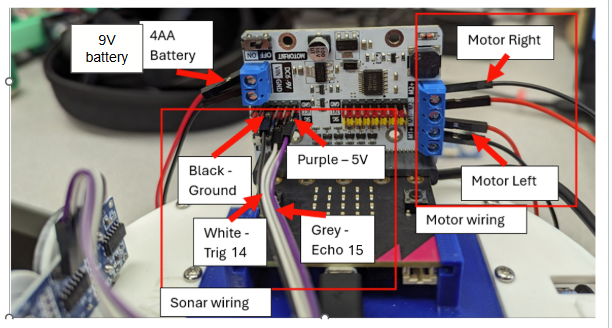
- Use pocket screwdriver to open up screws on blue terminal block
- Attach right motor, BLACK to M2+ and RED to M2-
- Attach left motor RED to M1-BLACK to M1+
- Use pocket screwdriver to open up screws on blue terminal block
- Attach RED wire of battery pack to VIN on Motor:Bit
- Attach BLACK wire of battery pack to GND on Motor:Bit
- Use female-female wire to attach VCC wire of sonar to 5V row on Motor:Bit (RED LINE)
- Use female-female wire to attach GND wire of sonar to GND row on Motor:Bit (BLACK LINE)
- Use female-female wire to attach TRIG on sonar to pin 13 on Motor:Bit (BLUE LINE)
- Use female-female wire to attach ECHO on sonar to pin 14 on Motor:Bit (BLUE LINE)
- You can change the code to match the two pins you attach trigger and echo to.
The Micro:Bit can be programmed with Bluetooth on an iPad or via the USB cable attached to a computer. See the video for examples of how to do wireless programming.
- Go the MakeCode website at the following linkhttps://makecode.microbit.org/
- Click New Project
- Click Extension
- Type MotorBit
- Click Icon to add to project
- Click Extensions
- Type sonar
- Click icon to add to project
- Write or download the code at the following link
- Run code to see what it does in the simulator, maybe not much since you used extensions
- Plug in Micro:Bit using USB chord or connect for Bluetooth wireless programming
- Click settings gear, connect device
- Click download to run code on actual Micro:Bit
- Slider switch needs to be on 5V for 5V sonar
- Battery pack slider switch need to be ON
- Motor:Bit slider switch needs to be ON
You can enhance your code by changing the pause times and changing the motor speeds to random numbers, figure eight motion, square motion, circle motion, proportional obstacle avoidance, proportional movement, and more!. You can also try other adventures with your Lily∞Bot and Micro:Bit by using the temperature sensor, buzzer, light sensor, touch sensor, accelerometer, compass and more! There are many examples on the MakeCode website.
Lily∞Bot with Micro:Bit doing obstacle avoidanceLily∞Bot with Micro:Bit doing keep away game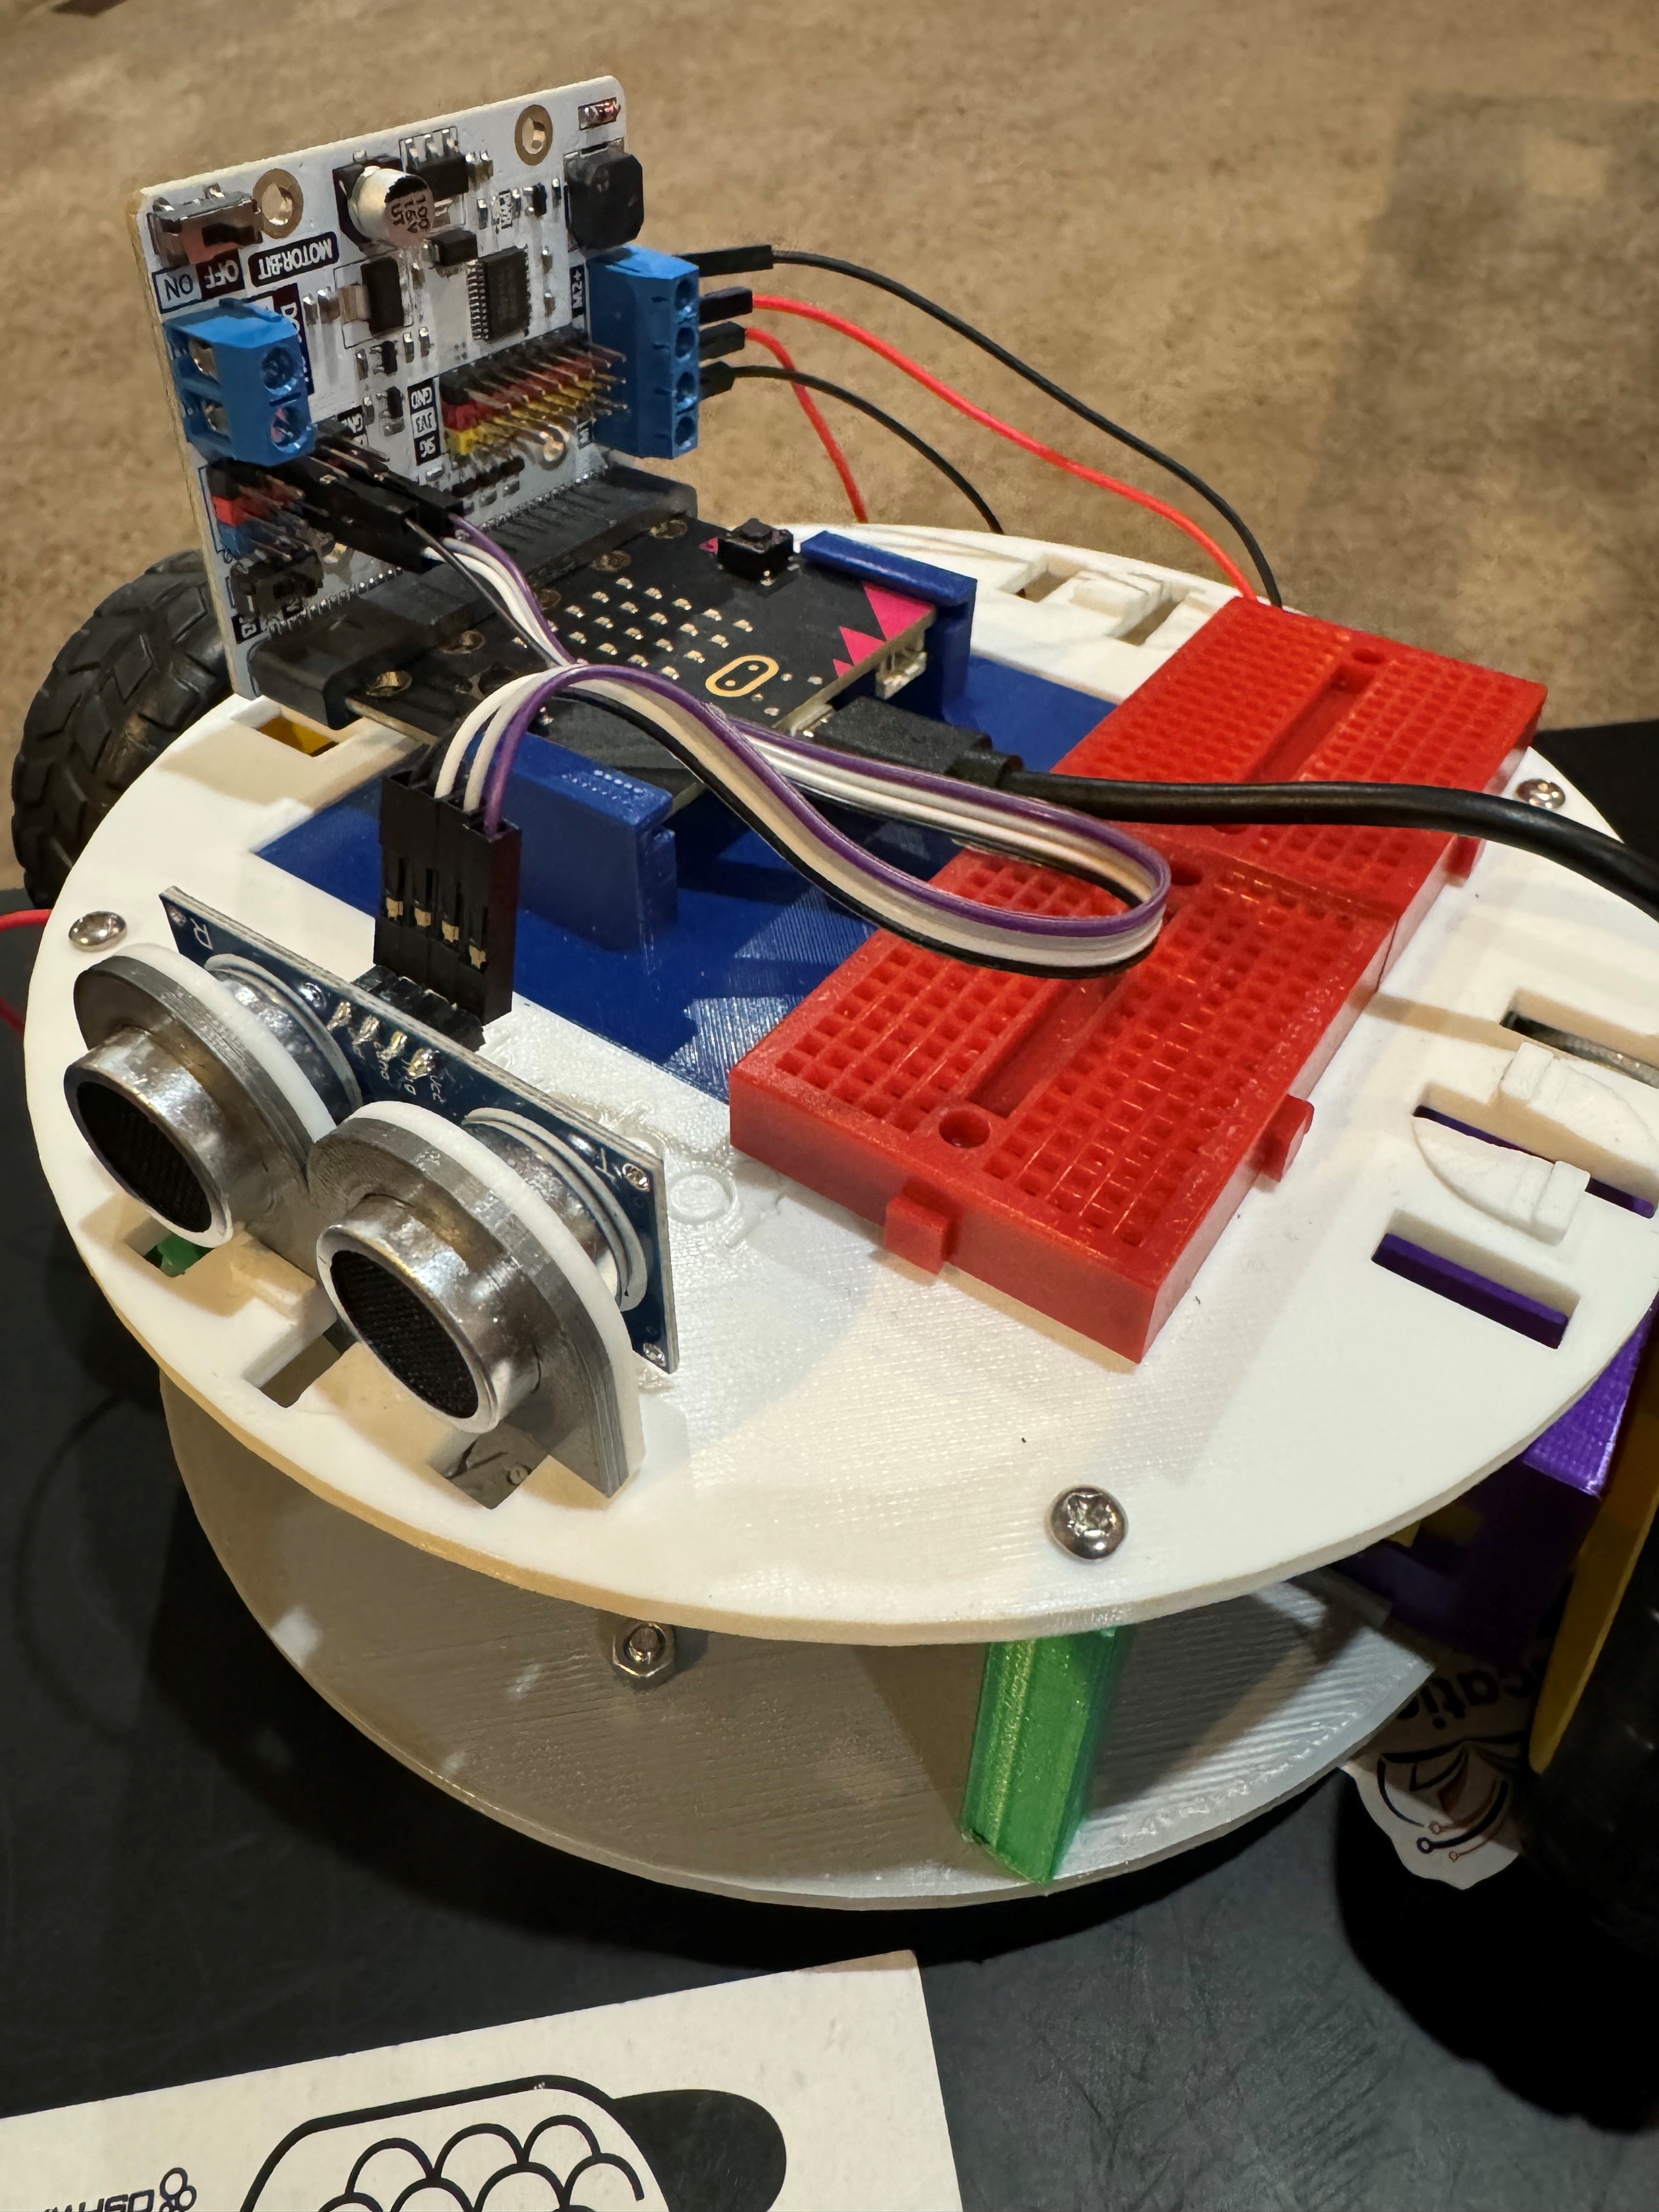


Comments