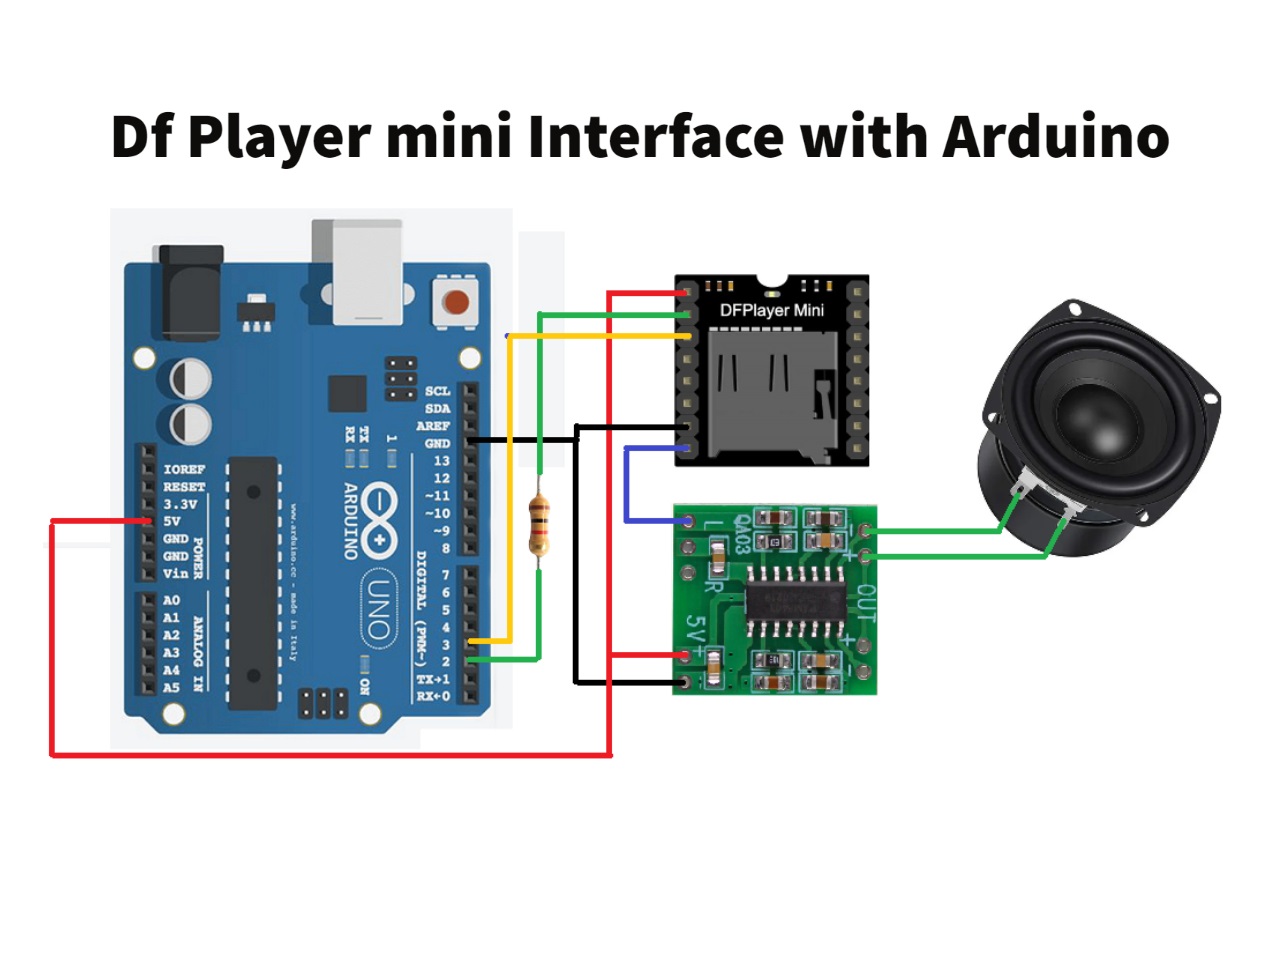
In this tutorial, we'll guide you through the process of interfacing the DFPlayer Mini with an Arduino and incorporating an audio amplifier for enhanced sound quality. The DFPlayer Mini is a versatile and compact MP3 player module that can be easily controlled using an Arduino. By combining it with an audio amplifier, you can achieve louder and clearer audio output for your projects.
Whether you're working on a DIY music player, an interactive installation, or any project that requires sound playback, understanding how to use the DFPlayer Mini with an Arduino and audio amplifier will be incredibly valuable. Join us in this tutorial and take your audio projects to the next level! If you found this tutorial helpful, don't forget to give it a thumbs up, subscribe to our channel for more exciting tutorials, and hit the notification bell to stay updated. If you have any questions or suggestions, please leave them in the comments section below. Happy tinkering and happy listening! 🎶🔊.


_ztBMuBhMHo.jpg?auto=compress%2Cformat&w=48&h=48&fit=fill&bg=ffffff)


Comments
Please log in or sign up to comment.