My mom is not able to use a telephone in the "correct" way. So she cannot dial any number nor push any memory button. All available phones are to complex for her disease. She's old and dementia.
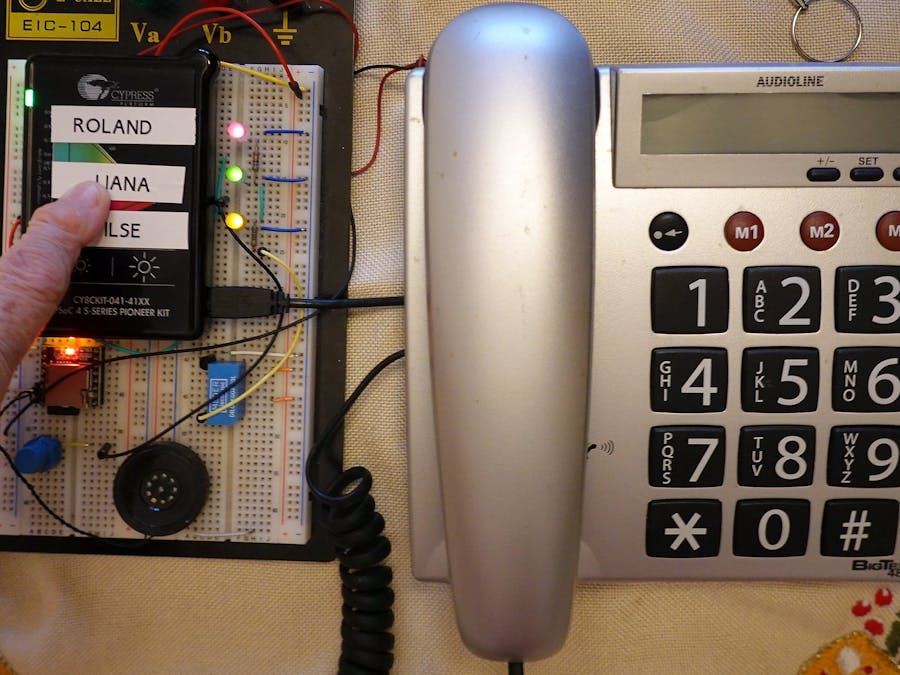
In this project I will build her a 3 button telephone. The buttons are illuminated to point her by visual - and it is speaking to her four help messages.
The 3 memory buttons of the telephone are touch sensitive. Before you press a button, it tells you, which person will be dialed. The whole body of the telephone contains a proximity sensor. So, when it triggers, it tells you, what you can do with this thing.
Here is the technical demonstration, how it works. The touch facility is not yet integrated into the phone:
The flow diagram describes the functionality which one we have to keep in mind to realize it. Due to the technical telephone considerations, the ring and the signal detection is not done yet. I got a telephone modem of a laptop and I hope it will be possible to use its signal processing for the detection in the future project iteration.
The output is the voice thru a speaker - your voice comes from a MP3-player!
I began with a free gift of "PSoC 4100S Pioneer Kit" from Cypress/Infineon. It contains a ready to use, USB-powered evaluation board around the 32 ARM MCUCY4146AZI-S433 (I should take this label as my hackster password ;-D ). It is boxed already with a usable user interface - a capacity sensitive proximity sensor, trackpad and 2 buttons - called CAPSENSE.
Anyhow, I learned to use the ModusToolbox IDE and the provided libraries. The MCU will be programmed with the help of this IDE.
Record the help messagesWho should speak?
- Anyone, who is close and familiar to the targeted person could do that.
What should be spoken?
General help: An announcement briefly describing the use of the telephone. Like "Press a button so you can call the Roland, the Liana or the Ilse."Memory help:An announcement for each of the memory button of the telephone. Like "Do you want to call Roland?"
How should it be spoken?
- Slow and clear! No noises!
How to record?
I used a good quality microphone and the Zoom recorder. Cut and normalize the voice with any audio editor, like the open source editor "Audacity".
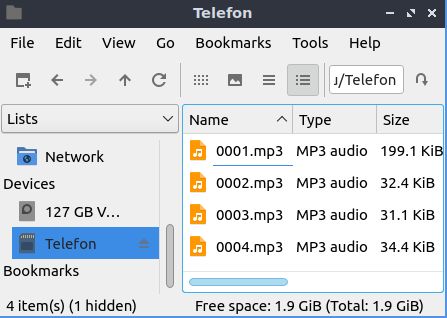
Cut and trim each piece of messages. Save it as mp3, 95Kbit/s. The filenames starts by 0001.mp3 for the general help message, 0002.mp3 names the first memory button message.....
Double check your recordings and transfer it to the empty micro SD card. Put it into the DFPlayer.
Prepare the TelephoneIt makes sense, to set up the memory buttons now - if the memory survives a telephone shut off. (I broke the cord to the keypad and had trouble to repair.)
The schematic shows the wiring in detail.
Open your phone. Since all these actions are very individual, it's up to you to deal with the next steps!
The TODOs
Adapting the telephone design
- Are the memory buttons big enough?
- Should the keypad covered, to reduce the visual complexity?
- Is the handset good visible?
- Is the handset tangible enough?
The hook switch:
- remove the connection between phone and off hook switch.
- Connect the phone side to the appropriate contacts of the relay.
- Connect a ON switch contact of the hook switch to the evaluation board.
The memory button illumination
- Insert a LED into or nearby each memory Button.
- Wire it to a controllable 5V power source. You could use a free relay switch.
The memory button sensor connection
The space of your creativity! Infineon provides a CAPSENSE Design Guide.
Mounta thin copper foil under each memory button. Solder a wire on the copper foil before!- Connect each sensor pad to the evaluation board.
The proximity sensor connection
- Layout copper foil in the inner telephone cover. Avoid shorts, avoid nearby parts with a large surface of metal. Take the corners, where the help of a proximity sensor makes sense.
- Connect the proximity sensor pad to the evaluation board.
The component enclosure
We need to add
- a good loud speaker,
- the evaluation board,
- the MP3 Player (DFPlayer),
- the relay,
- a 5V power source
Nearby or into the telephone. I recommend to use the space in the telephone.
Use a perfboard and cut it, until it fits into your telephone. Now wire it up according the schematic:
If you use the evaluation board CY8CKIT-041-41XX (aka. PSoC 4100S Pioneer Kit), the wire tags from U1 helps. i.e. "P0_7, 12@J2, SWITCHHOOK" refers to the PSoC4 port "P0_7". Connect the appropriate wire to the external board connector J2, Pin 12 (tag "12@J2"). The label "SWITCHHOOK" is used in the source code to address the port. Questions? Yes - this is the evolution from hardware level to human readable code !-)
The Source CodeThe ModusToolbox IDE ease the coding for a PSoC beginner - a little bit. You will find useful examples on Github. Btw: I love the Eclipse shortcut "Ctrl+Shift+F"!
Here you find my github repository. If you run into trouble during Import of the Project, these are the important files you can take in your own new Project:
main.cDFPlayer.h , DFPlayer.cutils.h , utils.c\bsps\TARGET_APP_CY8CKIT-041-41XX\config\design.cycapsense\bsps\TARGET_APP_CY8CKIT-041-41XX\config\design.modus
The two design files represents the peripheral configuration.
The code of DFPlayer is used to control the MP3 Player (init/start/stop/volume). I adapted these piece from the Arduino code for the DFPlayer.
The main controls the whole behavior and represents the entry point of the program.


Comments
Please log in or sign up to comment.