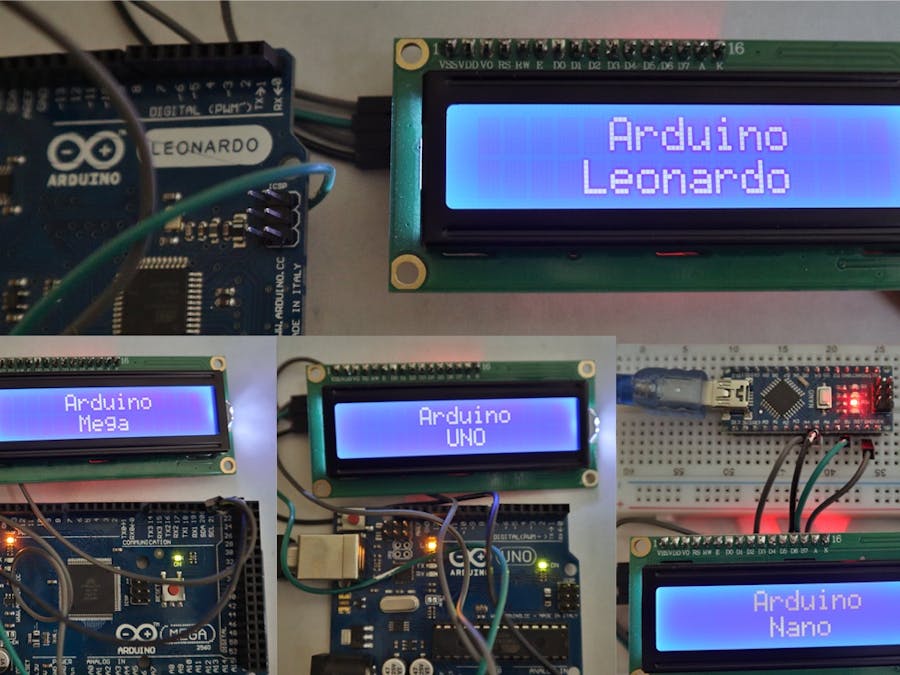
In this getting started with LCD module tutorial, we are going to learn interfacing an LCD module with popular development boards like Arduino Nano, Uno, Mega, and Leonardo.
- 16x2 LCD module
- Arduino UNO
- Arduino Nano
- Arduino Leonardo
- Arduino Mega
- Arduino IDE
- LiquidCrystal Library - Will available in Arduino IDE by default - For the first method.
LCD modules are coming in different colors and sizes with a different number of displayable characters. the most commonly used one is LCD1602 which can display 16 characters in each line, that is a total of 32 characters. Some other sizes are,
- LCD1604 - 16 char / 4 line
- LCD2004 - 20 char / 4 line
- LCD1602 - 16 char / 2 line
- LCD1601 - 16 char / 1 line etc...
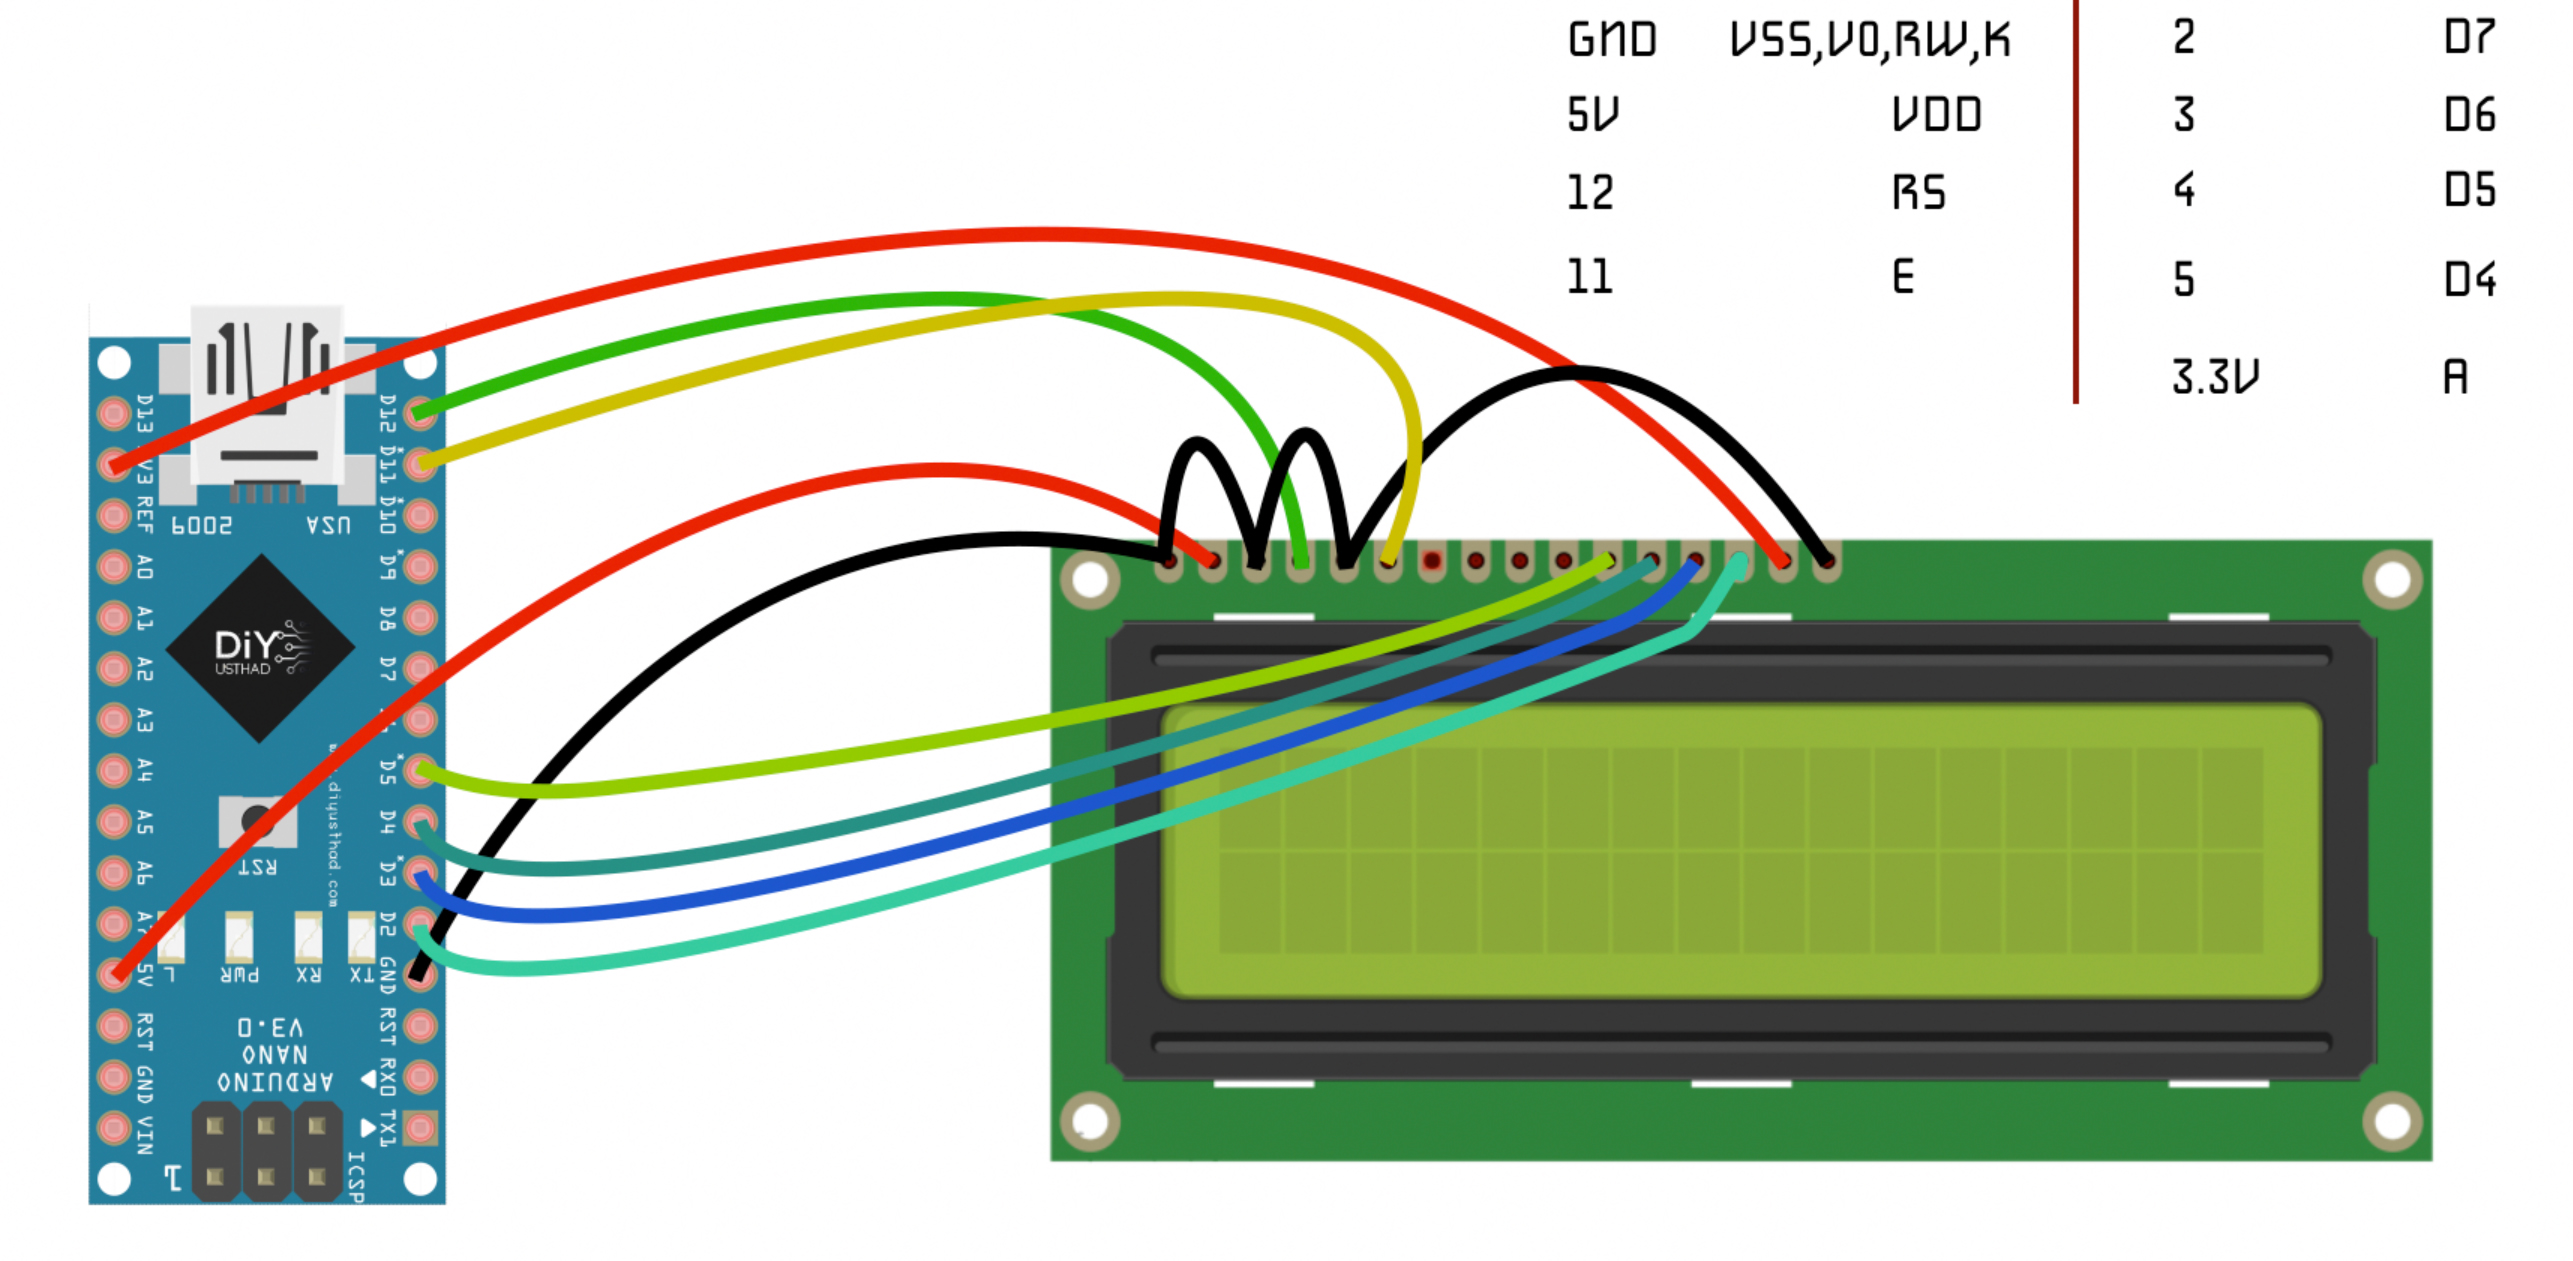
We are interfacing the LCD1602 with Arduino using the data pins of the LCD module. The same code and circuit will work for all Arduino and compatible boards.Connect the circuit as shown in the below diagram.
Circuit- First connect the
groundof Arduino to theVSSof the LCD. - Then connect the
V0of the LCD to thegroundfor full contrast - Then connect
RWto thegroundfor selecting write mode - Then connect
K, which is thegroundof backlight LED also to the ground. - Then connect the
5Vof Arduino to theVDDof the LCD module. - Then connect the
digital pin 12of Arduino to theRSof LCD module. - Then connect the
digital pin 11of Arduino to theEof LCD module. - Then connect the
digital pin 5of Arduino to theD4of LCD module. - Then connect the
digital pin 4of Arduino to theD5of LCD module. - Then connect the
digital pin 3of Arduino to theD6of LCD module. - Then connect the
digital pin 2of Arduino to theD7of LCD module. - And finally connect the
3.3Vof Arduino to theAof LCD which is the anode of backlight LED.
If you like my work please support me by subscribing to my channel here
Read this post in my blog: http://bit.ly/2R95CrQ


_wzec989qrF.jpg?auto=compress%2Cformat&w=48&h=48&fit=fill&bg=ffffff)


Comments
Please log in or sign up to comment.