


Hardware components | ||||||
| × | 1 | ||||
| × | 1 | ||||
 |
| × | 1 | |||
 |
| × | 1 | |||
 |
| × | 1 | |||
 |
| × | 1 | |||
originally posted in diyusthad.com
In this tutorial, we are going to learn about how to use Light Dependent Resistor with Arduino and we are going to do a small project based on the LDR sensor.
Table of Contents
What is LDR?Light Dependent Resistor or Photoresistor, which is a passive electronic component, basically a resistor that has a resistance that varies depending on the light intensity.
VideoWhat we are going to do!
We are going to connect an LED and a Photoresistor(Light Dependent Resistor or LDR) with an Arduino and program it to respond according to the light in the room.
If the room is dark then the LED will turn ON and if the room is bright then the LED will turn OFF.
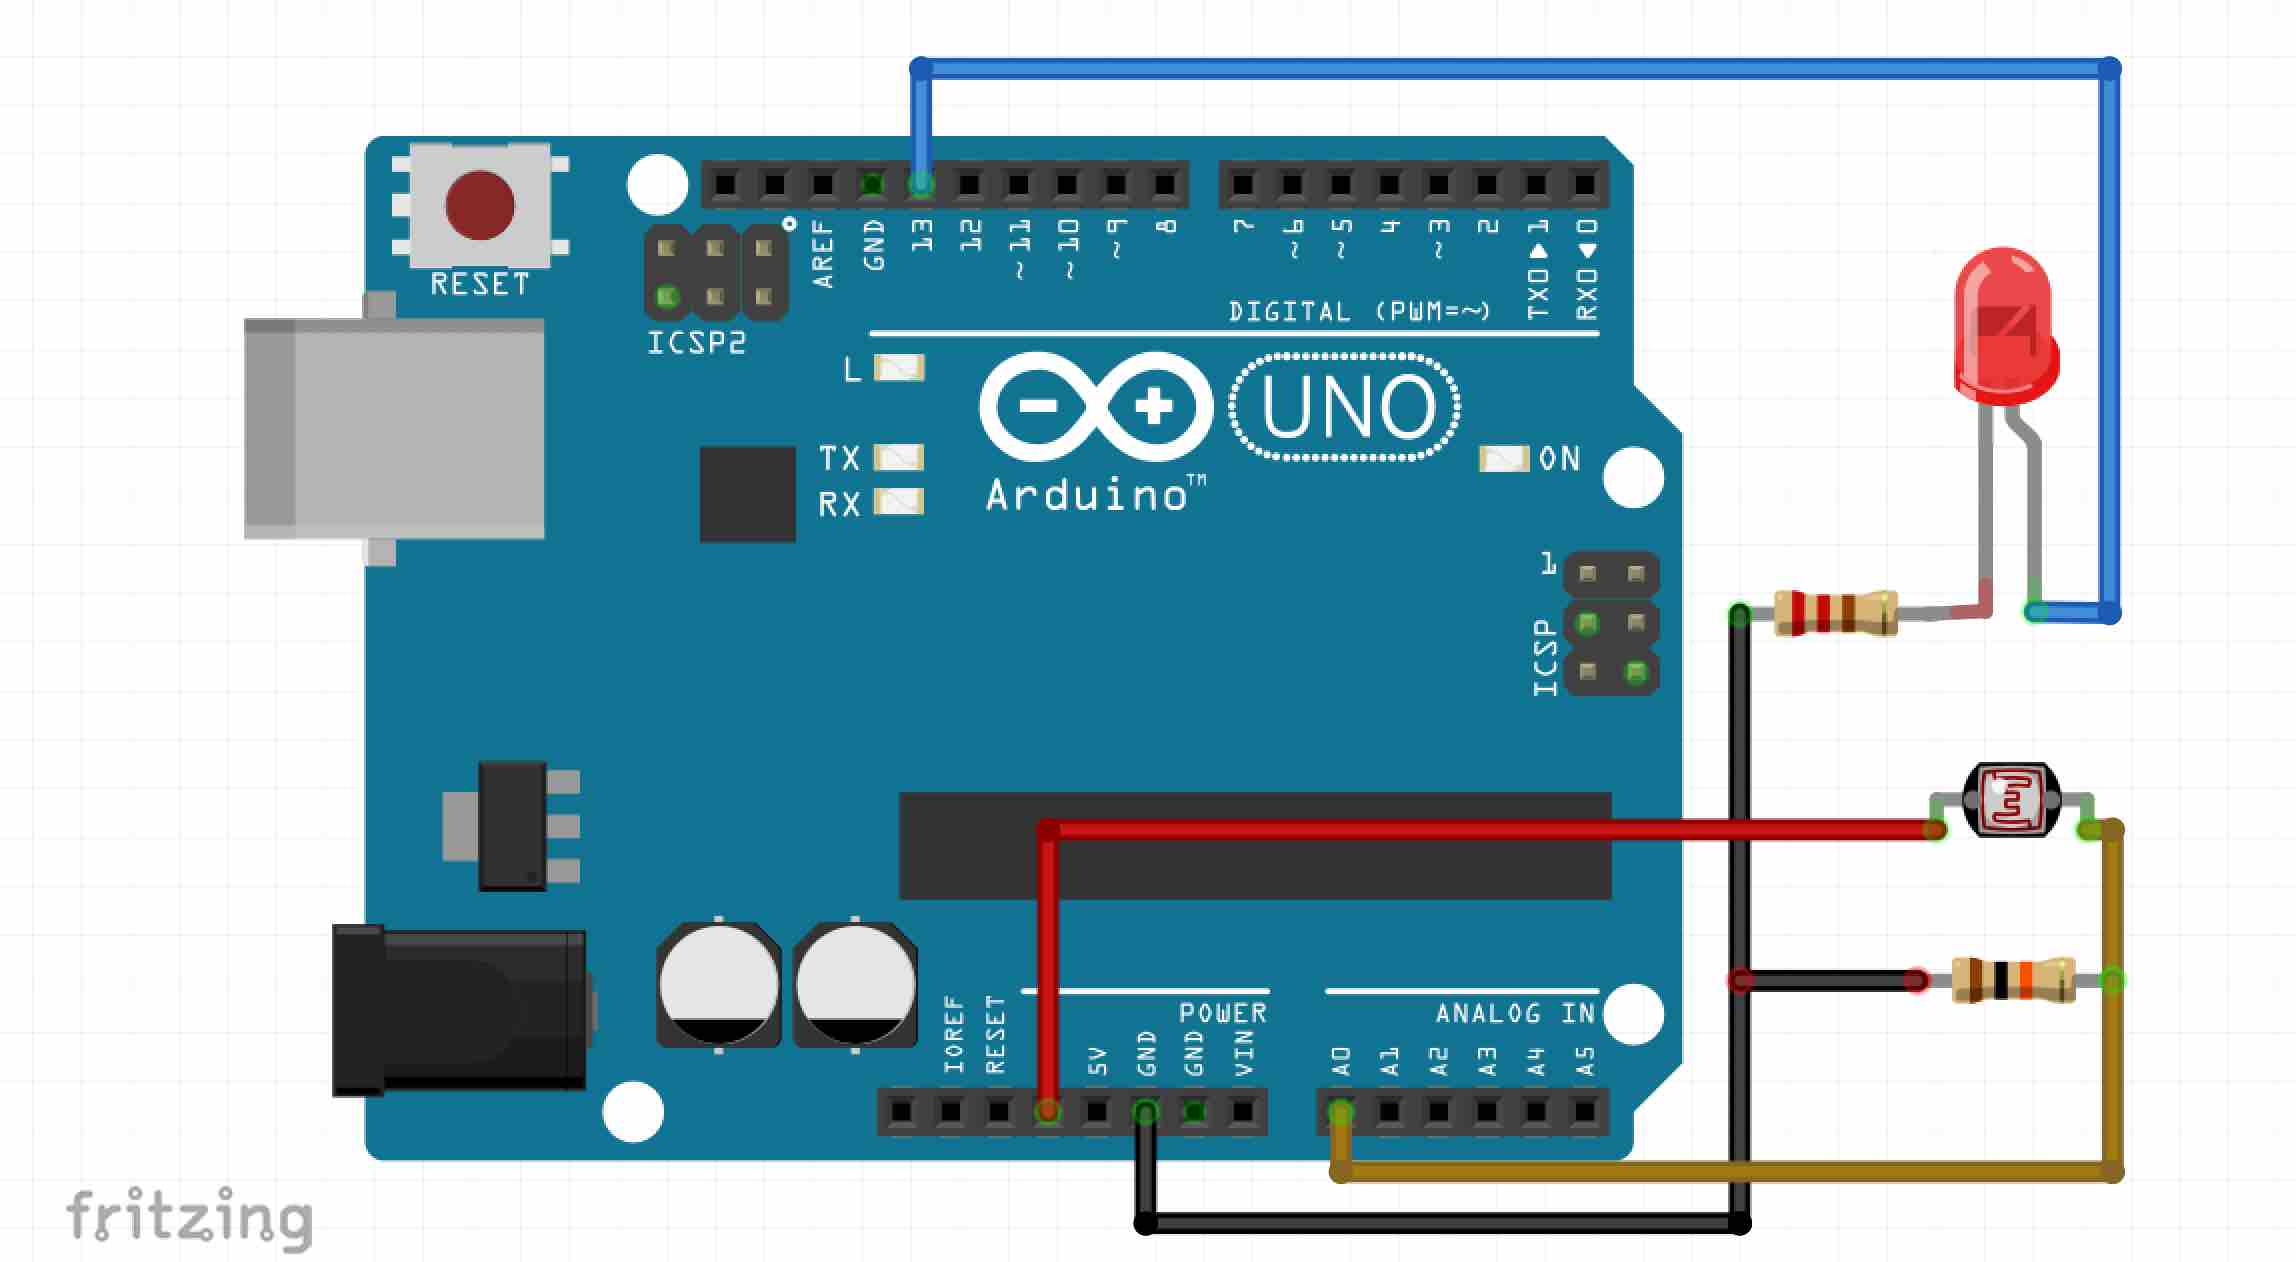
Circuit- Connect the A0 analog pin of Arduino to any pin of the LDR.
- Connect the other pin of Photoresistor to the 3v of Arduino.
- Then connect the 10k resistor from GND to A0 of Arduino.
- Connect the GND of LED to the GND of Arduino via 220 Ohm resistor and
- Finally, connect the anode of the LED to the 13th pin of Arduino.
- Upload the code and open the serial monitor.
- Now you will be able to see some values are printing in the serial monitor, cover the LDR with your hand or turn off the light in your room.
- Now the values will be decreasing, note down the current value.
- Go to the done and change the value of the threshold to the noted value in the previous step.
- Now upload the code again.
- Now, whenever the value goes below the threshold value then the LED will turn ON.
- You can replace the LED with some relay for controlling heavy loads.


Comments
Please log in or sign up to comment.