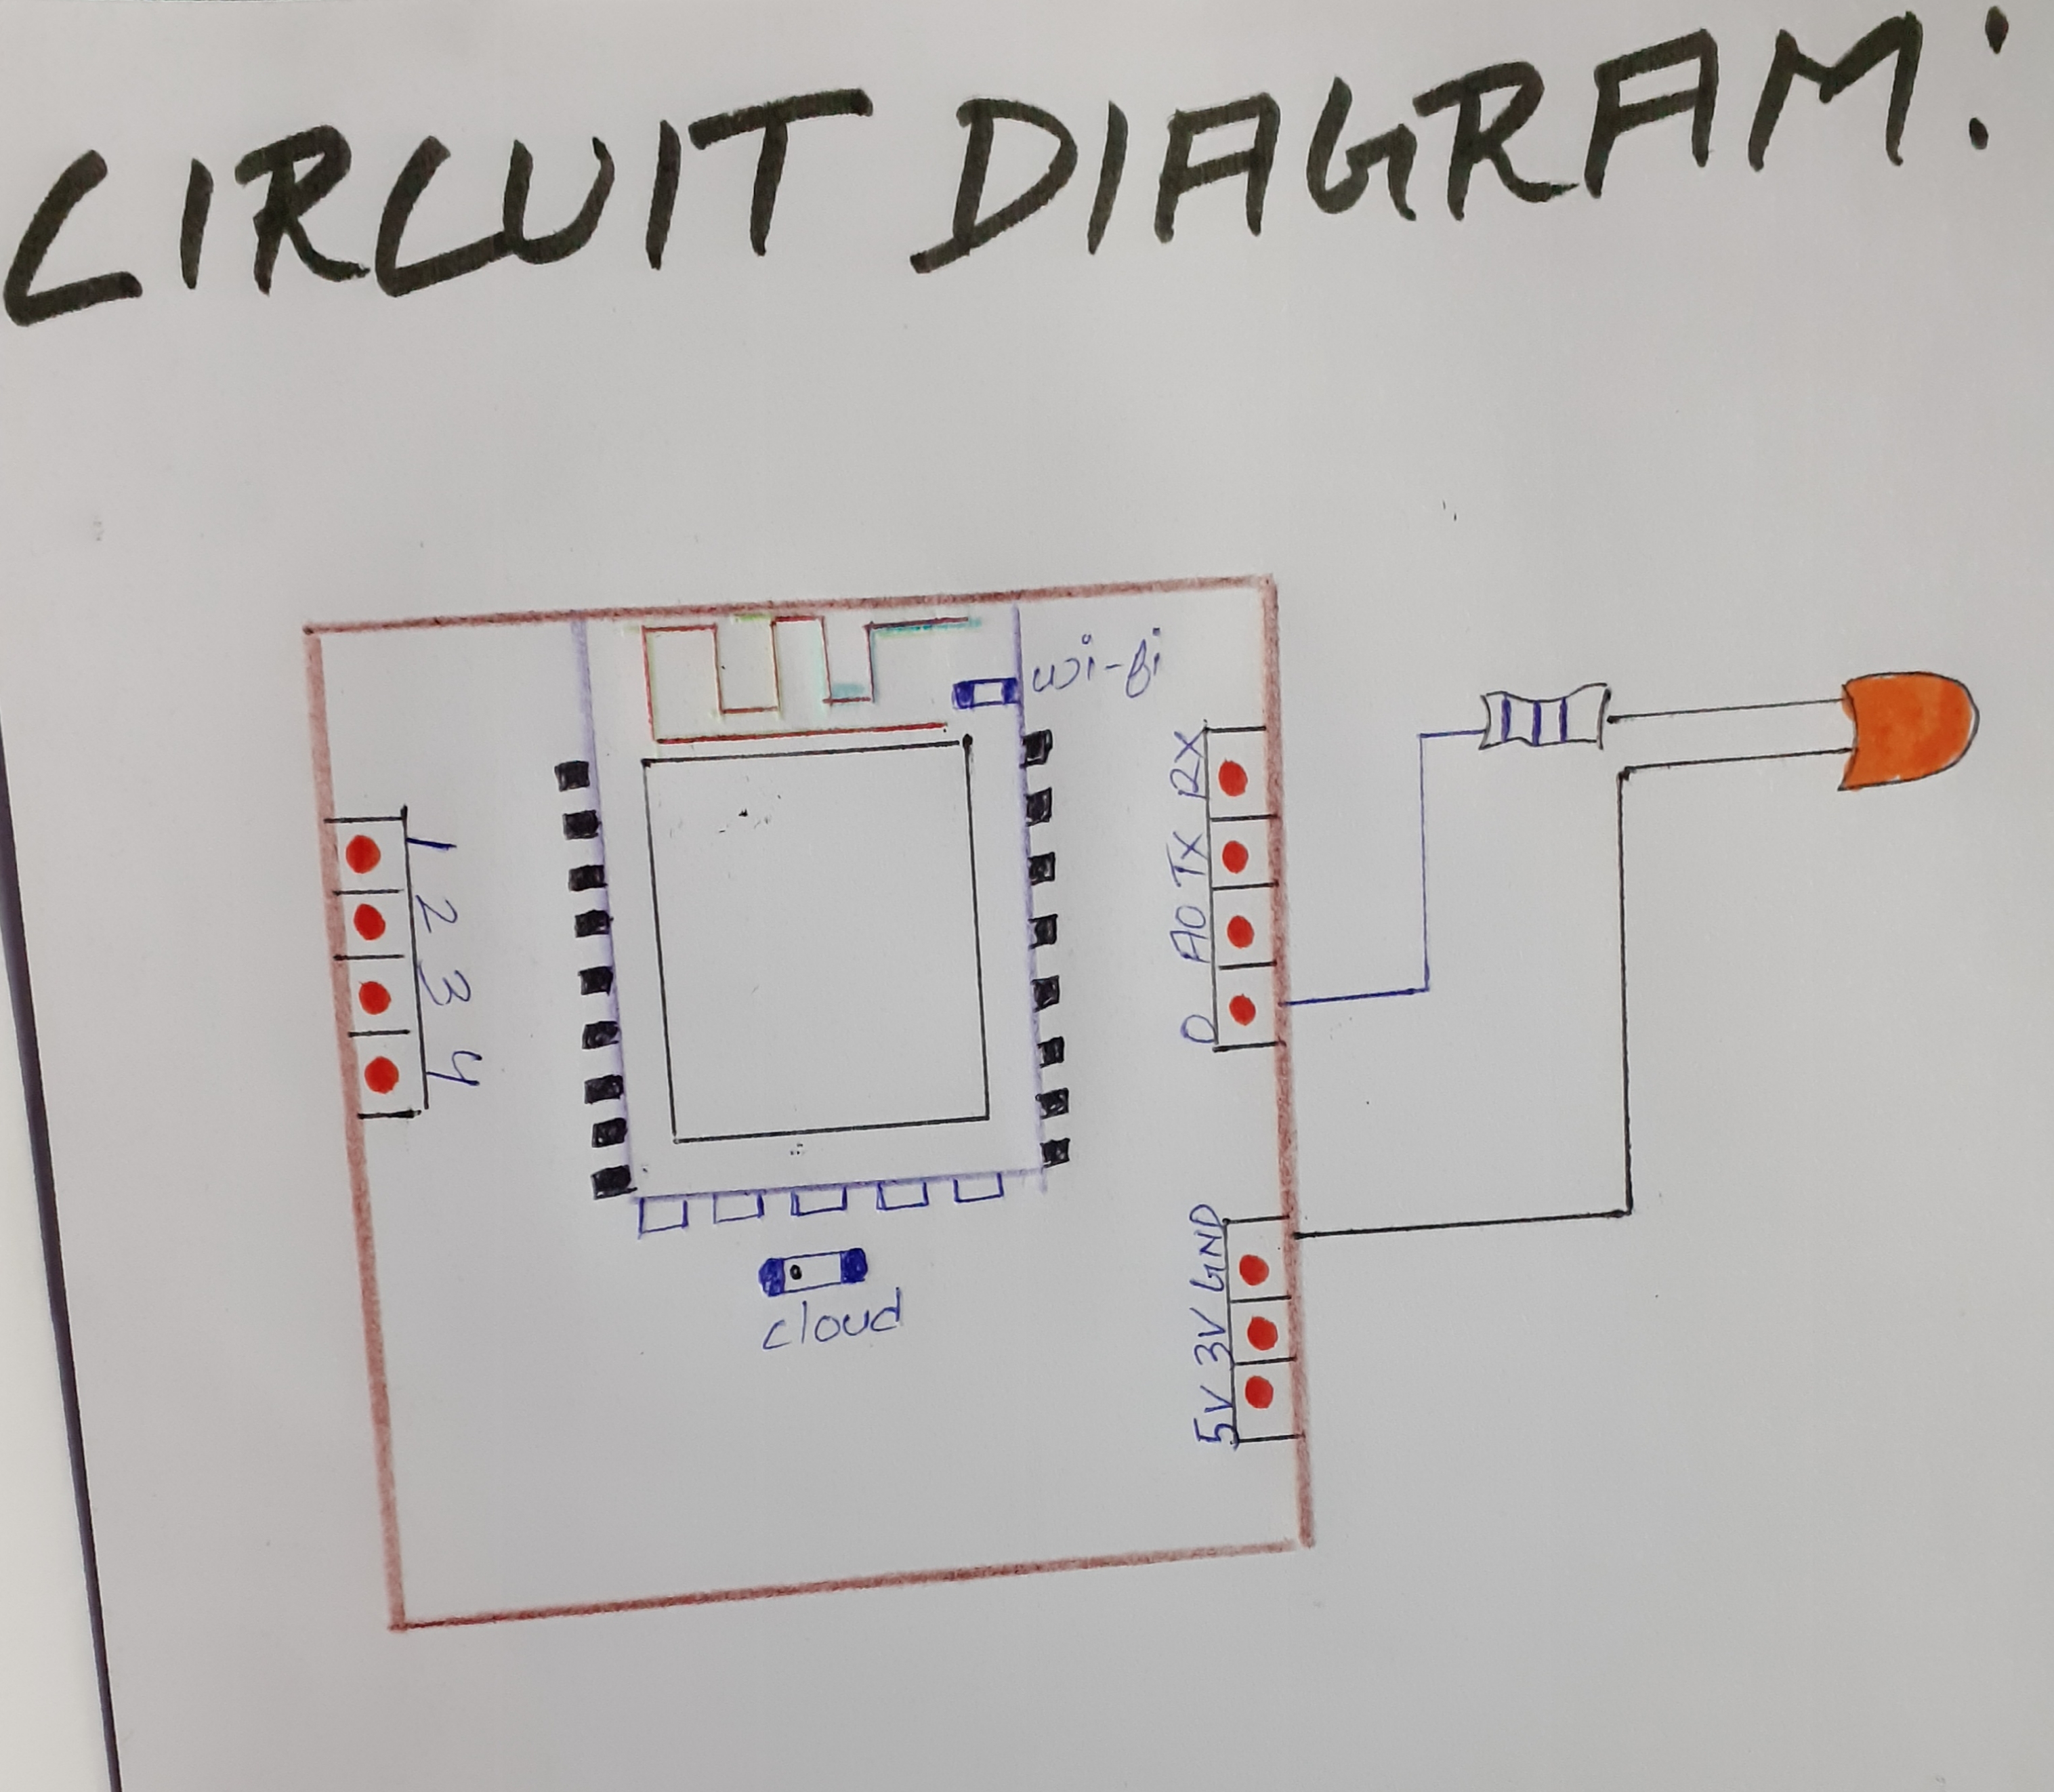
the function of this project is to control the LED lights through your computer using Bolt IoT(bolt cloud).
Hi friends, this is my first project: LED control using the Bolt IoT.
now lets know about the Bolt wifi module there are many number of pins there but we are going to use the 0 gpio pin and ground pin(GND). to power up the bolt wifi module we need a power supplier of 3.3V or 5V. So use mobile charger or Power Bank.when bolt device connected to charger or Power Bank a blue light will start blinking it means its start searching for internet hotspot. green light will start glowing when wifi module is perfectly connected to internet hotspot as well as bolt cloud. Once you have all the hardware requirements Follow the Below steps:
STEP 1: Connecting the LED to the Bolt* Take the one leg of the resistor and wrap it around the longer leg( positive leg ) of the LED.
* Insert the shorter leg( negative leg ) of the LED into the ground pin of the Bolt.
* Insert the other leg of the resistor in digital pin 0 of the Bolt.
STEP 2 : Go to cloud.boltiot.com and create a new product. choose product type as Output Device and interface type as GPIO While creating the product.
STEP 3 : Go to the code tab and write the following code to control the LED.<html>
<head>
<title>Bolt IoT Platform</title>
<script type="text/javascript"
src="https://cloud.boltiot.com/static/js/boltCommands.js"></script>
<script>
setKey('{{ApiKey}}', '{{Name}}');
</script>
</head>
<body>
<center>
<button onclick="digitalWrite(0, 'HIGH');">ON</button>
<button onclick="digitalWrite(0, 'LOW');">OFF</button>
</center>
</body>
</html>
You can try the Below code with some CSS styles to get the output as shown in the screenshot.
<html>
<head>
<title>Bolt IoT Platform</title>
<script type="text/javascript" src="https://cloud.boltiot.com/static/js/boltCommands.js"></script>
<script>
setKey('{{ApiKey}}', '{{Name}}');
</script>
</head>
<body bgcolor="black">
<center>
<font color="white"><h3> LED Controlling By Bolt Module </h3></font><br><br><br>
<button class="btn success" onclick="digitalWrite(0, 'HIGH');">ON</button>
<button class="btn danger" onclick="digitalWrite(0, 'LOW');">OFF</button>
</center>
<style>
.success {
border-color: #4CAF50;
color: green;
radius:2px;
}
.success:hover {
background-color: #4CAF50;
color: white;
}
.danger {
border-color: #f44336;
color: red;
radius:2px;
}
.danger:hover {
background: #f44336;
color: white;
}
</style>
</body>
</html>
STEP 4 : Now save the code.STEP 5 : Now click on view this device to view the page that you have designed. Where you can see a monitor like symbol(Buttons) where you can get the remote option there are two switches ON and OFF.if you press ON led starts glowing and when OFF button pressed led turns off.
Below is the screenshot of the final output.


Comments
Please log in or sign up to comment.