What It Is
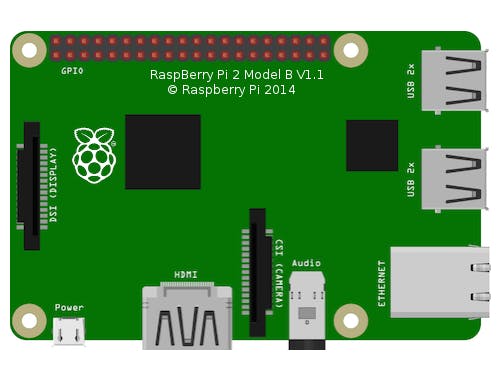
Raspi-io is a Firmata API compatible library for Raspbian running on the Raspberry Pi that can be used as an I/O plugin with Johnny-Five. The API docs for this module can be found on the Johnny-Five Wiki. Raspi IO supports the Model B Rev 1, Model B Rev 2, Model A+, Model B+, and Raspberry Pi 2 Model B, but does not support the Model A.
The Back Story
This plugin came to exist because of a conversation between Rick Waldron, the creator of Johnny-Five, and myself over the contents of a conference talk proposal. It was a total chance occurrence, and now here we are.
Installation
npm install raspi-io
Usage
Using raspi-io inside of Johnny-Five is pretty straightforward, although does take an extra step compared to the Arduino Uno:
var raspi = require('raspi-io');
var five = require('johnny-five');
var board = new five.Board({
  io: new raspi()
});

board.on('ready', function() {

  // Create an Led on pin 7 (GPIO4) on P1 and strobe it on/off
  // Optionally set the speed; defaults to 100ms
  (new five.Led('P1-7')).strobe();

});
The io property must be specified explicitly to differentiate from trying to control, say, an Arduino Uno that is plugged into the Raspberry Pi. Note that we specify the pin as "P1-7", not just 7. See the section on pins below for an explanation of the pin numbering scheme on the Raspberry Pi.
Note: This module is not intended to be used directly. If you do not want to use Johnny-Five, I recommend taking a look at Raspi.js, which underpins this library and is a little more straight-forward to use than using raspi-io directly.
Pin Naming
The pins on the Raspberry Pi are a little complicated. There are multiple headers on some Raspberry Pis with extra pins, and the pin numbers are not consistent between Raspberry Pi board versions.
To help make it easier, you can specify pins in three ways. The first is to specify the pin by function, e.g. 'GPIO18'. The second way is to specify by pin number, which is specified in the form "P[header]-[pin]", e.g. 'P1-7'. The final way is specify the Wiring Pi virtual pin number, e.g. 7. If you specify a number instead of a string, it is assumed to be a Wiring Pi number.
Be sure to read the full list of pins on the supported models of the Raspberry Pi.
I2C notes
There are a few limitations and extra steps to be aware of when using I2C on the Raspberry Pi.
First, note that the I2C pins can only be used for I2C with Raspi IO, even though they are capable of GPIO at the hardware level.
Also note that you will need to edit /boot/config.txt in order to change the I2C baud rate from the default, if you need to. If you notice that behavior is unstable while trying to communicate with another microcontroller, try setting the baudrate to 10000 from the default 100000. This instability has been observed on the Arduino Nano before.
Finally, if you try to access a device that doesn't exist, you will get an error stating EIO, i/o error (sorry it's not very descriptive).


Comments
Please log in or sign up to comment.