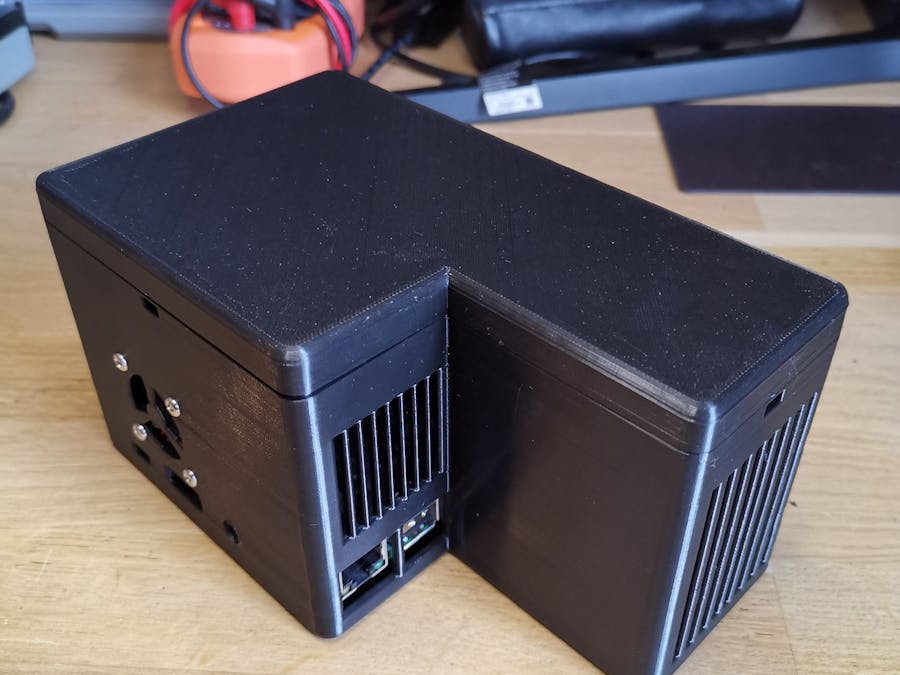
I've used my raspberry pi 3b+ to make a standalone nextcloud server.
DetailsI needed a cheap backup server, and since I had a raspberry 3B in one of my drawers, I chose to use it instead of buying a backup solution.
The main advantage of using a Raspberry is that it consumes little energy and is fully configurable. The solution therefore remains very flexible and scalable.
The main idea is to use NextCloud to duplicate my work data, which is cheaper than using a NAS with a RAID 5 or raid 1. Here a small 2.5 HDD do the job.
In addition, Nextcloud has interesting features in the context of access for customers, for example. You just have to declare the server in the DMZ of your router to provide access from the internet with a dyndns, for example.
Data takes a long time to copy. It took me several days to synchronize my TB of data.I hope you find this useful, and I wish you good make =)
Nextcloud
Raspbian
Build instructionsStep 1
print the top cover then the bottom.
If you have a RPi4 you need to modify the case.
Step 2
just follow this step :
https://www.raspberrypi.org/documentation/installation/installing-images/
then update the system :
sudo apt-get updatesudo apt-get upgrade
in the console start raspi-config and enable SSH in the interfacing options :
remove the X server at statup and enable automatic login
then :
configure the WLAN0 with a static IP adress :
mine is 192.168.0.3/24
DNS : 8.8.8.8 and 1.1.1.1
its better to use the wlan cause the ethernet is shared with the USB bus. you will loose some bandwith.
Step 3
Connect the HDD, then install gparted in the console :
sudo apt install gparted
Start gparted and delete all data on the drive (make a backup first). Format it to ext4. you can use ntfs but it will be a little slow
edit /etc/fstab
sudo nano /etc/fstab
add the line : /dev/sda1 /media/hdd ext4 defaults, noatime 0 1
If you dont know what drive you are using, juste use lsblk in the console.
sudo reboot
Step 4
install apache2 :
sudo apt-get install apache2
install PHP and modules :
sudo apt-get install php7.3 php7.3-gd sqlite php7.3-sqlite3 php7.3-curl php7.3-zip php7.3-xml php7.3-mbstring
restart apache :
sudo service apache2 restart
cd /media/hdd
Download nextcloud :
wget https://download.nextcloud.com/server/releases/nextcloud-18.0.1.zip
unzip :
unzip nextcloud-18.0.1.zip
cd nextcloud
mkdir data
sudo chown -R www-data:www-data /media/hdd/nextcloud/
Step 5
Edit and create the file nextcloud.conf in apache2
sudo nano /etc/apache2/sites-enabled/nextcloud.conf
<VirtualHost *:80>
ServerAdmin webmaster@localhost
DocumentRoot /media/hdd/nextcloud
Alias /nextcloud "/media/hdd/nextcloud/"

<Directory "/media/hdd/nextcloud/">
Options +FollowSymlinks
AllowOverride All

<IfModule mod_dav.c>
Dav off
</IfModule>

Require all granted

SetEnv HOME /media/hdd/nextcloud
SetEnv HTTP_HOME /media/hdd/nextcloud
</Directory>

ErrorLog ${APACHE_LOG_DIR}/nextcloud_error_log
CustomLog ${APACHE_LOG_DIR}/nextcloud_access_log common
</VirtualHost>
Restart apache2
service apache2 restart
Step 6
Enter the URL :
192.168.0.3/nextcloud
(change the ip with the one you set in step 2).
Step 7
use M 2.5 for plastic to setup the raspberry in the case :
I got some of them in a broken toy
Then mount the HDD.
For the fan, you can just connect it to pin 04 (5v) and 06(GRD) of the raspberry. I put mine on the 3, 3v and created a little electronic circuit with a green led (this is really optionnal and you can skip this) :
Raspebrry 3B V2 v15.f3z: Fusion 360 file
Raspebrry 3B bottom.stl: main case
Raspebrry 3B_top.stl: Cover


Comments
Please log in or sign up to comment.