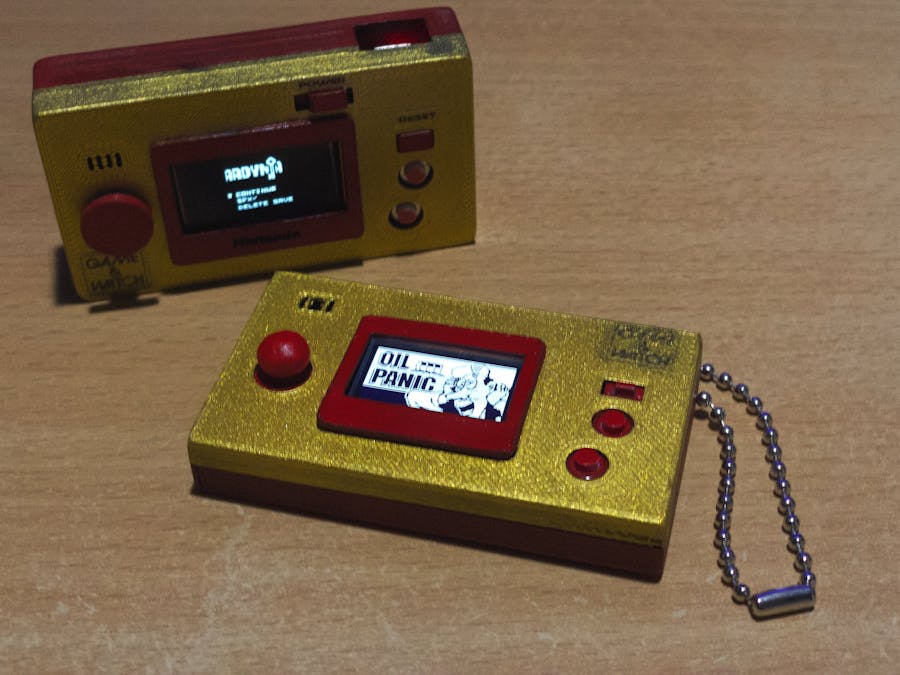
I've create Arduboy in many version, but I think this version is thin and easy to carry anywhere.
Warning: to build this thing, many parts depend on 3dprint, mounting tape and super glue. (I try to avoid use this as much as possible) and sorry for my English this is not my main language.
Initial state:
grab all 3d parts from download below or
Arduboy Game and Watch by Nochii - Thingiverse
(all parts and store link I put it in Thingiverse)
more game device design over here
to build Arduboy homemade you might need Mr. Blinky Arduboy homemade pakage:
* thank you for his hard work :)
* If you purchase part from Aliexpress avoid this shop (ANA FANG)
https://www.aliexpress.com/store/912623196
This is SCAM shop. They send empty package with no item. The trick they use is deliver with register mail, while you get item and open there is empty nothing in the mail. The part might cheap and you can let it go but it waste time to wait for new order.
Arduino pro micro sketch:
1. Print all 3d part. heck that the PCB part can place into back case. OLED can place into the PCB middle hole. front case and back case can close. If not use your plastic adjust tools to fix it.
2. Place all switch in to PCB that print form 3dprint.
It will look like this (sorry I did not take a photo while build but I will show from my Thinker CAD design instead). you can use super glue for hold the part.
for the direction place as the picture
3. place Arduino on back case and use mounting tape to hold it on board.
4. Use sand paper on small size plate and place on the place that show on picture. weld common ground together.
weld copper wire from reset, A, B button to Arduino.
for direction weld like I show on the picture.
up ------- A0
right ---- A1
down -- A3
left ------ A2
ground --- GND
then cover contact point with electrical tape.
5. place the OLED and use tape for support it.
weld copper wire from OLED to Arduino
OLED SDA ------------ 4
OLED SCL ------------ 6
VCC ------------------ VCC
GND ------------------ GND
6. place the power parts on back case.
hold every parts with mounting tape then weld all parts like picture below. The multi-function mini boost module should select 5v output by unconnected A and B connector.
on the switch you might need to apply some super glue to hold it with plastic but do not apply it too much it might make the switch stuck.
7. carefully cover all parts with electrical tape (we will place piezo between PCB board and power parts it might short circuit)
8. weld piezo to Arduino.
Piezo red wire --- 5
Piezo black wire --- GND
9. carefully place PCB to back case in this step you might need some adjust the PCB and make it fit to the back case.
In this step you might need mounting tape to support under the PCB part that because the button/ power supply or Arduino pro micro part might different from mine (supply from China).
10. PLEASE READ THIS STEP CAREFULLY!
OLED size which I bought from China supply might have various size the OLED screen might not fit to your OLED. While close the front case please carefully close not put forge to the screen it might break your part! if the screen not fit to you use your plastic adjust tools to extend front screen frame hole. no need to worry about the beauty of screen frame hole that you adjust it will cover with the Cover A or Cover B that include with 3d print parts.
11. Use Super glue with Cover (choose A or B which match your OLED screen)
WARNING: use super glue might make your OLED dirty if it happen apply acetone and clean it.
12. to upload game please go to Arduboy and find Arduboy homemade. my arduboy homemade config look like this
* in video I use clay on direct pad instead of my 3d print direct pad because I want to make it look alike arcade joystick. :)


_3u05Tpwasz.png?auto=compress%2Cformat&w=40&h=40&fit=fillmax&bg=fff&dpr=2)
Comments
Please log in or sign up to comment.