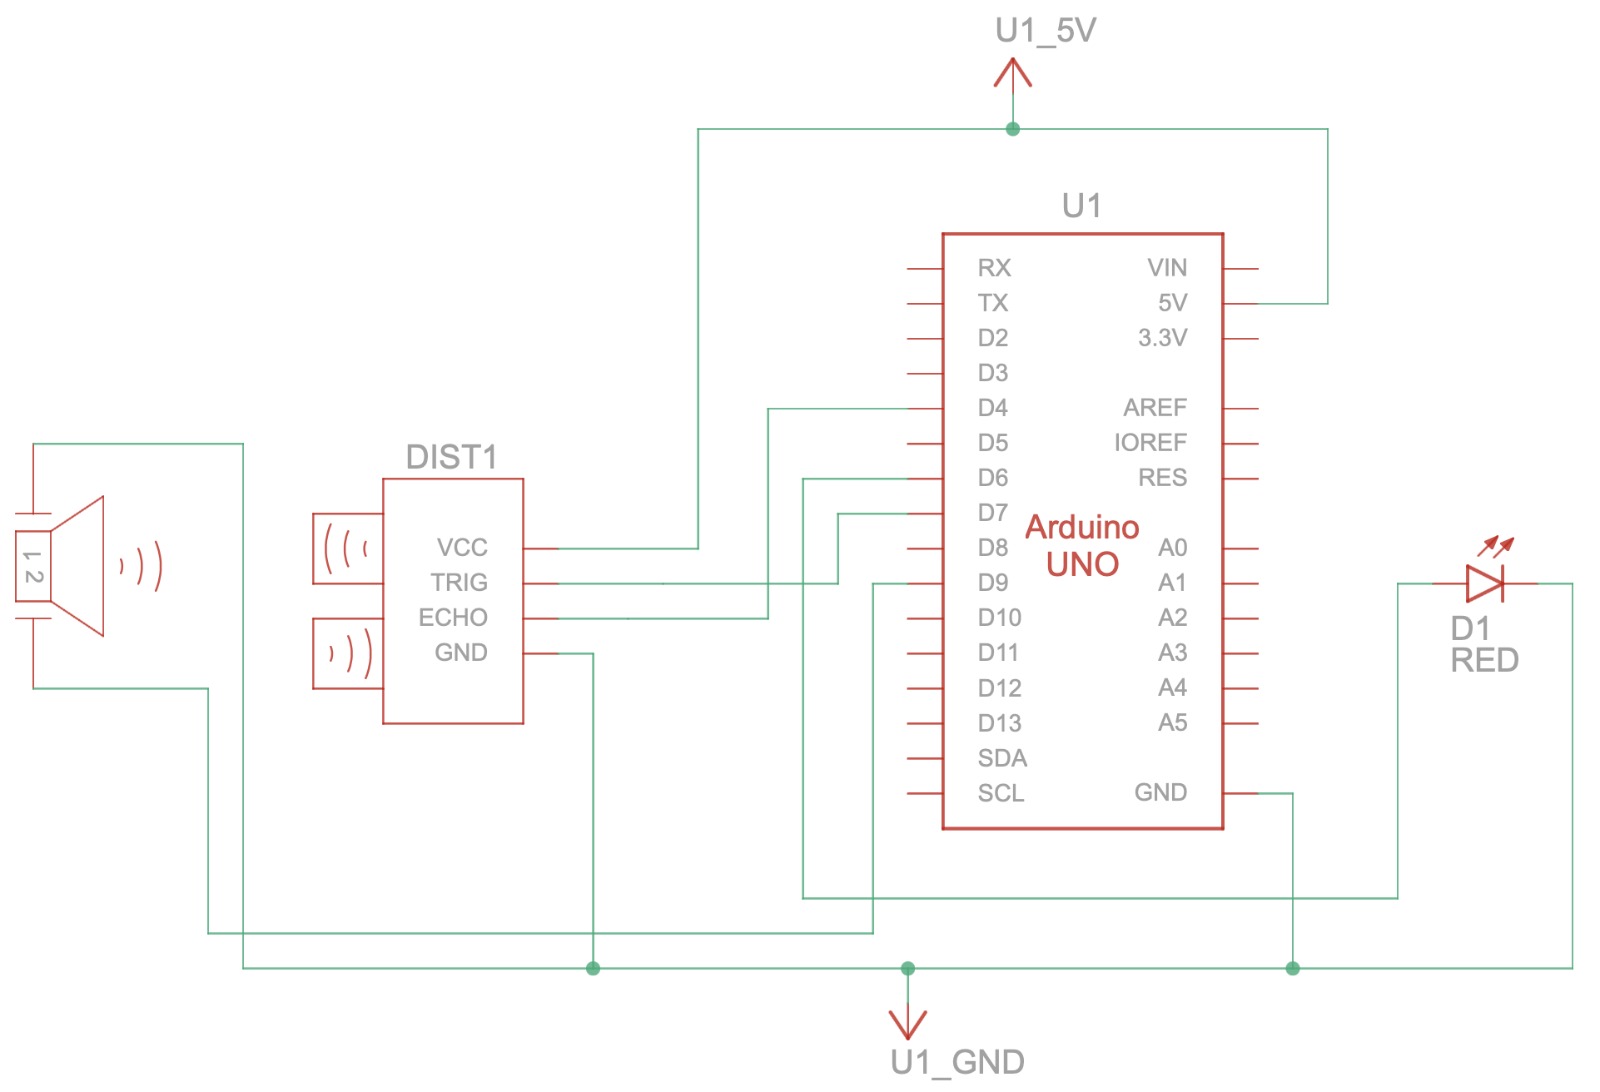
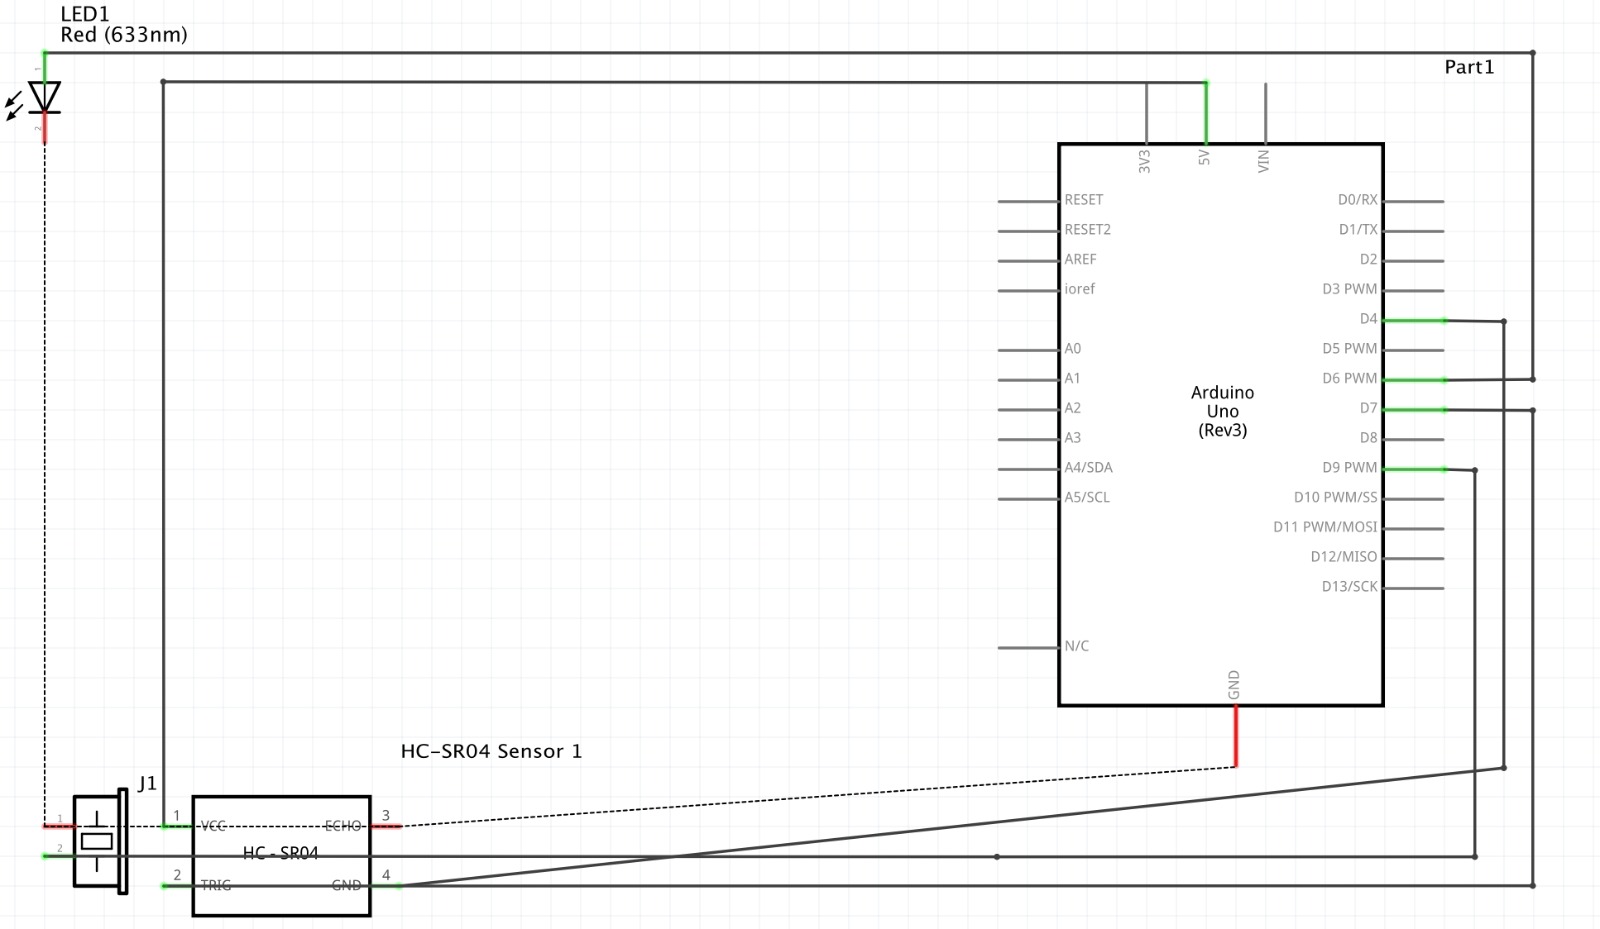
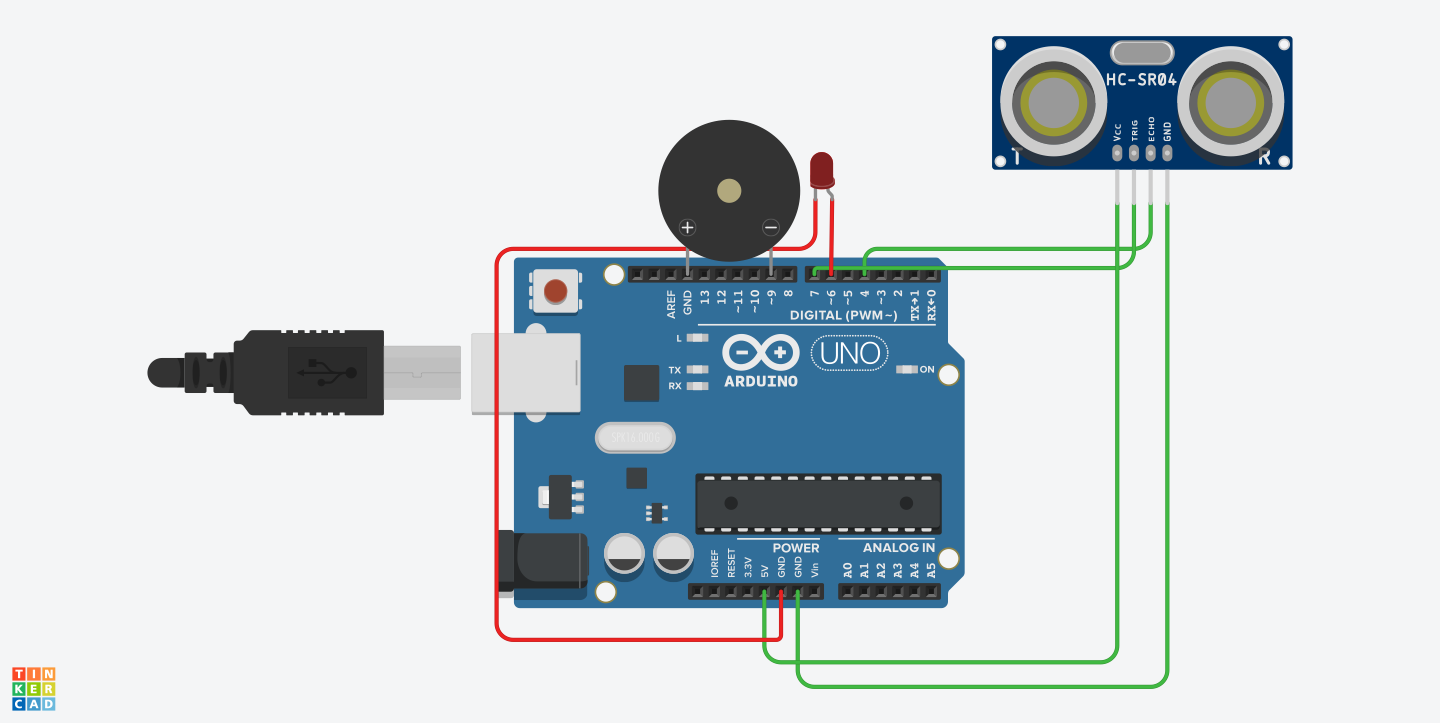
int trigPin = 7; //Here are the locations of pins
int echoPin = 4;
int buzzerPin = 9;
int ledPin = 6;
int time;		//Teaching the time and distance to machine
int distance;

void setup()
{
 pinMode(trigPin, OUTPUT); // sets the trigger pin as an output (sends wave out)
 pinMode(echoPin, INPUT); // sets the echo pin as the input (receives the echoed sound wave)
 pinMode (buzzerPin, OUTPUT); // sets the buzzer as an output
 pinMode(ledPin, OUTPUT);
}

void loop()
{
 digitalWrite(trigPin, HIGH); //sound waves emitted
 delayMicroseconds(5); // leave on for 5 us
 digitalWrite(trigPin, LOW); // turn off emitter
 int time = pulseIn(echoPin, HIGH); // turn on echo detector
 int distance = (time*0.034)/2;  // speed of sound in air is 340 m/s = 0.034 cm/us. Dividing this value by 2 gives us the distance from the sensor to the object

if (distance <= 30) {     // if the distance calculates is less than or equal to 30, the buzzer sounds and led blinks

        digitalWrite (buzzerPin, HIGH);
		digitalWrite(ledPin, HIGH);
        delay (200);

        }

  else {                 // if the distance calculated is greater than 30 cm, buzzer is not turned on and the led doesnt blink

        digitalWrite (buzzerPin, LOW);
		digitalWrite(ledPin, LOW);
        delay (200);
  }
}


_ztBMuBhMHo.jpg?auto=compress%2Cformat&w=48&h=48&fit=fill&bg=ffffff)


Comments
Please log in or sign up to comment.