


Hardware components | ||||||
 |
| × | 1 | |||
 |
| × | 1 | |||
 |
| × | 3 | |||
 |
| × | 1 | |||
Software apps and online services | ||||||
 |
| |||||
Getting started with the Particle Photon is pretty easy, at least in the beginning. When you then begin to include IFTTT and other things it can get tricky real fast. There are some great guides out there which helped me navigate beyond the basics. This is another one of those guides - doing just a little bit more with your Particle Photon.
What it'll do:Your particle photon will Tweet the person of your choice, with the tweet of your choice every time you press the push-button. Think of it as a "thinking of you" button. Every time you hit the button the built in LED will light up for 2 seconds.
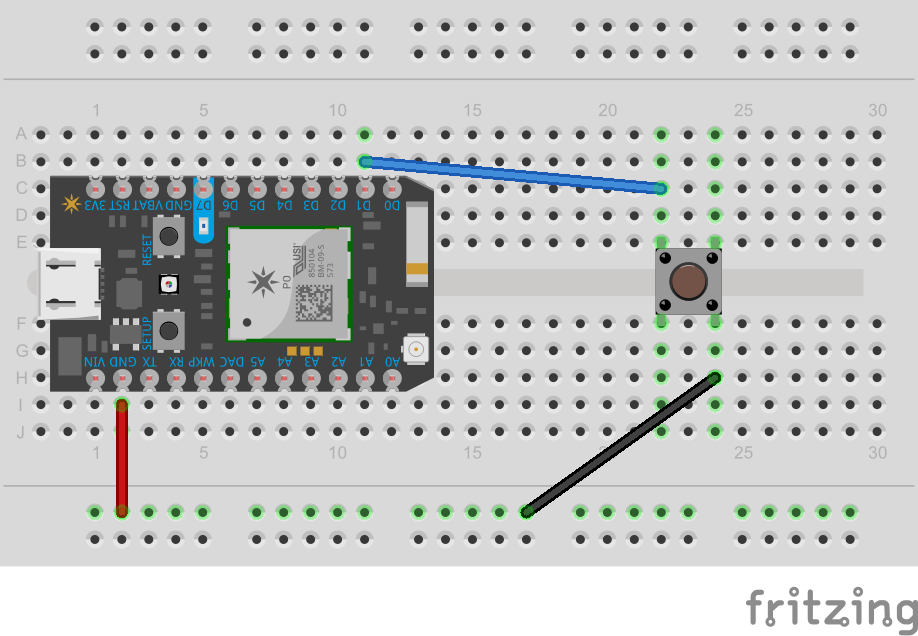
How we'll do it:First thing first, we need to wire up the particle photon on the breadboard to use the push-button.
D1 --> closest leg of the push button
furthest leg of the push button --> negative vertical column
negative vertical column --> GND
Now we need to make sure that IFTTT is set up correctly.
Select Particle as the "this" service to use.
Then choose the "New event published" trigger.
It's really important that the below conditions are exactly as shown here if you are planning on using the provided code.
Event Name = Button_Status
Event Condition = Pressed
Device Name or ID = [ID of your Particle device]
Select Twitter as the "that" service to use.
Then choose the "Post a tweet" as the action.
This is where you decide on what your Particle device is going to tweet. If you want to tweet someone, their handle should be the first thing in the field. (Don't forget the @ sign.)
Last but not least, we need to review the applet and hit Finish.
Where the orange box is below, your device ID should appear, and where the green box is the Twitter handle of the account you're tweeting from should appear.
Now you've just got to add the code (see below) on the online IDE, check it, and flash it to your device - then you can tweet with the press of a button!


_3u05Tpwasz.png?auto=compress%2Cformat&w=40&h=40&fit=fillmax&bg=fff&dpr=2)
Comments
Please log in or sign up to comment.