


Hardware components | ||||||
 |
| × | 1 | |||
_baVEVgguW1.jpg?auto=compress%2Cformat&w=48&h=48&fit=fill&bg=ffffff) |
| × | 1 | |||
 |
| × | 1 | |||
 |
| × | 1 | |||
 |
| × | 1 | |||
Software apps and online services | ||||||
 |
| |||||
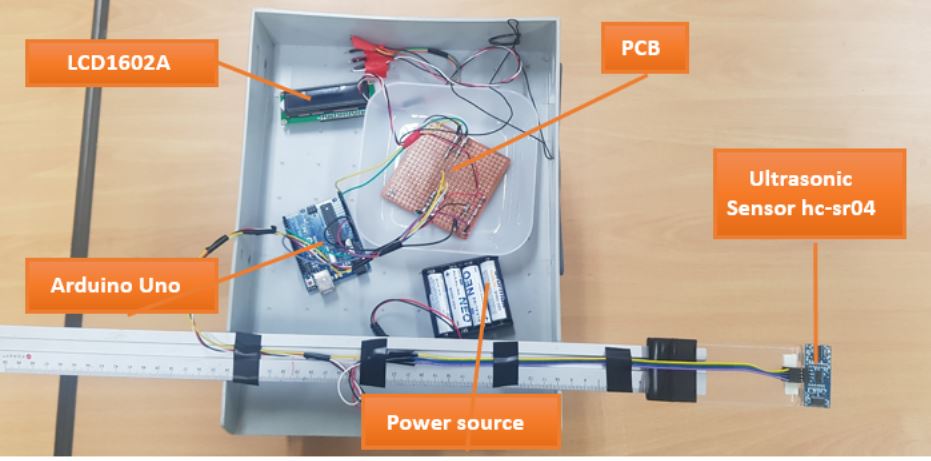
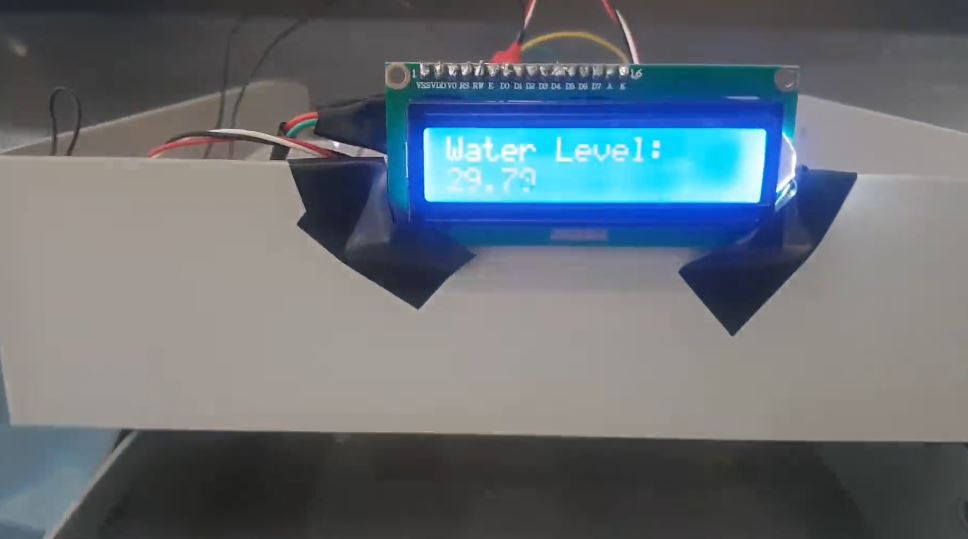
This project implements a water level monitoring system using an ultrasonic sensor. It accurately measures the water level in a tank and displays the information on an LCD screen. The system is powered by an Arduino microcontroller and is designed for easy installation and operation. The addition of a PCB ensures neat and reliable wiring, enhancing the overall performance and durability of the project.
The motivation behind creating this project was to develop a user-friendly and efficient method for monitoring water levels. Accurate water level measurement is essential in various applications, from domestic water tanks to industrial storage systems. By using a PCB for wiring, we aimed to create a robust and professional-looking system that is easy to install and maintain. This project also serves as an educational tool, demonstrating the practical use of ultrasonic sensors and Arduino in real-world applications.
The system operates by using an ultrasonic sensor to emit sound waves towards the water surface and measure the time it takes for the waves to bounce back. By knowing the speed of sound in the air, the Arduino calculates the distance to the water surface. Using the tank depth information, it then computes the water level and displays it on the LCD screen.
Assemble the Circuit1.Connect the Ultrasonic Sensor:
- Connect the VCC pin of the sensor to the 5V pin on the Arduino.
- connect the GND pin of the sensor to the GND pin on the Arduino.
- Connect the Trig pin of the sensor to digital pin 6 on the Arduino.
- Connect the Echo pin of the sensor to digital pin 7 on the Arduino.
2.Connect the LCD
Screen:
Follow the pin configuration for your specific LCD model. Typically, you connect the RS, E, D4, D5, D6, and D7 pins to appropriate digital pins on the Arduino.
Connect the VCC and GND pins of the LCD to the 5V and GND pins on the Arduino.
3.Power Supply:
Connect the 1.5V batteries in series to create a 6V power supply and connect it to the Arduino's Vin and GND pins.
4.PCB Assembly:
If you have a PCB like I do, mount all the components onto it and solder the cables using a soldering iron.


Comments
Please log in or sign up to comment.