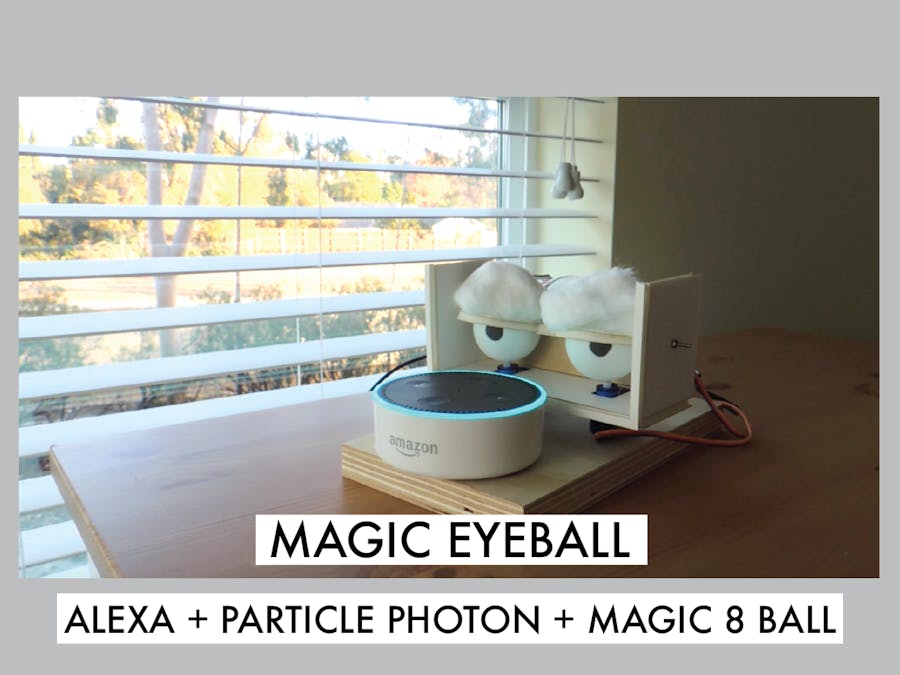
While browsing through the Amazon website, I couldn’t pass up on the $10 discount Amazon has on its own Echo Dot. I wanted to know what the hype is all about. So I bought one.
As a hardware hacker, I knew I wanted to use Alexa to control something tangible. I don’t really believe in fortune telling, but I always have fun playing with a magic eight ball. So I thought why not make my own version and add some character to make it a little more personal. And what a better time to predict your future than the new year. So here it is. Say hello to the Magic Eyeball.
This project is divided into three parts:
Part 1: Building the frame to allow for the movement of the eyes and eyebrowFirst, I cut out the back of the two ping pong balls to make the eyes, and measured the positions of the three servo motors that will allow me to move the eyes left and right and the eyebrows up and down. Then, I cut foamcore to make the eyebrows and the base structure, and mounted the whole thing on a sheet of plywood. The structure and the number of servo motors used can vary as long as you can move the eyes and the eyebrows.
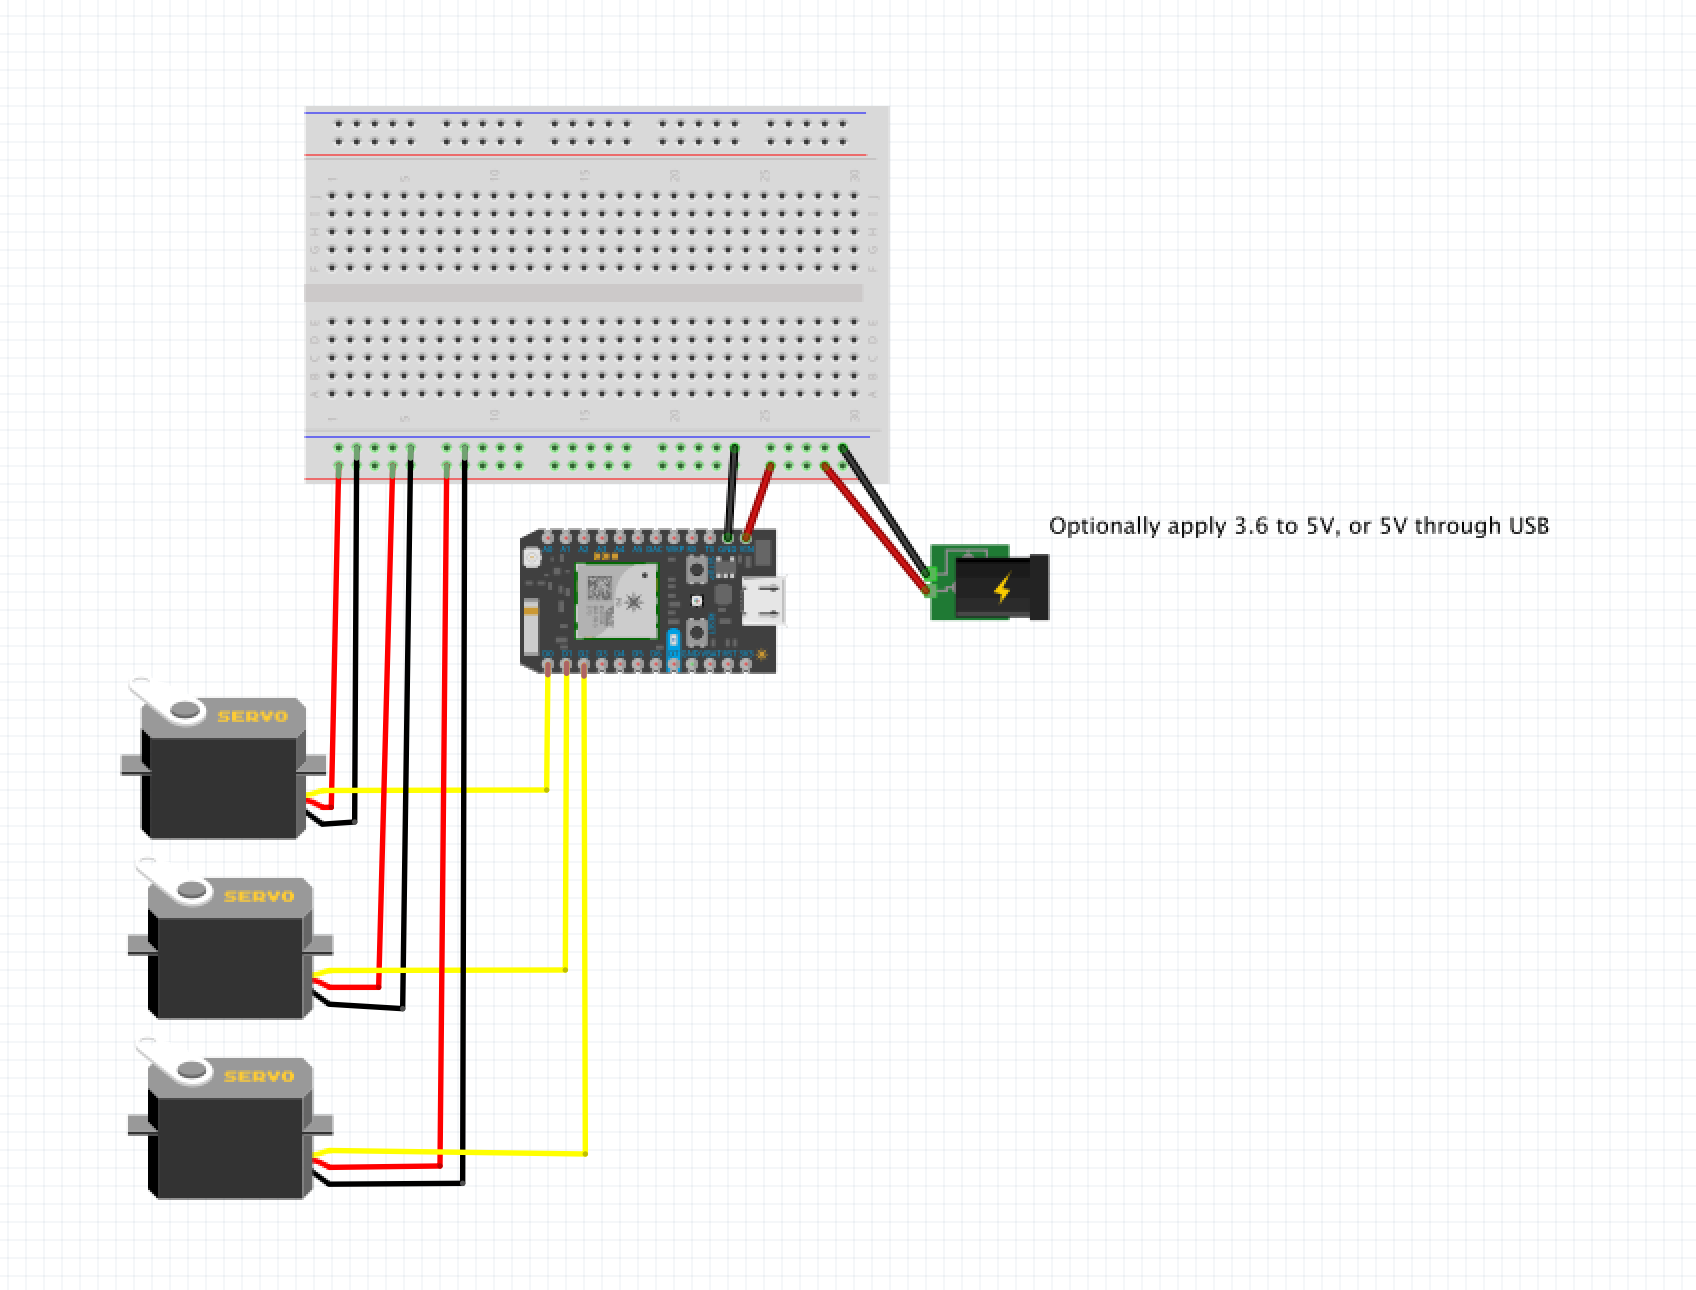
Part 2: Using a photon to control the motors to create different expressionsI connected two potentiometers to the 3 servos: 2 for the eyes, and 1 for the eyebrows. I played around with the movement of the eyes and eyebrows to create three unique face expressions for the three responses: yes no and maybe.
Part 3: Creating an Alexa skill that communicates to the photonI created an Alexa skill called Magic Eyeball (*This is not a published skill).
Here’s how the skill works:
User: Alexa, ask Magic Eyeball (Yes/No Question)
The command sends a request to the web API that returns one of the three responses: yes, no, or maybe.
Once we get the response, Alexa does two things:
1. Alexa says a random phrase within the list of yes, no or maybe responses that I created
2. Alexa tells photon what the response is, and photon makes a corresponding face expression.
Here's how I created the Magic Eyeball Alexa Skill. The github link below will provide you all the necessary files:
There are three main pages required for installation:
- AWS Lambda
- Amazon Developer Control
- Particle Web IDE
1) AWS Lambda https://aws.amazon.com/console/
Steps:
- Sign in to the console
- Click Services (top left corner) > Compute > Lambda
- Make sure on the right top corner, the region is set to US East (N. Virginia)
- Click Create Lambda Function
- You should now be on Select blueprint on the left tab. Go ahead and click Configure triggers.
- Configure triggers: Click inside the blank square on the left of the Lambda icon. Choose a drop down option Alexa Skills Kit for Lambda. Then, click Next.
- Configure function: Choose a function name (I usually choose the same as the Invocation name for easy remembering).
- Runtime*: Choose Node.js 4.3
- Handler*: Choose index.handler
- Role*: If this is your first time, choose create a custom role. This will redirect you to a new page. IAM Role: choose lambda_basic_execution. Then, click allow at the bottom right corner.
- Once made, Role*: choose Choose an existing role. Existing role*: choose lambda_basic_execution.
- Leave the Advanced settings as is. Then, click Next.
- Review: Review, then click Create function.
- Once the function is created, click on the Code tab.
- Modified the index.js file found in ASK>src folder.
- Insert the correct deviceid and accessToken of the Particle Photon unit. (You can find them from the Particle Web IDE).
- For Code entry type, choose a drop down option: Upload a .ZIP file. Then, upload the compressed zip file inside src. Compress the AlexaSkill.js and index.js file together. Make sure to be inside the src folder before compressing the files.
- Click Save and Test.
- Save the ARN key on the top right corner. You will need it for the next step. (Necessary for the Configuration Tab in Amazon Developer).
2) Amazon Developer Control: https://developer.amazon.com/
Steps:
- Sign in at the right top corner
- Click Alexa > Get Started (under Alexa Skills Kit) > Add a New Skill
- Skill Information: Put in the Name and the Invocation Name. This is the keyword that you use to activate the skill. In this case, it's magic eyeball. Then click Next.
- Interaction Model: Add Custom Slot (Make sure you do this before adding Intent Schema and Sample Utterances). Then, Add Intent Schema and Sample Utterances (Look at the ASK>speechAssets folder for references)
You might wonder, what are all these random phrases. What I am trying to do here is to create a generic slot by listing out several random phrases with varying lengths. My intent is to trick Alexa to pass whatever question or whatever I say into a QUESTION slot. I am not sure if this is the best way to approach this. If anyone knows of a better idea, I'd love to hear.
Type
QUESTION
Values
yes
no
maybe
Do I like cheese
Can he eat spicy food
Is this a pen
Are you pink
Is he really doing that
Are you serious
Can I get a cup of tea
Is the sky blue
Are you kidding me Alexa
Is my real name Scala J Jisi
The calculator is not working
What the heck is this
Can you answer my question please
The sun is shining in my eyes
I am quite confused
Am I going to win this contest
What is going on with the salmon
Is the room too cold
Is it really December
Intent Schema
{
 "intents": [
   {
     "intent": "ParticleIntent",
     "slots": [
       {
         "name": "question",
         "type": "QUESTION"
       }
     ]
   }
 ]
}
Sample Utterances
ParticleIntent {question}
- Configuration: Click AWS Lambda ARN (Amazon Resource Name) and North America. In the link, post the ARN key you get from the AWS Lambda page. Click Next, then Yes, Apply.
- Test: You can test the commands without an Amazon Echo by entering commands in the Enter Utterance for testing tab.
- Error cases: (Most of the errors happened in the index.js file)
- If the error stated that it cannot find the endpoint, make sure the Particle's device ID in the index.js file is entered correctly.
- Publishing Information + Privacy & Compliance: I haven't done it yet, but just fill everything out then click Submit for Certification. You need to wait for Amazon to approve the skill, and then it will be ready for the public to use.
3) Particle Web IDE https://build.particle.io
Steps:
- Use the Particle iOS app to set up a new device. Follow basic instructions.(https://docs.particle.io/guide/getting-started/intro/photon/).
- Note the device ID and access token found on the website to put in the index.js file.
- Flash an appropriate sketch.
This is my first take on creating an Alexa Skill. I did not publish the skill yet because there is still a little bit of a bug as Alexa sometimes does not recognize the skill or does not hear me say magic eyeball correctly. However, it works most of the time.
Take a stab at it, and let me know what I can improve!


Comments
Please log in or sign up to comment.