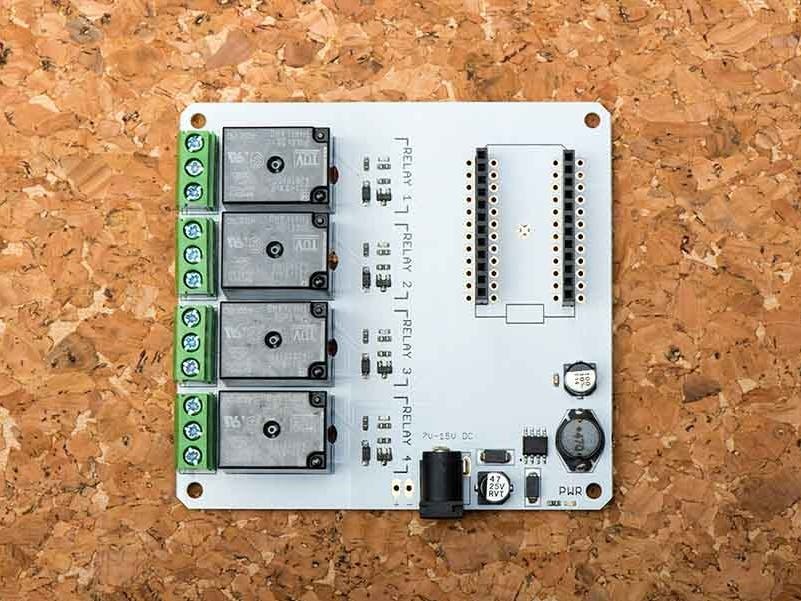
I hooked up a Spark relay shield to a popcorn machine, but wanted to take it to the next level, and create a voice recognition command system for it. This was actually surprisingly simple to do! See the video below first…
Now for some code.
I used the stock standard relay shield example code from the spark.io/docs and then went on and flashed it to my Spark Core.
On the Android side, I won’t bore you with starting a new project etc. but I will post the code that does the magic.
First we need a few properties to hold the data we need.
Button Start;
TextView Speech;
Dialog match_text_dialog;
ListView textlist;
ArrayList<String> matches_text;
Next we define an onTouchListener for the audio button:
View.OnTouchListener mDelayHideTouchListener = new View.OnTouchListener() {
@Override
public boolean onTouch(View v, MotionEvent event) {
switch (event.getAction() & MotionEvent.ACTION_MASK) {
case MotionEvent.ACTION_DOWN:
v.setPressed(true);
// Start action ...
Log.i(TAG, "Button pressed");
if (isConnected()) {
Intent intent = new Intent(
RecognizerIntent.ACTION_RECOGNIZE_SPEECH);
intent.putExtra(RecognizerIntent.EXTRA_LANGUAGE_MODEL,
RecognizerIntent.LANGUAGE_MODEL_FREE_FORM);
startActivityForResult(intent, REQUEST_CODE);
} else {
Toast.makeText(getApplicationContext(),
"Plese Connect to Internet", Toast.LENGTH_LONG)
.show();
}
break;
case MotionEvent.ACTION_UP:
case MotionEvent.ACTION_OUTSIDE:
v.setPressed(false);
// Stop action ...
Log.i(TAG, "Button pressed done");
break;
case MotionEvent.ACTION_POINTER_DOWN:
break;
case MotionEvent.ACTION_POINTER_UP:
break;
case MotionEvent.ACTION_MOVE:
break;
}
return true;
}
You will notice from the above, that we fire off an Intent to the RecognizerIntent (android library) to do the hard work!
Since this is an online service that needs to talk to Google, we also put in a connection manager:
public boolean isConnected() {
ConnectivityManager cm = (ConnectivityManager) getSystemService(Context.CONNECTIVITY_SERVICE);
NetworkInfo net = cm.getActiveNetworkInfo();
if (net != null && net.isAvailable() && net.isConnected()) {
return true;
} else {
return false;
}
}
and then, of course, we need something to handle the results from the activity of speaking:
@Override
protected void onActivityResult(int requestCode, int resultCode, Intent data) {
if (requestCode == REQUEST_CODE && resultCode == RESULT_OK) {
match_text_dialog = new Dialog(MainActivity.this);
match_text_dialog.setContentView(R.layout.dialog_frag);
match_text_dialog.setTitle("Select Matching Text");
textlist = (ListView) match_text_dialog.findViewById(R.id.list);
matches_text = data
.getStringArrayListExtra(RecognizerIntent.EXTRA_RESULTS);
ArrayAdapter<String> adapter = new ArrayAdapter<String>(this,
android.R.layout.simple_list_item_1, matches_text);
textlist.setAdapter(adapter);
textlist.setOnItemClickListener(new AdapterView.OnItemClickListener() {
@Override
public void onItemClick(AdapterView<?> parent, View view,
int position, long id) {
match_text_dialog.hide();
String workingText = matches_text.get(position);
}


});
match_text_dialog.show();
}
super.onActivityResult(requestCode, resultCode, data);
}
We use a List to display the text matches on screen, as a way of “training” your phone. It should get better at recognizing you soon though, and then you can disable the List and just go with the first option and hope for the best!
I then created a switch statement to help with parsing the keywords/phrases and set up a simple request function using Android Volley:
public void sendRequest(String url, final String state) {
RequestQueue queue = Volley.newRequestQueue(getContext());
StringRequest myReq = new StringRequest(Method.POST, url,
createMyReqSuccessListener(), createMyReqErrorListener()) {
protected Map<String, String> getParams()
throws com.android.volley.AuthFailureError {
Map<String, String> params = new HashMap<String, String>();
params.put("access_token",
"your spark core access token here");
if (state.equals("on")) {
params.put("params", "r1,HIGH");
} else {
params.put("params", "r1,LOW");
}
return params;
};
};
queue.add(myReq);
}
as well as some Response handling:
private Response.Listener<String> createMyReqSuccessListener() {
return new Response.Listener<String>() {
@Override
public void onResponse(String response) {
Log.i(TAG, response);
}
};
}
private Response.ErrorListener createMyReqErrorListener() {
return new Response.ErrorListener() {
@Override
public void onErrorResponse(VolleyError error) {
Log.i(TAG, error.getMessage());
}
};
}
That is pretty much it! You would call your request like:
sendRequest("https://api.spark.io/v1/devices/deviceid123/relay", "on"); Obviously, with more devices, you may want an extra parameter to do which relay, but this is a trivial task best left to you!
Cool! You now have a voice controlled Spark Core! Yay!


Comments
Please log in or sign up to comment.