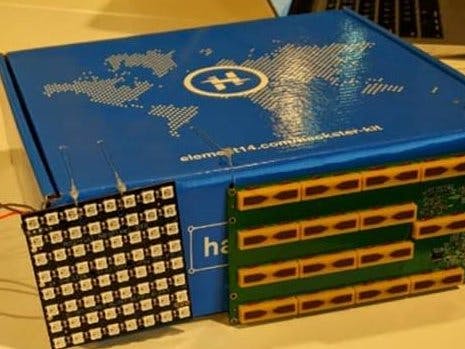
This tutorial will emphasize the bridge built to transport data from a Walabot Python app to a Processing Sketch that controls an LED system through the use of a socket.
The flow of this tutorial will be
1: Walabot Setup and Code
2:Processing Code
3:Opening the different Applications in the correct order
4:Possible Improvements and Insights
1: To get started on the walabot I would recommend first downloading the SDK and making sure that you have Python 3 active on your computer. If you open up your terminal or command prompt and type the word "python" then you should see what version you have running. The next thing is to download and open the ScanTargets.py file attached to this tutorial. In the code you will see a basic flow as recommended by the Walabot api for capturing targets with the Walabot. I have limited the sensor to only capture one target and set the arena for you to optimally place the sensor in a similar fashion to that in the cover of this tutorial. The key thing to notice in regards to the "bridge" is that I am creating a socket using 127.0.0.1 (this computer) and opening port 5000. This allows us to then send the target id,x,y,z through the socket to be received by Processing.
2. If you download and open the processing sketch attached in it you will find a I receive the information from the socket each frame and utilize easing to move the target to the newly received sensor data (shout out to cacheflowe on the easing float). In regards to the rest of the code in the processing sketch we are utilizing the opc protocol with the fadecandy to capture pixel data on the sketch window to be sent to the led matrix which is an 8x8. Please refer to the fadecandy github for more information on setting up the fadecandy along with the circuit itself to the leds and necessary power requirements. I was using a half mangled Fadecandy from a festival stage where the 0,1,2 lines are broken so I placed the grid on the 3 third line.
3. While I am sure this is not the cleanest way of building a bridge so to speak the order of operations here is very important to putting this all together. First dependent on your OS you need to open the fadecandy-master folder downloaded from github and navigate to the fc-server. Upon opening that file you will be able to see that your fadecandy is now attached. Once the device is attached you can press play on the processing sketch and you should see the pulsing orb of sorts on the grid. Now open up another command prompt window and navigate directories using cd until you are in the same directory as your ScanTargets.py file. To start the walabot app type python ScanTargets.py then the script will engage and you should start to see the numbers received in the console window of the Processing app that is playing. I have purposely kept the print outs other lines that might be considered messy to help with the debugging process and adjusting the scaling of the values coming in to map to the sketch window in the hope that these pieces will help you to build off of this foundation into something great!
4. This project was quite rushed and with the proper time I would make sure to further develop the code, comments, and tutorial language to be much more clear. With this lack of clarity I encourage you to reach out and message me if you are attempting to set this up and hitting any troubles as I am happy to help!


_copy_P5AWOdT4dX.png?auto=compress%2Cformat&w=48&h=48&fit=fill&bg=ffffff)


Comments