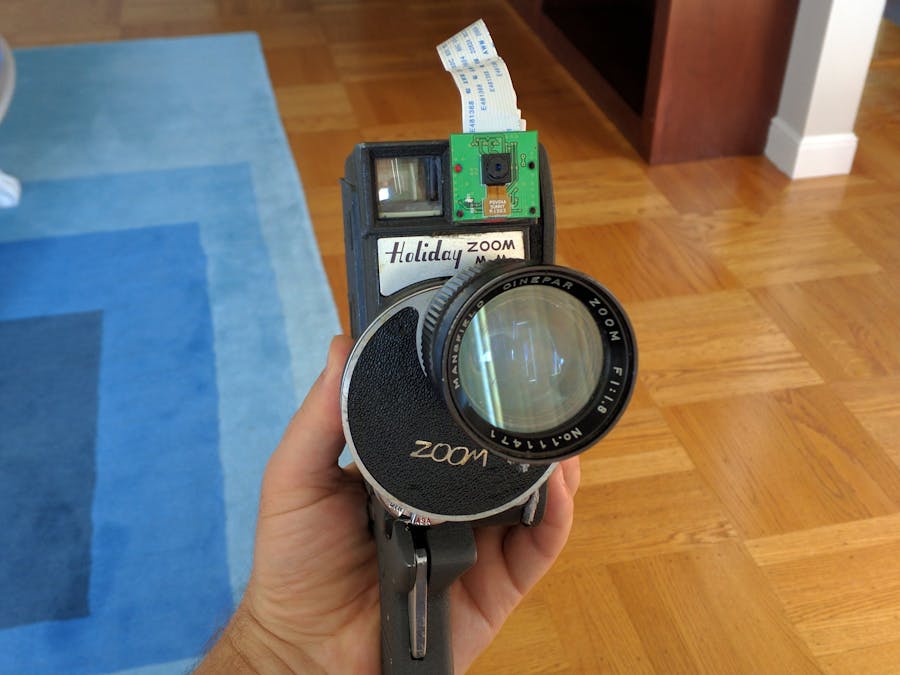
When I was a kid, my sister and I used to have a lot of fun with our family's 8mm home movie camera. Everything about the overall experience, even the deferred gratification of waiting for the film to be developed, was irreplaceably magical. The live preview on camcorder screens (and then later mobile phone screens) dispelled that forever.
Well, perhaps not.
A while back, my wife and I found an old Mansfield Holiday Zoom movie camera on Yerdle. The mechanical parts were still fully operational, but the lens was cracked, so even if it were possible to obtain and develop film for it, that was a nonstarter.
What we didSo, time to replace the lens and film with a Raspberry Pi Zero and Raspberry Pi camera, while still preserving the overall experience:
To do so, I had to remove the big heavy spring to make room inside for the components. This was a shame, because winding the spring and listening to it whir would have been a major bonus for nostalgia factor, but oh well.
Controlling RecordingNext step was to attach wires to the trigger mechanism to control recording start/stop:
(You can see the disemboweled spring mechanism on the right.)
With the spring removed, the trigger would no longer automatically stop recording when released, so I used a rubber band to restore this functionality. Inside, the trigger connects to a bronze hinge, so I soldered one wire (the white one) to that. Using a multimeter, I discovered that all of the metal parts of the camera were connected, so I couldn't detect the "open" state of the trigger by connecting a wire to the other side of the gap (the silver part at the lower left inside). Instead, I used sugru to fasten a random piece of metal at the bottom (with no conductivity to any other part), and then soldered a wire to that. Now when the trigger is pressed, the hinge makes contact with the extra part; when the trigger is released, the circuit is open.
Then it's as easy as connecting one wire to the Pi's 3.3v contact, and the other wire to one of the GPIO pins (I chose BCM 16). When the circuit is closed, the GPIO will go high; it will be low at all other times.
I attached the Raspberry Pi camera via Sugru and Lego at the top of the camera (being careful not to block the viewfinder). Then I threw in power (via a USB phone charger battery) and WiFi (via a dongle). After booting the Pi Zero, the camera can be started via a custom script, and then once filming is complete, the results can be "developed" via another script and then downloaded via SCP.
Both scripts are available in this Github repository. Tip of the hat to this unrelated project, from which I adapted the Python code.
For the full retro experience, this project works quite well for digital post-processing. Here are some example results, starring our dog!
It was fun being able to walk around filming, with everything self-contained. However, there are a few improvements I'd like to work on in order to make the experience more substantial:
- Figure out a good way to completely close the camera compartment; the removed spring also had a hook used by the door, so without that, the camera operator has to hold the compartment door shut with a spare finger, or use something like a clamp or rubber band.
- Mount the camera internally; in order to do this, I would need to smash out the broken lens. Even better would be to use a camera with an intact lens, and figure out how to deal with the focus; this could produce some very authentic analog retro effects. Or maybe none of this would work at all.
- Shoehorn the spring contraption back in there. Seems impossible, but maybe with a bigger camera.


Comments
Please log in or sign up to comment.