


Hardware components | ||||||
_ztBMuBhMHo.jpg?auto=compress%2Cformat&w=48&h=48&fit=fill&bg=ffffff) |
| × | 1 | |||
 |
| × | 1 | |||
 |
| × | 1 | |||
 |
| × | 1 | |||
Software apps and online services | ||||||
 |
| |||||
Hand tools and fabrication machines | ||||||
 |
| |||||
 |
| |||||
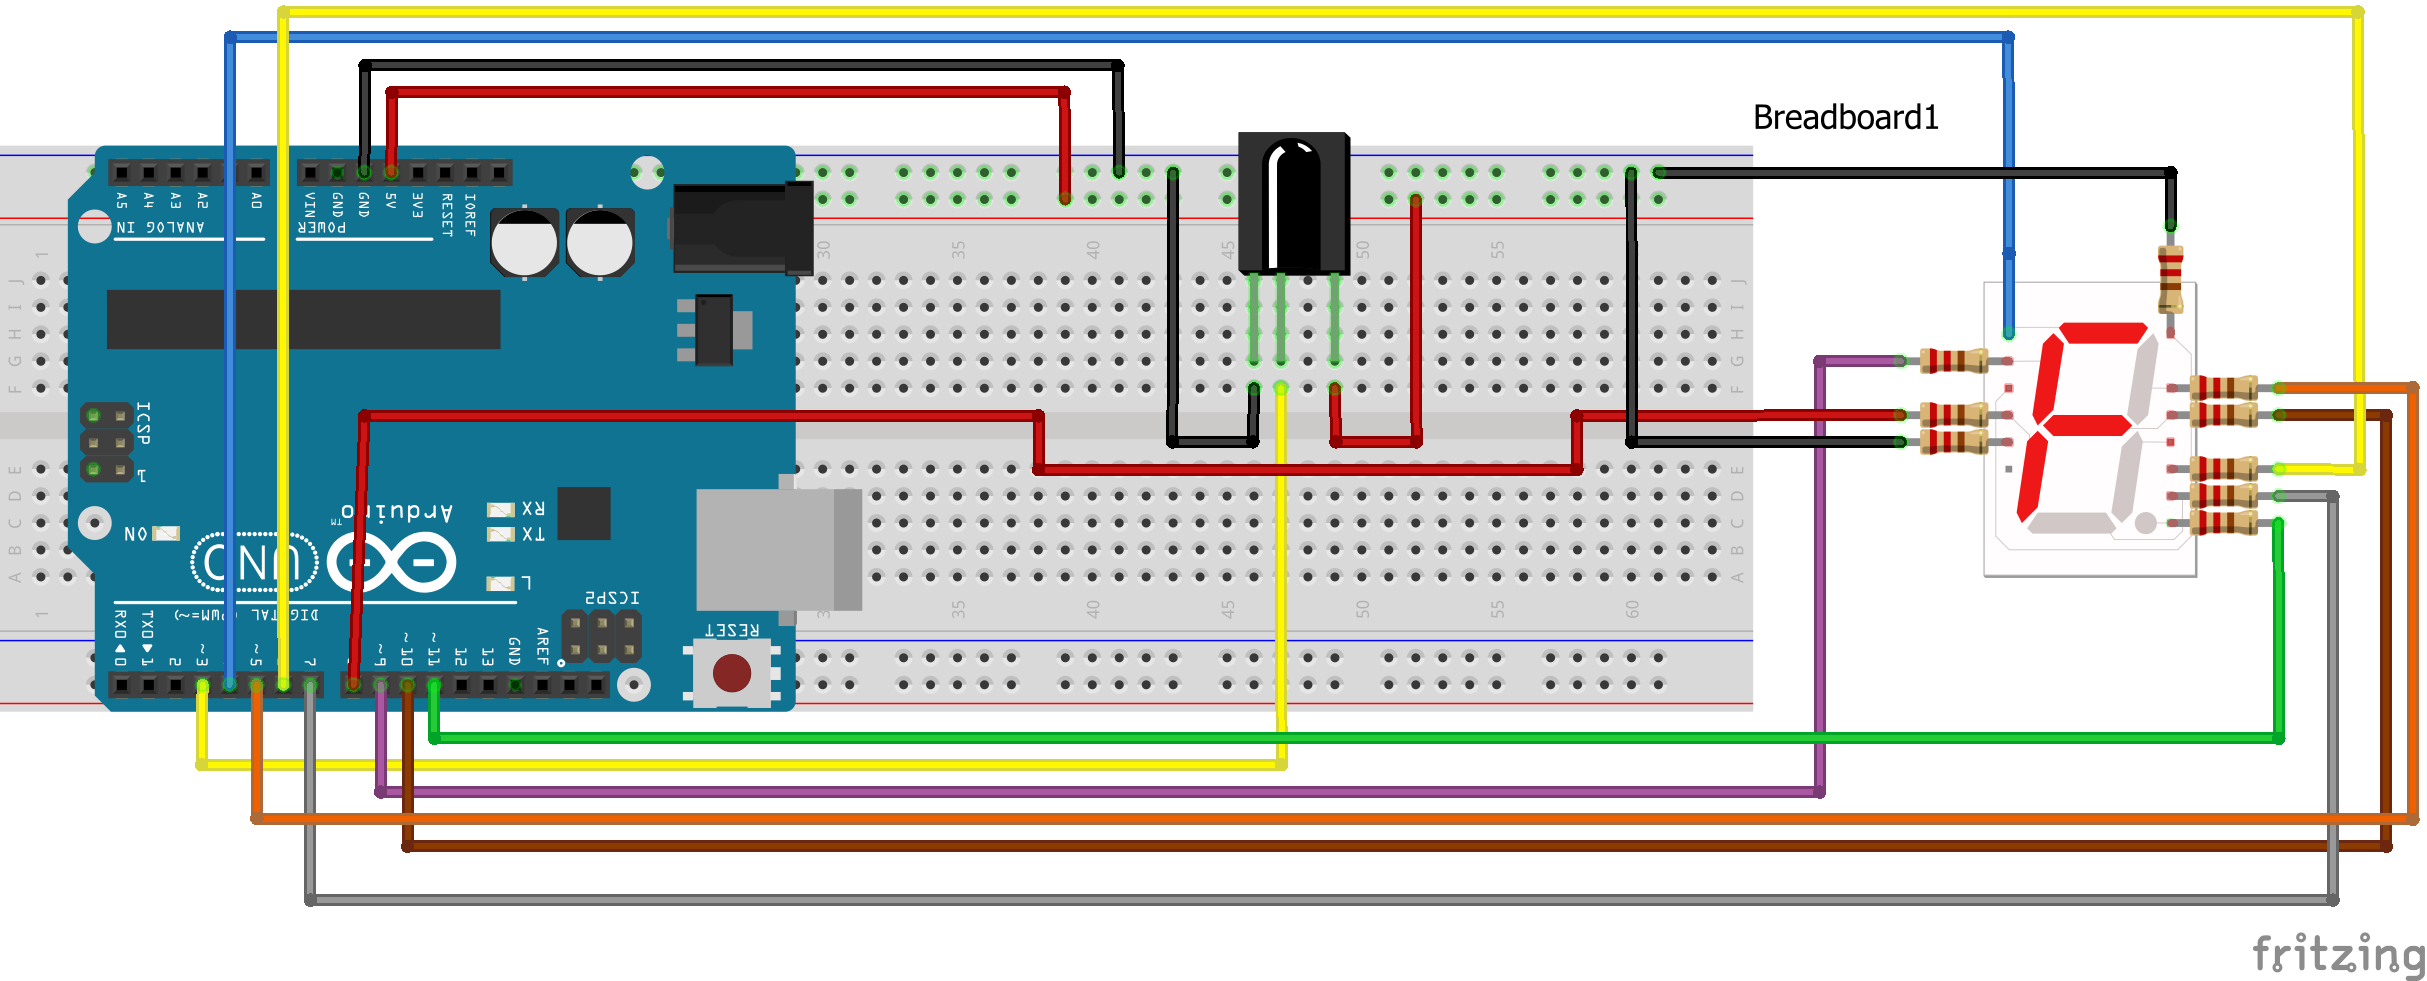
This project is an Arduino based project that consist of a Remote and an Infrared Receiver that is programmed to display the corresponding Remote signal to a single 7 segment display...quite a messy build though so take your time to put it together, and I would also suggest you use straight wire other than Jumper Wires
So let me walk you through the process...
We will be using a Single Digit 7 segment Display, Infrared Sensor, Remote Controller and an Arduino
For the Seven Segment Display is more of a combination of LEDs, I've arranged a couple of photos that might help you out during your build
Each Alphabetical Pin should be connected to a 220 ohm resistor to prevent high current from damaging it, There are a total of 10 pins on a single Digit Seven segment display of which 2 are ground the images below should help
Connecting the Infrared Receiver from the Circuit Diagram the connection is as follows
I connected the signal pin in the middle to pin 3 on my Arduino that is the one to the far left (Blue)
Use this Corresponding PIN OUT to map out the Individual PINS and "cc" in the Diagram means common Cathode OR GROUND
The final build like I said Earlier mine was kind of messy, but here are some tips to build a clean build
* Try trimming the legs of your Resistor with a Cutter will help make your project arranged
*Use Jumper Wire appropriately when NEEDED and also know when to use straight wires
Check out the Working Here(copy the URL below and paste it in a new tab)

Comments
Please log in or sign up to comment.