This project is not a medical device and is not intended to diagnose or treat any conditions.
Lately I have been studying how to measure human body activity and how to use this data in several ways, for example with Machine Learning.
Lets think about, how nice would be if we may have the possibility to monitor our Heart activity and get useful feedback like possibility of heart attack or a serious arrhythmia.
To show the potential for a project like this, lets build a EKG/ECG device using Windows IOT with a Raspberry Pi 3 and send this Data to the Cloud, using Microsoft Azure (IOT Suit).
First lets us understand what is EKG/ECG and how its work.
EKG is a device that measure the heart's electrical activity during a period of time, using electrodes placed on the skin. This activity may be measured in several parts of the body. The first recorded EKG was reported on 1972 by Alexander Muirhead.
To fully understand an EKG/ECG is necessary to understand how the electrical conduction system of the heart works. I will not explore deep how to read and understand this data, but what we need to understand is that the Heart conduction works on a predictable pattern, and that all the information comes from the wavelengths and from the spikes intervals.
To make our understanding easier, lets divide the wave in 2 basics intervals PR and QT, as showed at the picture bellow.
PR - Is the first wave generated, normally last 120 to 200msQT - Normally last 400ms a prolonged QT interval is a risk factor for ventricular tachyarrhythmia.
To detect this waves the fundamental component is a Instrumental amplifier, which is responsible for measure the voltage difference between the electrodes by amplifying the signal.
If you want to create your own system you can my recommendation is to use components like INA 128 / 129 and filter the noise using Operational Amplifiers like TL702.
A good news is that Analog Device have create a chip that cover all necessary aspects, called AD8232, it is a Single-Lead ECG Frontend, and this make our life really easier.
As the component is really small and require some tools and expertise to assemble we can buy a board ready to use, reducing the need of soldering and facilitating the project creation.
Of course you can create your own using the Operational Amplifier and will work as good as this one, follow a example :
As a mention before we can place the electrode in several parts of the body, here is some suggestions:
As we know Raspberry Pi doesn't have a Analog to Digital converter so we need a external one, my favorite is the ADS1115. It is a 16-Bit 4 Channel Analog to Digital Converter that has far more accuracy the one used on a traditional Arduino, and also counts with a programmable gain (similar an operational amplifier).
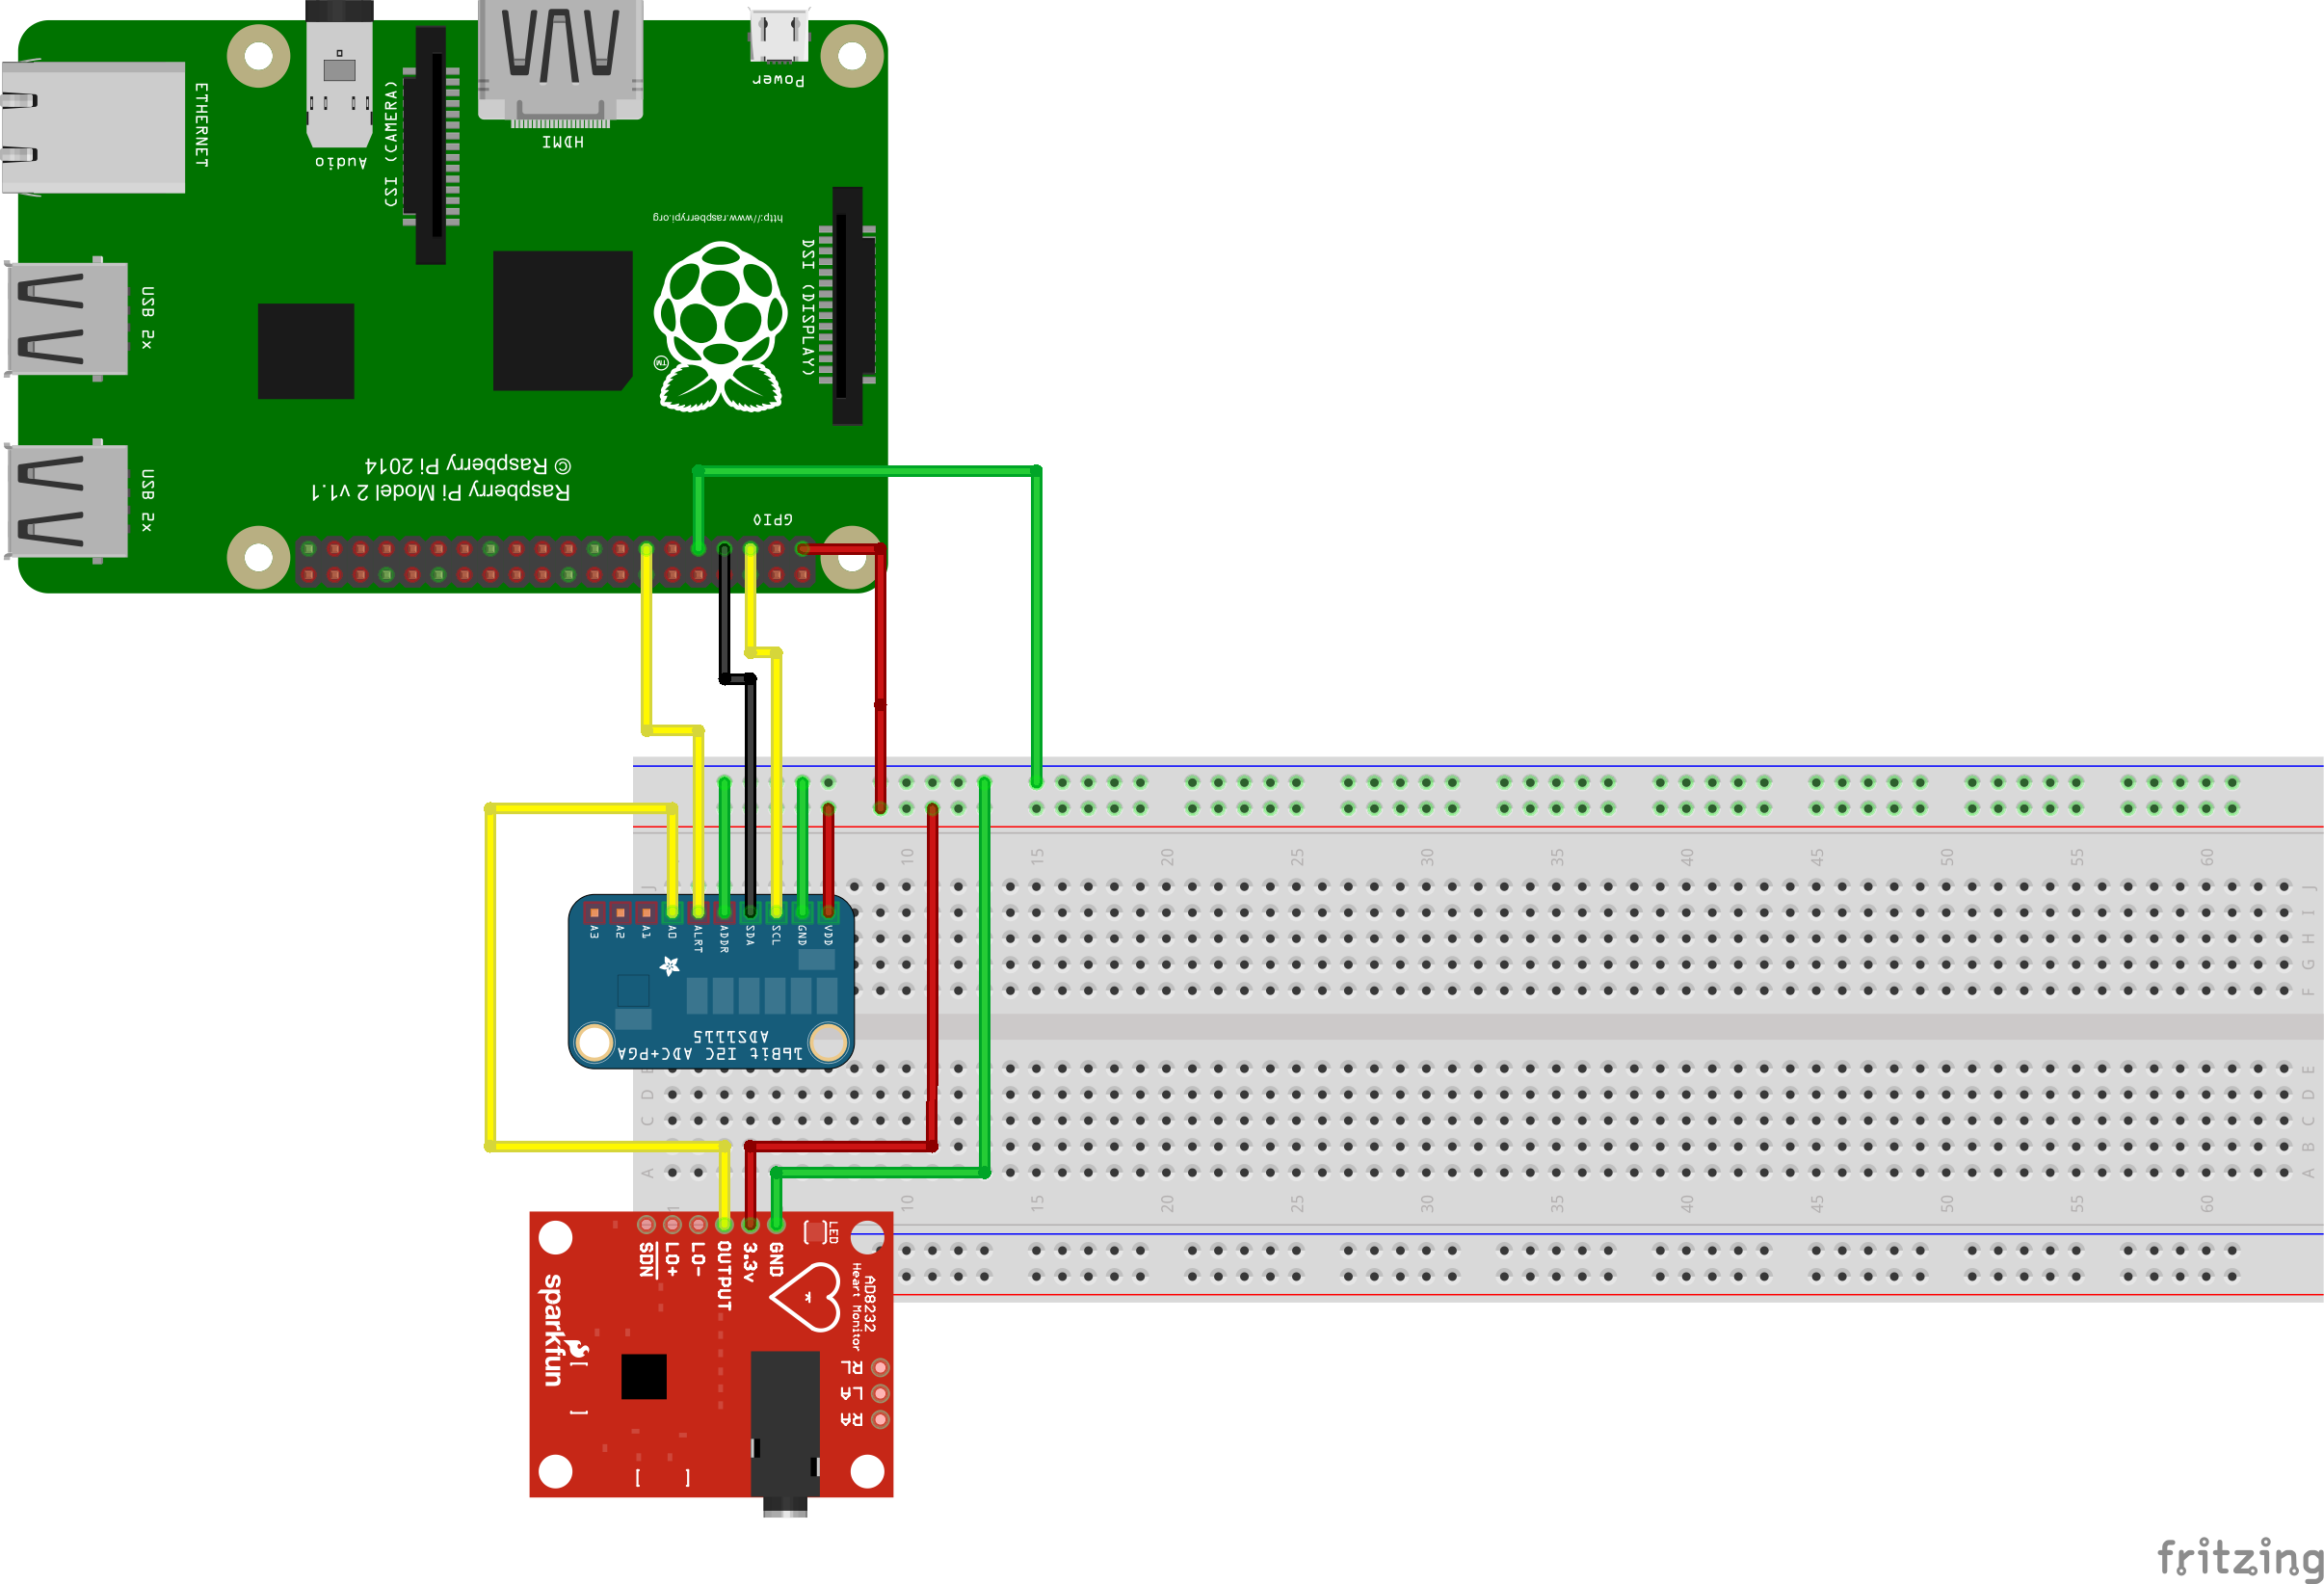
Here is the schematics on how to wire it up.
Now that the electronic part is done and you know where to place your electrodes, let check it out the software from the device and the cloud configuration.
Lets start with the Cloud Setup, so lets log on Azure and create a IOT HUB
Than lets setup
And now we need to grab the connection String
Take a note of the Connection String, and that is it for the Event Hub.
The coding part is listed at the session bellow.
Where to go from here, you may explore Azure Streaming Analitics or Machine Learning to analyse this data. But the I think you will really enjoy is to use Microsoft Power BI to plot this graph and see your heart waves
Regards
Chris


_3u05Tpwasz.png?auto=compress%2Cformat&w=40&h=40&fit=fillmax&bg=fff&dpr=2)


Comments
Please log in or sign up to comment.