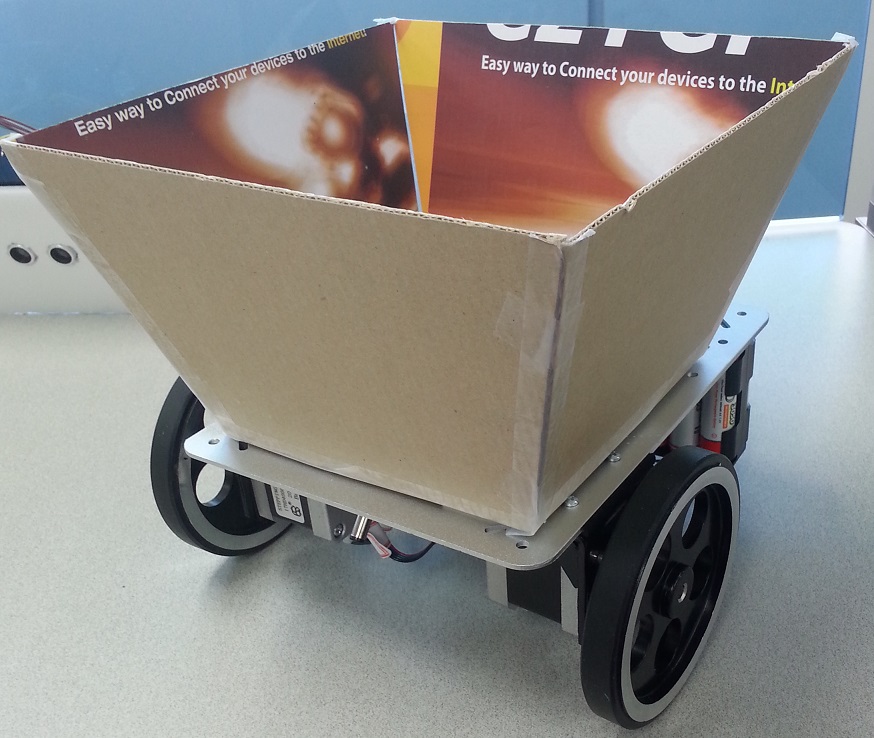
The main idea was to control a step motor-based robot by drawing route on web-based map, making the robot carry your goods to destination just by touching your finger on mobile screen.
In this project, I make a simple car without using feedback sensor. Therefore, position error is accumulated over time.
This project may inspire someone to make a perfect carrier robot by using some kind of feedback sensors to correct position error. This will be more convenient if it is combined with a routing algorithm such as Dijkstra algorithm.
How it worksWe need an image of office's map. The map's size must have the same aspect ratio as real size.
Tip: drawing map will be more exact in term of aspect ratio if it is drawn based on the floor bricks.
Map image is scaled to fit the mobile screen. When finger touch on web-based map:
- The XY coordinate (in pixel) is rescaled to image's coordinate, and then is sent to PHPoC as target position.
- PHPoC converts the pixel coordinate to real coordinate (in millimeter).
//pixel to millimeter
$ratio = MAP_IMG_WIDTH / MAP_REAL_WIDTH; //pixel / millimeter
$target_x /= $ratio;
$target_y /= $ratio;
MAP_IMG_WIDTH is width of map image in pixel unit.
MAP_REAL_WIDTH is real width of your office in millimeter unit.
- PHPoC calculates the direction (rotated angle) and distance based on: current position, previous direction and target position
// calculate the rotate angle
$vector_x  = $target_x - $pre_x;
$vector_y  = $target_y - $pre_y;
$length_1 = sqrt($pre_vector_x * $pre_vector_x + $pre_vector_y * $pre_vector_y);
$length_2 = sqrt($vector_x * $vector_x + $vector_y * $vector_y);
$cosin_alpha = ($pre_vector_x * $vector_x + $pre_vector_y * $vector_y) / ( $length_1 * $length_2);
$angle = acos($cosin_alpha) * 180 / M_PI;
$dir = $pre_vector_x * $vector_y - $pre_vector_y * $vector_x;
//save new values
$pre_x = $target_x;
$pre_y = $target_y;
$pre_vector_x = $vector_x;
$pre_vector_y = $vector_y;
// calculate the distance
$dist = sqrt($vector_x*$vector_x + $vector_y*$vector_y);
- PHPoC converts the rotated angle to number of step the motor has to move and send command to step motor controller to move the motor.
//angle to step
/* Theory
$chord = $angle * M_PI / 180* TRACK;
$dist_per_step = HALF_STEP_ANGLE * M_PI / 180 * WHEEL_RADIUS;
$step_num  =round($chord / $dist_per_step);
*/
// Simplify
$step_num  = round(($angle * TRACK) / (HALF_STEP_ANGLE * WHEEL_RADIUS)/2);
HALF_STEP_ANGLE is angle per a step in haft-step drive mode (since motors is operated under this mode).
WHEEL_RADIUS is radius of wheel.
- PHPoC converts the distance to number of step the motor has to move and send command to step motor controller to move the motor.
//distance to step
$step_num = $dist / WHEEL_PERIMETER * HALF_STEP_NUM;
WHEEL_PERIMETER is perimeter of wheel
HALF_STEP_NUM is number of step per a revolution of motor in haft-step drive mode (since motors is operated under this mode).
A distance sensor is added to detect obstacles.
Hardware SetupStep motor controller setup
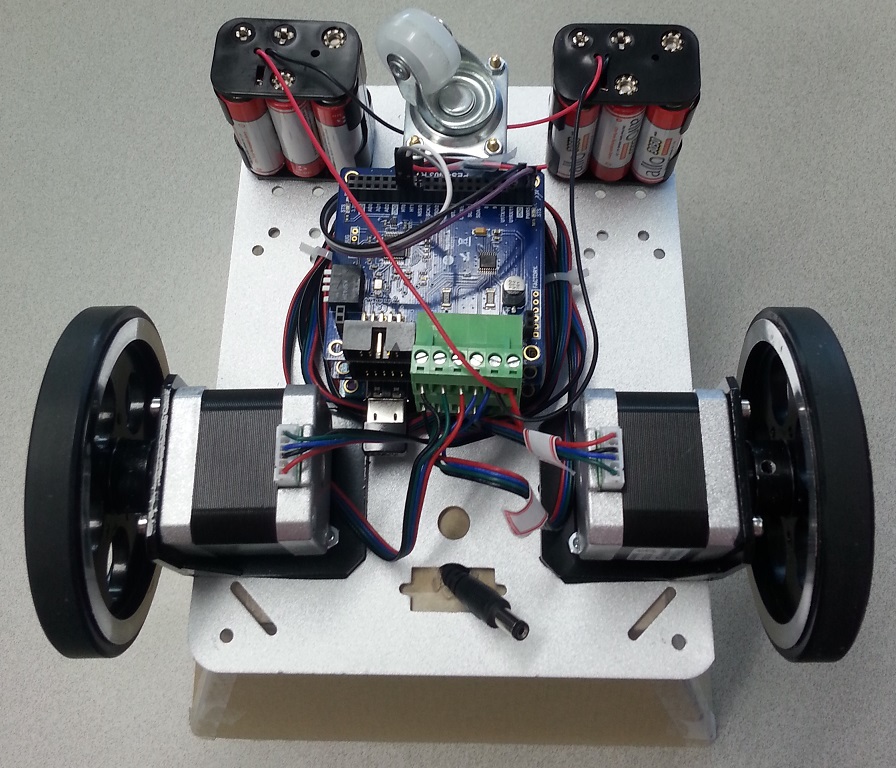
Since the car use two step motor, it needs to use two step motor controller. The command is sent from PHPoC to step motor controller in particular (smart expansion board in general) via a dedicated port and a protocol, called SPC protocol. But we don't need to care about it. The library takes care all.
What we need to do it stack two steps motor controllers on PHPoC.
Additionally, Since there can stack up to 14 smart expansion boards on PHPoC, in order identify each boards, we need to give address (called slave ID) for each boards. Addressing for each board is done by setting a dip switch. (see image)
In my case, I set address (slave ID) for two step motor controller is 13 and 14. you can look into source code, you will see some command with these slave ID, for example:
step_cmd(13, "goto $pos_1 400 1600");
step_cmd(14, "goto $pos_2 400 1600");
Note that, the order is not important.
Connecting Step motors to Step motor controllers
Firstly, connect each motor to each controller according to this instruction. (don't care about which motor connect to which controller). When we runs source code, if the direction is inverted, just switch slave ID (13-> 14 and 14 -> 13).
In this case, I did not use Digital input port. So, ignore it
Connecting distance sensor to PHPoC
Ultrasonic distance sensor is used to detect and avoid obstacles.
Now look into source code and see which parameters we need to change to suit to your car.
Parameters of your car
in task0.php
define("TRACK",				191); //in mm
define("WHEEL_RADIUS",		48.2); // in mm
define("WHEEL_PERIMETER",	2*M_PI*WHEEL_RADIUS); // in mm
You need to manually measure the parameters.
- TRACK : see a above images
- WHEEL_RADIUS is radius of wheel.
- WHEEL_PERIMETER is perimeter of wheel
Parameters of motors
define("FULL_STEP_ANGLE",	1.8); //degree0
define("HALF_STEP_ANGLE",	0.9); //degree
define("FULL_STEP_NUM",		200); //step per round
define("HALF_STEP_NUM",		400); //step per round
You will get FULL_STEP_ANGLE from specification of motor. and then we can calculate the the remaining value
- HALF_STEP_ANGLE = FULL_STEP_ANGLE /2
- FULL_STEP_NUM = 360 / FULL_STEP_ANGLE
- HALF_STEP_NUM = 360 / HALF_STEP_ANGLE
Parameter of map
in task0.php
define("MAP_IMG_WIDTH",		1140); //pixel
define("MAP_REAL_WIDTH",	25*450.0); //millimeter
- MAP_IMG_WIDTH is width of map image in pixel (check property of the image)
- MAP_REAL_WIDTH is real with of your area corresponding to map. it need to be manually measured. Tips: just measure size of brick and count number of brick in your area.
in index.php
var IMAGE_WIDTH = 1140, IMAGE_HEIGHT = 1562;
Initial position of car
Initial position is position of car when PHPoC boots or resets. It must be the same among: real position (where you put your car), position setting in task0.php and index.php
In my setting, I set my car at position (15th brick, 20th brick) (see below image)
in task0.php (line 227, 228), initial position is in millimeter (450 is width of brick)
$pre_x = 15*450.0;
$pre_y = 20*450.0;
in index.php (line 59. 60), initial position is in pixel (25 and 34 is number of brick in width and height, respectively)
//initial position
x = 15 * IMAGE_WIDTH / 25.0;
y = 20 * IMAGE_HEIGHT / 34.0;
If you have any question, please feel free to leave a comment!


Comments
Please log in or sign up to comment.