


Hardware components | ||||||
| × | 1 | ||||
| × | 1 | ||||
 |
| × | 1 | |||
Software apps and online services | ||||||
 |
| |||||
Streaming radio over the internet is commonplace nowadays – but building your own ESP32 internet radio is certainly special! In this tutorial, you’ll construct your own receiver to stream your favorite stations.
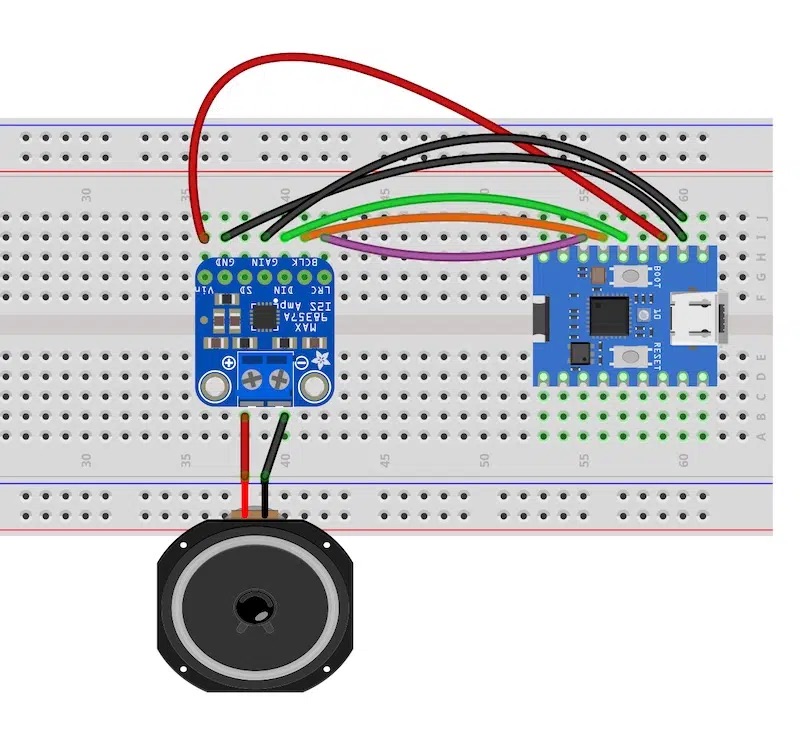
Setting up the ESP32 Online RadioLet’s start with the simplest circuit for your streaming radio. You’ll only need the ESP32-S3 Zero (e.g., from Waveshare), the amplifier module, and a speaker. Follow this wiring diagram attached.
The amplifier module has a socket for your speaker where you can secure the wires with a screw. Once assembled, your online radio might look like this:
The core of your online radio is a library you won’t find in the Arduino IDE’s library manager – but it’s available on GitHub. Download the library as a ZIP file here. Create a new sketch in the Arduino IDE and include it via Sketch > Include Library > Add ZIP Library.
Copy the sketch, add your WiFi network credentials, and upload it to your ESP32. If you encounter issues with the ESP32-S3 Zero, verify that you’ve selected the correct board. It should work with ESP32 S3 Dev Module. Also, check if you see the entry USB CDC On Boot: “Enabled” in the Tools menu. If it’s set to Disabled, change it accordingly.
If everything’s set up correctly, you should hear Byte.fm after starting the ESP32 online radio – a member-funded station from Hamburg, Germany that broadcasts alternative programming without ads.
Understanding the ESP32 Internet Radio CodeLibrary Setup
The sketch begins by importing necessary libraries. The standard libraries are included in your Arduino IDE, while the Audio.h library needs to be downloaded separately as mentioned in previous instructions.
Pin Configuration
The following defines the connections between your ESP32 and the amplifier module:
#define I2S_DOUT  2
#define I2S_BCLK  3
#define I2S_LRC   4
Feel free to change these pins based on your wiring preferences - just update the corresponding values in the code.
Core Functionality
The sketch then initializes an Audio object and stores your WiFi credentials. In the setup function, it establishes Serial communication and connects to your WiFi network. Two critical lines handle the audio streaming:
audio.setVolume(10);
audio.connecttohost("http://www.byte.fm/stream/bytefm.m3u");
The first line configures the volume (values range from 0-100), while the second specifies the stream URL. To listen to different stations, simply replace the URL with your preferred radio stream address, which can typically be found online.
Main Loop and Callbacks
The main loop contains just one essential function that maintains the audio stream. Additionally, the sketch includes callback functions that trigger on specific events and provide information about the current station and track details, which are displayed in your Serial Monitor.
Upgrade Your ESP32 Radio Project!Supercharge your ESP32 Radio! Add battery power, analog volume control, and a rotary encoder for station browsing. Check out the complete DIY guide at Pollux Labs.
Plus, learn how to instantly save any song playing on your radio directly to your Spotify playlist.

Comments