


The Ender 3 marked my entry into the 3D-printing world, and I love it! The 3D printer has been a godsend! If you're also newbie and searching for advice, here's my brief take on the Ender 3. It's awesome!
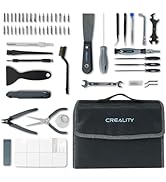
The Ender 3 arrives in pieces that you must assemble. Since it is essentially a robot, assembly can seem overwhelming at first, but if you take it one step at a time, you'll be printing in no time. I found the printed instructions accompanying the unit to be more sizzle than steak, but, fortunately there are several videos on YouTube that make assembly a breeze. Believe it or not, assembling the unit yourself is beneficial because it familiarizes you with the device. It will allow you to easily make the minor adjustments that 3D printers often require.
My wife and I have found that 3D printing comes with somewhat of a steep learning curve, but it's fun. YouTube and websites such as "all3DP dot com" have proven themselves to be life savers.
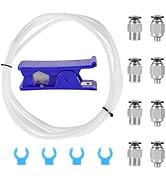
The most common adjustments you'll make while 3D printing is "bed leveling." In truth, though, you're not actually "leveling" the print bed, but rather you're ensuring that the print nozzle is uniformly distanced from the bed (the print surface) on all its 4 corners. The nozzle needs to be super close, too. ...not about an inch or two away from the print bed, but rather it needs to be no further than the thickness of a piece of paper. Crazy, huh?
When my wife and I printed a test file provided by Creality (the manufacturer), we frankly sat mesmerized at the unit's precision. It was like staring into a campfire and getting lost in the flames. The nozzle just zipped back and forth across the print bed leaving tiny bits of corn-based "plastic" one layer at a time, and eventually (over time) created a cat/dog thingy.
In search of more things to print, we settled on two websites with tons of 3D-printable files that are very often free to download. The websites are "thingiverse dot com" and "cults3d dot com". The latter site takes longer to load, but seems to have more options. Creality has one too, but I haven't really checked it out yet. It's important to note that the files you download from such websites are *.stl files, whereas the Ender 3 needs *.gcode files. To make the file conversion, we downloaded a piece of software called Cura. It appears to be the best (free) software on the market for "slicing" 3D files into *.gcode files. That too has a steep learning curve, complete with complicated settings. But fortunately there are lots of tutorials online along with settings you can copy from experts. I mostly rely on "all3DP dot com" for that.
After a while, we decided to invent our own designs and then print them into existence. In my opinion, the cat's meow -- the best and easiest 3D design application -- is Fusion360. It has a limited free version for students and schools, but otherwise it's quite pricey. My wife then found free, open-sourced design software called FreeCAD. We love it, and haven't turned back since.
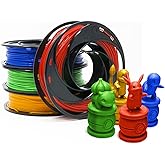
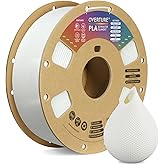
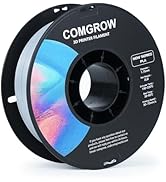
The filament we prefer is PLA. In our experience, PLA produces little to no fumes and it's guilt-free because it's corn-based and biodegradable. It should be noted, though, that not all PLA is created equally. This is primarily because (according to what I've read) pigments affect the PLA in different ways. So, when I order PLA from Amazon, I always look for the PLA with the most and highest reviews. Then, I refer upon their temperature recommendations.
Overall, we absolutely love the Ender 3. At under $200, it's extremely affordable, and the process of printing things into existence can be (in my experience) somehow transformative. And if you find yourself confused about something, take my advice by not wasting time by trying to figure it out for yourself. Just refer to the experts on any of the websites I mentioned so, later on, you can focus on things that really matter...like design.
Note: the bearing on a little fan went out. So, I reached out to Comgrow, they got back to me immediately, and now a new fan is on the way. No fuss no muss.
Finally, at the risk of getting to personal, I'm a disabled veteran who benefits from focusing on tangible things. The process of 3D printing has proven itself to be such a godsend in that regard, that I think the VA should seriously explore ways of getting more vets 3D printing.
I hope this helped newbies like me. Happy printing!
Add to your order
-
 Coverage for accidental damage including drops, spills, and broken parts, as well as breakdowns (plans vary)
 -
 24/7 support when you need it.
 -
 Quick, easy, and frustration-free claims.
Cover this product:
3-Year Protection Plan $28.99
4-Year Protection Plan $38.99
Cover all of your eligible devices:
Asurion Complete Protect: One plan covers all eligible past and future purchases (Renews Monthly Until Cancelled) $16.99/month
Select a plan
Add to your order
- Coverage for accidental damage including drops, spills, and broken parts, as well as breakdowns (plans vary)
- 24/7 support when you need it.
- Quick, easy, and frustration-free claims.
Cover this product:
Select a plan
Add Prime
to get Fast, Free delivery
Bundles with this item
Frequently bought together
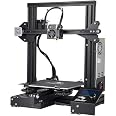
This item: Official Creality Ender 3 3D Printer Fully Open Source with Resume Printing Function DIY Printers Build Volulme 8.66x8.66x9.84 inch
$179.00
Get it as soon as Monday, Apr 7
In Stock
+
$25.64
Get it as soon as Monday, Apr 7
In Stock
+
$24.95 ($0.88/Ounce)
Get it as soon as Monday, Apr 7
In Stock
Total price: $00
To see our price, add these items to your cart.
Choose items to buy together.
More items to explore
Page 1 of 1 Start overPage 1 of 1

Sustainability features
This product has sustainability features recognized by trusted certifications.Made with chemicals safer for human health and the environment.As certified by
Global Recycled Standard
Products certified to the Global Recycled Standard (GRS) contain recycled content that has been independently verified at each stage of the supply chain, from the source to the final product. In addition, social, environmental, and chemical criteria related to processing are required. The purchase of Global Recycled Standard (GRS) certified products demonstrates demand for recycled content and best processing practices in the supply chain.Certification BodySCS Global ServicesCertification NumberTE-00121753
Product Description


3D Printer Filaments & Accessorys
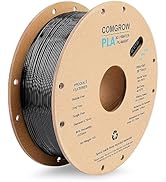
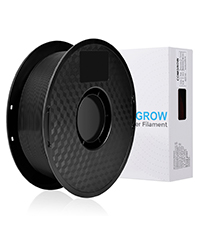 Black PLA Filament | 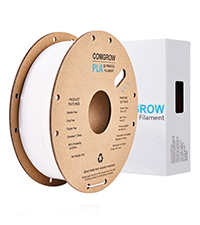 White PLA Filament | 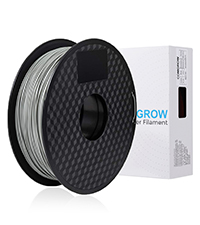 Grey PLA Filament | 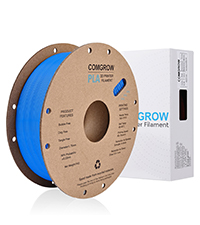 Blue PLA Filament | 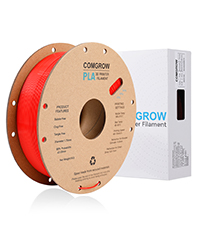 Red PLA Filament | 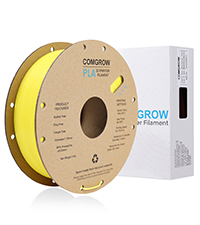 Yellow PLA Filament | 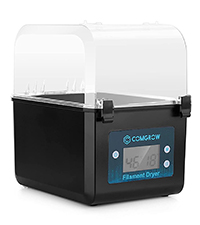 Dryer Box | |
|---|---|---|---|---|---|---|---|
|
Customer Reviews
|
5,315
|
5,315
|
5,315
|
5,315
|
5,315
|
5,315
|
5,315
|
|
Price
| $11.99 | $12.99 | $17.09 | $17.09 | $17.09 | $17.09 | $41.99 |
|
Color
| Black | White | Grey | Blue | Red | Yellow | Black |
|
Material
| PLA | PLA | PLA | PLA | PLA | PLA | Plastic |
|
Diameter
| 1.75 ± 0.02mm | 1.75 ± 0.02mm | 1.75 ± 0.02mm | 1.75 ± 0.02mm | 1.75 ± 0.02mm | 1.75 ± 0.02mm | 1.75mm/2.85mm |
|
Weight
| 2.2lbs (1KG) | 2.2lbs (1KG) | 2.2lbs (1KG) | 2.2lbs (1KG) | 2.2lbs (1KG) | 2.2lbs (1KG) | / |
|
Nozzle Temp
| 190-230°C | 190-230°C | 190-230°C | 190-230°C | 190-230°C | 190-230°C | temperature range 40°~ 50 °C |
|
setting time
| / | / | / | / | / | / | 6 hours to 12 hours |
From the brand

-

Comgrow is the first seller of Creality 3D on Amazon.
We own 20+ technical staff to provide professional support to all customers.
Comgrow is devoted to provide high quality and economical 3d printers, 3d printer accessories, 3d printer filament and excellent after-sales service to all customers.
-
Multi-Color 3D Printing
-
Comgrow Creality 3D Printers
-
Comgrow Creality 3D Printers
-
Comgrow Creality 3D Printers
-
Comgrow Creality 3D Scanners
-
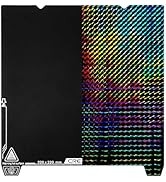
Comgrow Magnetic Build Plate
-
Comgrow 3D Printer Accessories
-
Comgrow 3D Printer Filaments
-
Comgrow 3D Printer Tube & FEP
-
Comgrow 3D Printing Assistant
-
Comgrow 3D Printer Accessories
-
Comgrow 3D Printer Filaments
Take your time, build it, don't just assemble it. Make the build quality right and your prints will turn out right.
You might be able to assemble this printer in a couple of hours but you can't build it in that time. There is a significant difference in building something correctly and assembling it. Assembly is the easy part, anyone can throw things together. The build is now complete and to do it correctly takes 4 to 5 hours.When you stand the Z axis uprights on their ends on a granite surface plate it's clear that the ends aren't machined square. After machining the ends they are square and flat enough to assemble now. The Z axis bracket that the leadscrew nut bolts to was not fully bent so the leadscrew didn't line up with the coupler and had to be straightened to make it parallel to the Z uprights so it would line up with the coupler. Check yours to make sure that bracket was bent at 90 degrees. The two uprights had to be shimmed to get them square to the bottom supports and parallel with each other so that the X axis rail would go up and down in a straight line without binding. Colored plastic shim stock of various thickness and an accurate machinist square is paramount to your success here. Even a small Framing square or a plastic triangle from an office supply store would assist in getting the uprights square to the base. The two uprights have to be parallel to one another and hopefully square to the base in order for the top rail to mate up correctly.If you want accurate prints the X and Y axis has to be able to move squarely to one another. The Z axis has to move perpendicular to the build plate once the X and Y axis are square. If this isn't accurate it will affect your print quality. Once the mechanics are built you will need to tidy up the wiring, check the hot end and build plate heating and make sure the extruder will extrude plastic from the nozzle.Prints can be made directly to the build plate, to a piece of borosilicate glass, mirrored glass or tempered plate glass resting on the heated bed. Once the Z stop is set close so that the Z homes with the nozzle close to the bed plate the you can level up the bed plate with a stainless steel feeler gage and you should be good to go. I would use a .005" feeler gage to start as a comparable piece of paper is .004" thickness.Summary:Pros:1. Good value for money.2. Everything bolted up and worked3. Spare parts were a nice touch and much appreciated.4. Good selection of software to slice and handle STL files.5. Fastener quality was good enough to get the job done.Cons:1. Instructions are abysmal. The illustrations are too small, not well explained and the references are sorely lacking for someone that has no experience with building small CNC type electronics. In short the instructions are just enough to get the job done but the neophyte will struggle.2. Build photos would be a big help. You can't depend on a bunch of folks on the Internet to cover your failings with YT videos and websites that may be doing it wrong to start with. The factory needs to own it.3. Use a full size SD card. Micro SD cards are OK for phones and tablets because they get installed and stay installed, they have no business in a 3D printer they are simply too small to use all the time.4. The 24V wiring coming from the power supply had insulation nicks on both the + and - wires and had to have heat shrink applied to keep them from possibly shorting out. The screws on the terminal block at the bottom of the power supply were just barely tight so check yours.5. XT 60 connectors are rated for up to 65 amps continuous but they were never designed to be permanent connections. In RC model applications you may fly for 5 to 10 minutes and then the packs are disconnected. Most of the time the connectors aren't even in use. I would prefer to see a metal enclosure with a terminal strip for the power connections.6. The uprights are cut on a cold saw and this is a common operation for extrusions. The problem is that the resulting surface isn't flat, straight or square. When you bolt the uprights onto the lower frame they aren't square and parallel. You will have to shim them to get them to be square and perpendicular. Note to the factory; you can do better.Suggestions to Creality:Look at the Pro's and Con's, take note of some of the issues and make corrections to the new kits coming out of China. It takes just as long to do something wrong as it does to make it right. Making it right is easier.There should be an adjustable Z stop instead of a fixed one.The homing speed needs to be lowered slightly as the hot end and table hit too hard when homing. I can do this in the Marlin Firmware but the factory just needs to lower the speed slightly.All in all, this is a great way to spend a couple of evenings and the print quality is really good, especially for the money. Despite the issues this is a great printer. Don't let the issues cloud your decision about buying it. All the issues can be resolved by the builder and that's you. This should be a 3.5 star printer but it could be a 5 star printer with just a little work by the factory.Suggestions:
Top reviews from the United States
There was a problem filtering reviews. Please reload the page.
- Reviewed in the United States on April 18, 2024Model: Ender 3Verified Purchase
 I've only printed a few things so far but it's enough to give some good feedback. At this price point don't expect any frills. That said this bare bones printer performs great. First off from my pictures you'll notice I upgraded the print bed to glass. It's only an extra $12 at the time I purchased. I read some other info online that lead me to believe this would be more likely to be level and perform better. i don't regret it. It works great. My advice would be to take your time assembling this printer. Expect it to take about 4 hours, perhaps more. Make sure everything is tight and aligned properly in terms of the rollers, belts etc. Do not rely on the quick start guide or included instructions. Go out to Youtube and follow the assembly video. Pause it for each step. When you are done stay on Youtube. There is a "Complete beginner's guide" on there from an Australian creator that demonstrates using this exact model. I noticed his menus are a little different due to software changes but his leveling guide and calibration files work great. For being one of the cheapest printers you can get the performance is surprising. I'm very happy with the print quality. I love that I can use tools on Linux or Windows. You don't need to be plugged in as you can simply print from G code on the included micro SD card. The videos online can get you up and running quickly. Every tool needed to build and run the printer are in the box. Nice touch. There is a small amount of PLA material but you will want to order more right away. The included spool is small and really only enough for a couple test prints. If you are a beginner why spend more? This is the perfect first printer.
Update: I thought I would add to my review now that I have had some time working with this printer. I've made a lot of improvements to the device I first received. The nice thing is most of the improvements are cheap or you can print them. First thing to note: I was having a lot of problems with printing anything large that took a bit of time. After a lot of digging I found the hotend shipped with the printer was (in my opinion) put together wrong. They either built it cold or inserted the nozzle before the heat break. Either way there was a gap that could not be fixed in the hotend. I bought a Creality spider hotend which is all metal. Way better and it works great. Add to that a BL Touch sensor for autoleveling the bed. Best addition ever. You still need to start with a level bed but it fixes all the little problems with uneven bed surfaces and stopped my extruder problems. While on the extruder. Calibrate your machine! Take the time to measure the output from your extruder. They use a generic setting from the factory. You NEED to set up this machine. Calibrate the extruder, the retraction distance, the nozzle temp for the filiment etc. Pay attention to the details and you will get great results. Really happy with this printer. It takes work but it's a fun project that leads to other projects, and for a beginner it's hard to beat. Some say you should buy higher end and avoid all the minor issues. I disagree. I think this has been a learning experience that prompted me to understand the machine. I think that basic knowledge of the process is important. Your mileage may vary.
Images in this review


Top reviews from other countries
- Peter CReviewed in Australia on December 17, 2020
It's a fantastic, very adequately-priced 3D printer for beginners
Model: Ender 3Verified Purchase
I really gotta give props to Creality for making this printer so affordable and (relatively) easy to set up and use. Since getting it I learned a <ton> of stuff about 3D printing (both by being forced to do it and trying to troubleshoot all the different issues :P)Peter CIt's a fantastic, very adequately-priced 3D printer for beginners
Reviewed in Australia on December 17, 2020
It's a great printer for the price, not sure what else I can say. Initial assembly was relatively easy and took around an hour. Then I realised I haven't done it properly so I had to re-assemble parts I assembled before (another 1h). Then a couple of days later I realised the frame is not straight... So I disassembled and re-levelled the whole thing from scratch (another 2h or so) Then i've done it yet again a couple of days later to straighten the gantry :P Unfortunately factory pre-assembled parts were not perfectly assembled. The bed is not perfectly even either, seems a bit warped but oh well the glass bed upgrade is too expensive.
Usage is straightforward after assembly, there's an amazing amount of 3D-printable improvements to the Ender 3, tons of guides and information readily available. SD card slot is a great addition but you'll probably want to move to an Octoprint setup for ease of use and to flash a more recent Marlin firmware.
Unfortunately the Pause feature has bugged out multiple times on me on the original firmware (just freezes printer in place, ruining prints) but at least the power-loss recovery works fine (once it freezes just shut it off and back on and it will give you an option to resume). No such issues with the custom-built Marlin fw.
Worth noting is that my unit came with a 4.2.2 32-bit motherboard, an extruder guide enforced with metal and adjustable tension. Attached amount of filament was almost enough to print the sample doggy figure - you can clearly see where the filament ran out ;(
Overall it's a fun learning experience but if you're expecting to just "buy, print and forget" - this might be the best choice for you as it has no auto bed levelling and other features present in more expensive printers (unless you upgrade it yourself)
Definitely watch one or two assembly videos to get an idea of what to look out for during assembly, it will save you time in the longer run
Images in this review
- Arun P.Reviewed in India on September 27, 2020
This is probably one of the best FFF 3d printers there is at this price bracket.
Model: Ender 3Verified Purchase -
-
-
Ainhoa Toro SantosReviewed in Spain on December 12, 2024
Facil de usar
Model: Ender 3 V3 SEVerified Purchase
Es mi primera impresora 3D y estoy encantado con ella. Super facil de montar, super facil usarla, se calibra sola y imprime super bien. Muy recomendada si vas a inicarte en impresion 3D.Ainhoa Toro SantosFacil de usar
Reviewed in Spain on December 12, 2024
Images in this review


