


Hardware components | ||||||
 |
| × | 1 | |||
Software apps and online services | ||||||
| ||||||
 |
| |||||
Hand tools and fabrication machines | ||||||
 |
| |||||
| ||||||
This example project uses a light sensor and a piezo speaker to generate a changing tone based on the amount of light sensed. More light causes the Bean to produce a higher-pitch tone and vice versa.
Software
- Node-RED
- Bean Loader
Hardware
- LightBlue Bean
- Windows or OS X computer
You will need to solder the Light Sensor before starting this guide. Follow the Light Sensor guide first.
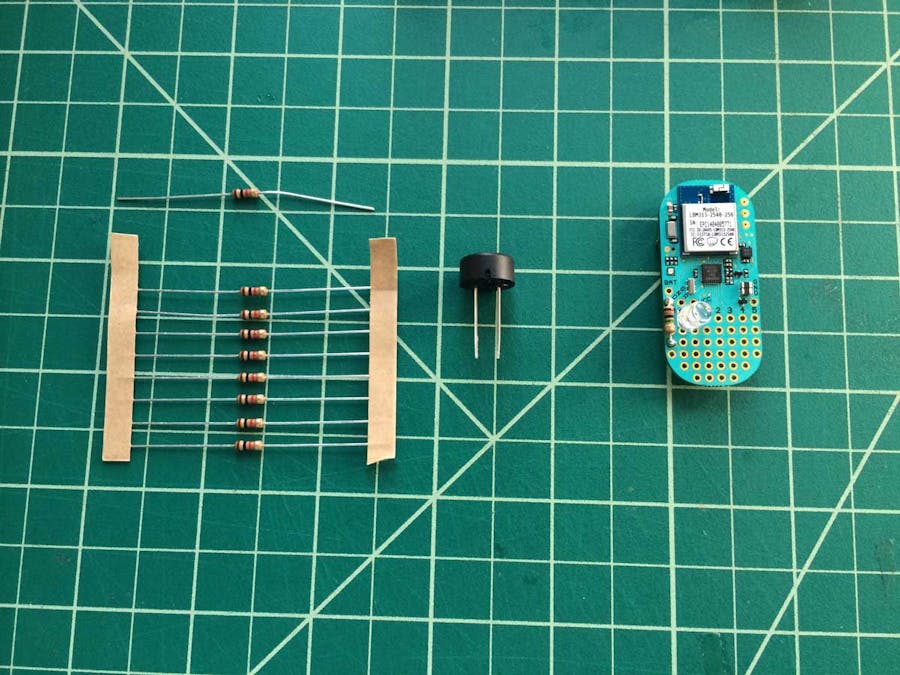
Step 2: Gather ComponentsFind these parts in your Maker Kit:
- 1K Ohm Resistor
- 1 Piezo Speaker
Place the components as seen below.You’ll need to bend one leg of the Piezo Buzzer so it can reach the pin labeled ‘2’. Trim it to size.Bend the pins as seen below.
Solder all the pins. The end result is shown below.The top should look like this.
Now all you need to do is load up the sketch below, and program your Bean! Once programmed, your Bean should play a tone that changes frequency based on how much light is detected!
*Line 1-2: we define a macro. The compiler can then substitute the token string for each occurrence in the source file.
*Line 4: is the setup function. This function is executed only once during the duration of the program.
*Line 5-8: we initialize the serial communication. We set GPIO pin 0 and 2 and output. We turn pin 0 off ('low')
*Line 11: is the loop function. This function is executed multiple times.
*Line 12-15: We turn pin 0 on and read the data from A1 pin. We initialize r, g, b as variables.
*Line 16-31: we check the conditions of the sensorValues, BLEVEL, and MINLEVEL, and reassign 'g' and 'b' accordingly.
*Line 32: we set the Bean's LED.
*Line 33: we play the tones.
Having trouble with this guide? Reach out to BeanTalk to get directed feedback from our developers and community!


Comments
Please log in or sign up to comment.