COVID-19 has been a major threat of 2020. It has been six months and the researchers are working hard to develop the vaccines for this virus. We are bound to reduce the spread of this virus in order to win this pandemic. So, it is our responsibility to wash our hands and follow social distancing practices. Although we try to follow social distancing, some people are not responsible to maintain distance or stand away from the neighboring person.
Maintain at least 1 metre (3 feet) distance between yourself and others. Why? When someone coughs, sneezes, or speaks they spray small liquid droplets from their nose or mouth which may contain virus. If you are too close, you can breathe in the droplets, including the COVID-19 virus if the person has the disease.
To avoid getting infected or spreading it, It is essential to maintain social distancing while going out from home especially to public places such as markets or hospitals.
Idea and Working Prototype💡The system is designed to detect the people from the Camera or Video feed and to determine the distance between the humans to classify whether they maintain social distancing or not. Using the above data, we can decide how to take countermeasures if they do not follow frequently. This project can be used in the hospital, market, bus terminals, restaurants, and other public gatherings where the monitoring has to be done.
This project consists of a camera that will capture the image of the people entering public places and measure social distancing among them using the distance features.
Hardware BuildFirst of all, I would like to thank Xilinx and Hackster.io for supporting this project with the most powerful Zynq UltraScale+ MPSoC ZCU104 Evaluation Kit that lets you run computer vision and machine learning algorithms. I really felt helpful to achieve some of the complex designs and algorithm developments.
You can purchase the Evaluation Kit from Xilinx at $1, 295. Visit the product page here for more info.
Step 1: Getting Started with Zynq UltraScale+ MPSoC ZCU104 Evaluation Kit (Content from Xilinx)The ZCU104 Evaluation Kit enables designers to jumpstart designs for embedded vision applications such as surveillance, Advanced Driver Assisted Systems (ADAS), machine vision, Augmented Reality (AR), drones, and medical imaging. This kit features a Zynq® UltraScale+™ MPSoC EV device with a video codec and supports many common peripherals and interfaces for the embedded vision use case. The included ZU7EV device is equipped with a quad-core ARM® Cortex™-A53 applications processor, dual-core Cortex-R5 real-time processor, Mali™-400 MP2 graphics processing unit, 4KP60 capable H.264/H.265 video codec, and 16nm FinFET+ programmable logic.
Key Features & Benefits
reVISION package provides out-of-box SDSoC software development flow with OpenCV libraries, machine learning framework, USB HD camera, and live sensor support
- reVISION package provides out-of-box SDSoC software development flow with OpenCV libraries, machine learning framework, USB HD camera, and live sensor support
reVISION Getting Started Guide
PS DDR4 2GB Component - 64-bit
- PS DDR4 2GB Component - 64-bit
Integrated video codec unit supports H.264/H.265
- Integrated video codec unit supports H.264/H.265
USB3, DisplayPort & SATA
- USB3, DisplayPort & SATA
LPC FPGA mezzanine card (FMC) interface for I/O expansion
- LPC FPGA mezzanine card (FMC) interface for I/O expansion
Optimized to work with SDSoC/reVISION development environment with OpenCV and Machine Learning libraries
- Optimized to work with SDSoC/reVISION development environment with OpenCV and Machine Learning libraries
What's Inside
ZCU104 Evaluation Board
- ZCU104 Evaluation Board
Access to a full seat of Vivado® Design Suite: Design Edition
- Access to a full seat of Vivado® Design Suite: Design Edition
Node-locked & Device-locked to the XCZU7EV MPSoC FPGA, with 1 year of updates
- Node-locked & Device-locked to the XCZU7EV MPSoC FPGA, with 1 year of updates
Ethernet Cable
- Ethernet Cable
Access to the SDSoC™ development environment
- Access to the SDSoC™ development environment
1080p60 USB3 Camera
- 1080p60 USB3 Camera
Power Cord and Adapter
- Power Cord and Adapter
4-Port USB 3.0 Hub
- 4-Port USB 3.0 Hub
Step 2: Running Built-In Self-Test (BIST) Instructions
Step 2: Running Built-In Self-Test (BIST) InstructionsSet the Configuration Switches as shown in the image below
- Set the Configuration Switches as shown in the image below
Connect the provided power adapter to J28 and slide the switch to turn on the evaluation board.
- Connect the provided power adapter to J28 and slide the switch to turn on the evaluation board.
To ensure the proper working, make sure that all the LEDs glow green. LED DS8 - VADJ will not be turned on. Once the Configuration is done successfully, LED DS32 glows green.
- To ensure the proper working, make sure that all the LEDs glow green. LED DS8 - VADJ will not be turned on. Once the Configuration is done successfully, LED DS32 glows green.
Install Xilinx Tools and Redeem the License Voucher
- Install Xilinx Tools and Redeem the License Voucher
Step 3: Using Xilinx Zynq UltraScale+ MPSoC ZCU104 Evaluation Kit
Step 3: Using Xilinx Zynq UltraScale+ MPSoC ZCU104 Evaluation KitTo get started, see the ZCU014 Getting Started Github site,
https://github.com/Xilinx/ZCU104-reVISION-Getting-Started
Optional ===> NCS2
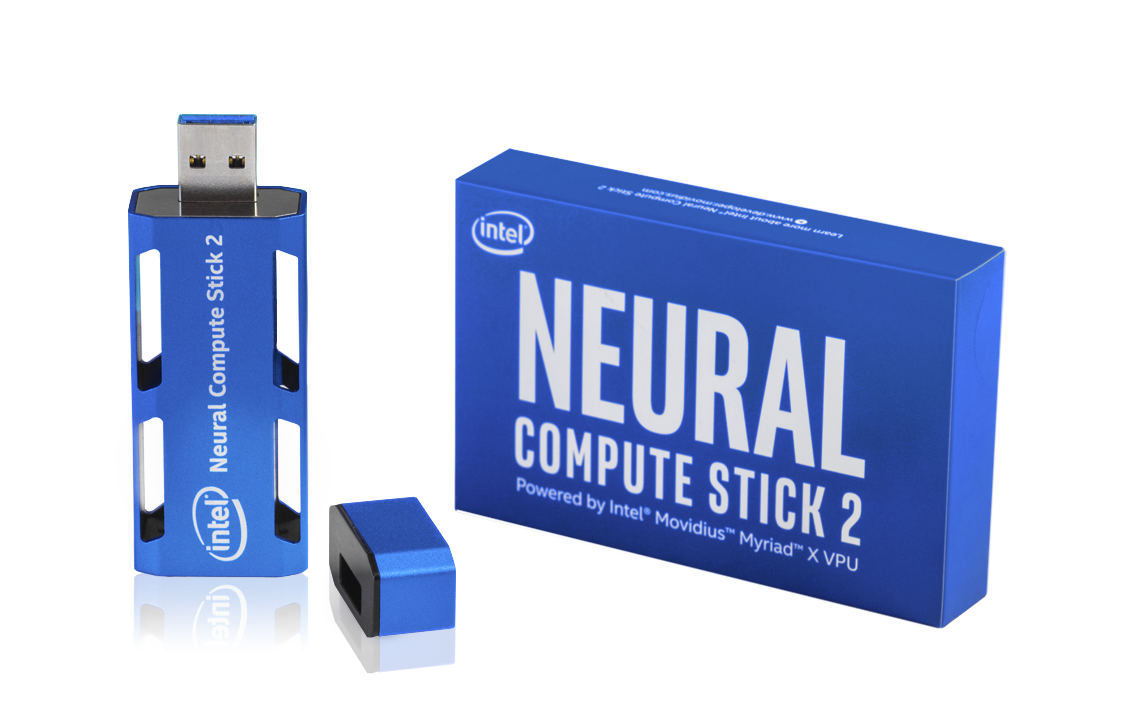
Step 1: Getting started with Intel Neural Compute Stick 2The Intel Neural Compute Stick 2 (NCS2) is a USB stick that offers you access to neural network functionality, without the need for large, expensive hardware. It enables you to incorporate computer vision and artificial intelligence (AI) into your IoT and edge devices. A neural network is a way in which we are able to teach machines to learn like humans.
The Intel NCS2 is based on the Intel Movidius™ Myriad™ VPU which has a dedicated hardware accelerator for DNN interference. The NCS2 is supported by the OpenVINO™ Toolkit.
This is the perfect tool for developers, data scientists, industrial engineers, AI engineers, and academics.
Features
- Deep learning inference at the edge
- Pretrained models on Open Model Zoo
- A library of functions and preoptimized kernels for faster delivery to market
- Support for heterogeneous execution across computer vision accelerators—CPU, GPU, VPU, and FPGA—using a common API
- Raspberry Pi hardware support
OpenVINO toolkit is a free toolkit facilitating the optimization of a deep learning model from a framework and deployment using an inference engine onto Intel hardware
You can find my detailed tutorial on setting up the OpenVINO toolkit on a Windows machine.
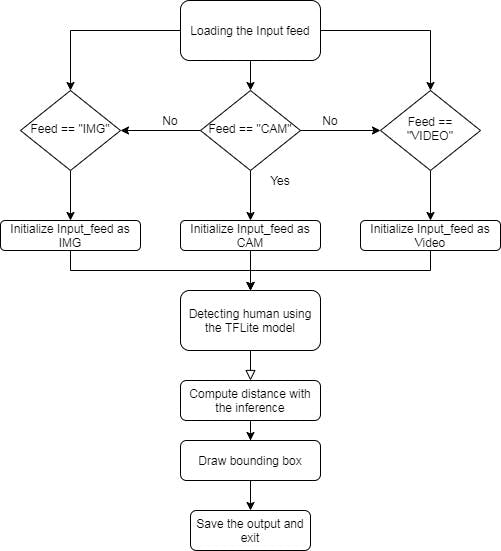
Step 3: Algorithm and ImplementationNow, let's see how the social distancing project can be implemented. The Workflow diagram is given below:
Overall Architecture
- Use object detection to detect all the people in the frame
- Compute the pair-wise distance between the detected people
- From the distance, set a threshold of N pixels to see if they are close to each other.
Some of the optional packages used
$ pip install "picamera[array]"
$ pip install scipy
$ pip install numpy
$ pip install opencv-contrib-python==4.1.0.25
$ pip install imutils
$ pip install scikit-image
$ pip install pillowObject Detection
The input feed can be either an image, video, or CAM feed. OpenZoo pre-trained model is used to perform the inference. The model uses the COCO dataset and it is capable of detecting the location of 90 types of objects. Input is resized to 300x300 as it requires input in that shape.
coords, image= pd.predict(frame)
frame, current_count, coords = pd.draw_outputs(coords, image, initial_w, initial_h)
We start the performance counter to calculate the inference time.
start_inference_time=time.time()The Inference is carried out for the given frame and the following parameters are generated
for obj in coords[0][0]:
# Draw bounding box for object when it's probability is more than the specified threshold
    if obj[2] > self.threshold:
        xmin = int(obj[3] * initial_w)
        ymin = int(obj[4] * initial_h)
        xmax = int(obj[5] * initial_w)
        ymax = int(obj[6] * initial_h)
        cv2.rectangle(frame, (xmin, ymin), (xmax, ymax), (0, 55, 255), 1)
        current_count = current_count + 1
        #print(current_count)
        det.append(obj)
The Inference is performed using the invoke() and the bounding box coords, class and the confidence are extracted.
Calculating Pair-wise Distance
First, the inference result is flattened and the list is created. Then we compute the pair-wise distance between the detected people and append the index to the list if the distance between the people is lesser than the Threshold value.
D = dist.cdist(cent[0], cent[1], metric="euclidean")The distance calculation is done using the Scipy. The centroid of the bounding boxes is computed and appended to the 'cent 'list. The Euclidean distance between the detected objects is used to measuring the social distancing level.
Filtering using threshold
The threshold value is set to identify people who are very close and people who are within the short-range to the other person. The threshold value is calculated based upon the pixel value and can be altered depending on the deployment.
def check_coords(self, coords, initial_w, initial_h):
    d={k+1:0 for k in range(len(self.queues))}
    dummy = ['0', '1' , '2', '3']
    for coord in coords:
        #print(coord)
        xmin = int(coord[3] * initial_w)
        ymin = int(coord[4] * initial_h)
        xmax = int(coord[5] * initial_w)
        ymax = int(coord[6] * initial_h)
        dummy[0] = xmin
        dummy[1] = ymin
        dummy[2] = xmax
        dummy[3] = ymax
        for i, q in enumerate(self.queues):
            if dummy[0]>q[0] and dummy[2]<q[2]:
                d[i+1]+=1
    return d
The distance is denoted in pixel. The MIN_DISTANCE and NEAR_DISTANCE are set by the trial and error method.
for k, v in num_people.items():
    print(k, v)
    out_text += f"No. of People in Queue {k} is {v} "
    if v >= int(max_people):
        out_text += f" Queue full; Please move to next Queue "
    cv2.putText(image, out_text, (15, y_pixel), cv2.FONT_HERSHEY_COMPLEX, 1, (0, 255, 0), 2)
    out_text=""
    y_pixel+=40
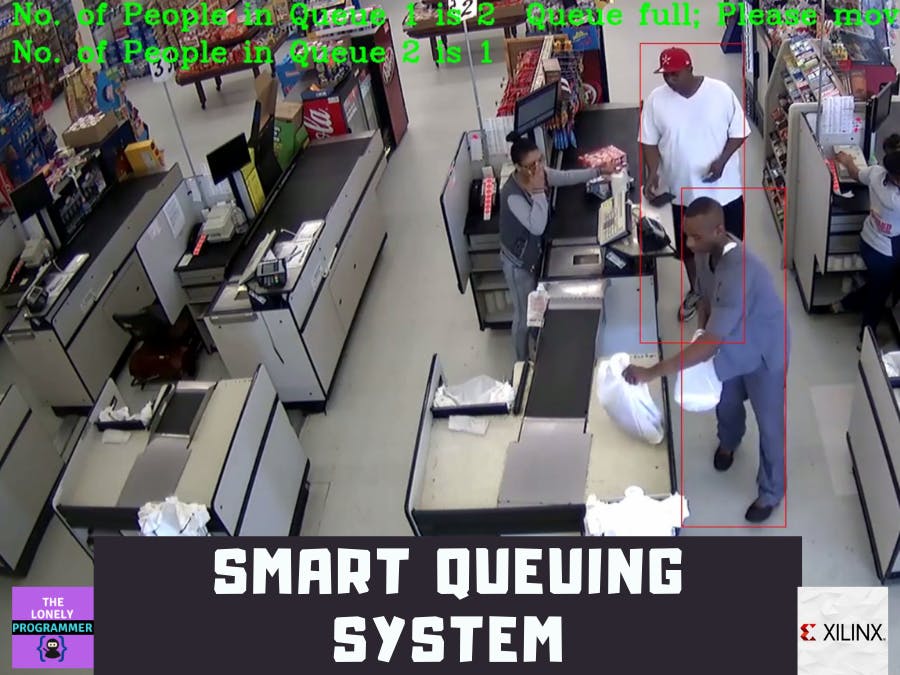
From the inference and check_coords(), the No of people in the queue is detected and identified whether the queue is full.
Command-line arguments
The person_detect.py file is fed with the following arguments in the command line inference, where
- --modeldir "Folder path to the open zoo model file."
- --device
- --video "Name of the video file
- --queue_param
- --output_path
- --max_people
- --threshold "Probability threshold for detection filtering"
Run the person_detect.py
To run inference on a video file:
python3 person_detect.py  --model ${MODEL} \
--device ${DEVICE} \
--video ${VIDEO} \
--queue_param ${QUEUE} \
--output_path ${OUTPUT}\
--max_people ${PEOPLE} \
You can find the complete code on my GitHub repository.
Step 6: Working of the Project 🔭Video Source: Intel
People are marked with a red bounding box. In the above video, if queue 1 is full, it advises people to move to queue 2. By this, we can avoid people meeting very close distance in a queue or not maintaining the social distancing practices. This also saves time and improves customer waiting time.
NOTE: This prototype is licensed. Do not use it for commercialized products without prior permission.This system is affordable and can be deployed in public places such as hospitals and markets to decrease the spreading of the virus unknowingly. This solution will be very useful and easy to integrate with a CCTV/DVR. This is a valuable approach to reduce the disease's impact on the economies of these vulnerable areas
-----------------------------------------------------------------------------------------------------------------
If you faced any issues in building this project, feel free to ask me. Please do suggest new projects that you want me to do next.
Give a thumbs up if it really helped you and do follow my channel for interesting projects. :)
Share this video if you like.
Blog - https://rahulthelonelyprogrammer.blogspot.com/
Github - https://github.com/Rahul24-06
Happy to have you subscribed: https://www.youtube.com/c/rahulkhanna24june?sub_confirmation=1
Thanks for reading!


Comments
Please log in or sign up to comment.