


Hardware components | ||||||
 |
| × | 1 | |||
 |
| × | 1 | |||
This is the board of raspberry pi.
Here the pinout of raspberry pi:
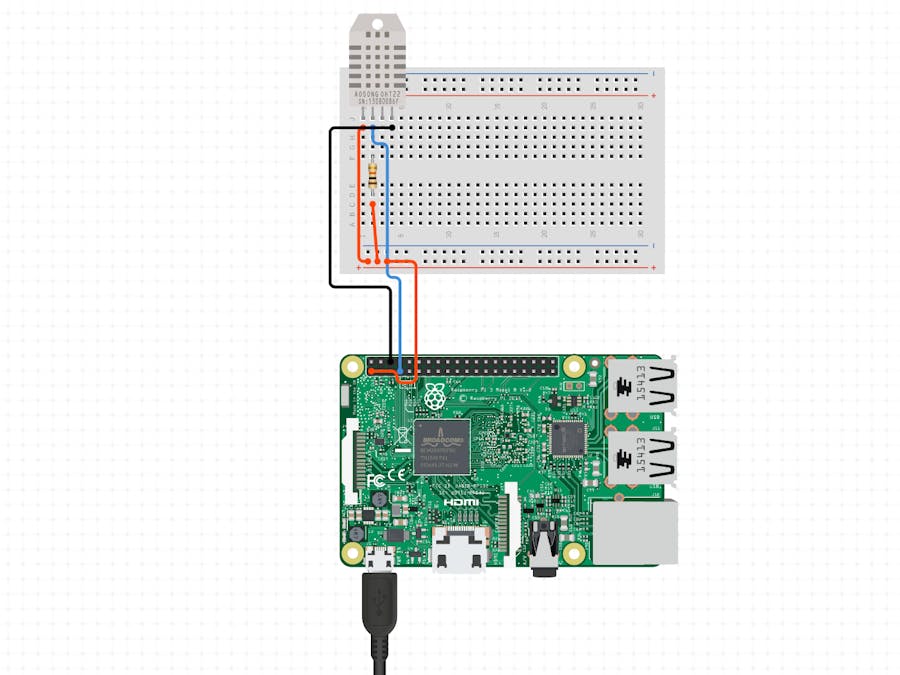
The DHT22 is a basic, low-cost digital temperature and humidity sensor. It uses a capacitive humidity sensor and a thermistor to measure the surrounding air and spits out a digital signal on the data pin (no analog input pins needed). Connections are simple, the first pin on the left to 3.3V power, the second pin to your data input pin and the rightmost pin to ground.
Temperature monitoring using a Raspberry Pi involves using the Raspberry Pi as a sensor to measure temperature and then displaying the data in a useful way. Here are the basic steps to implement temperature monitoring using Raspberry Pi:
- Connect a temperature sensor to the Raspberry Pi: There are many temperature sensors available in the market, but the most commonly used one is the DS18B20 sensor. Connect the sensor to the GPIO pins of the Raspberry Pi.
- Install the necessary software: You will need to install some software to enable your Raspberry Pi to read the temperature data from the sensor. The most commonly used software is the RPi.GPIO library.
- Write a Python script to read the temperature data: You will need to write a Python script that will read the temperature data from the sensor and store it in a file or a database.
- Display the data: Once you have the temperature data, you can display it in various ways. One common method is to display the data on a website using Flask or Django.
- Automate the process: You can set up your Raspberry Pi to run the temperature monitoring script automatically at a set interval using a cron job.
With temperature monitoring using Raspberry Pi, you can monitor temperature data in real-time and detect any unusual changes. This can be particularly useful in industrial or agricultural settings where temperature plays a critical role in the production process.


Comments
Please log in or sign up to comment.