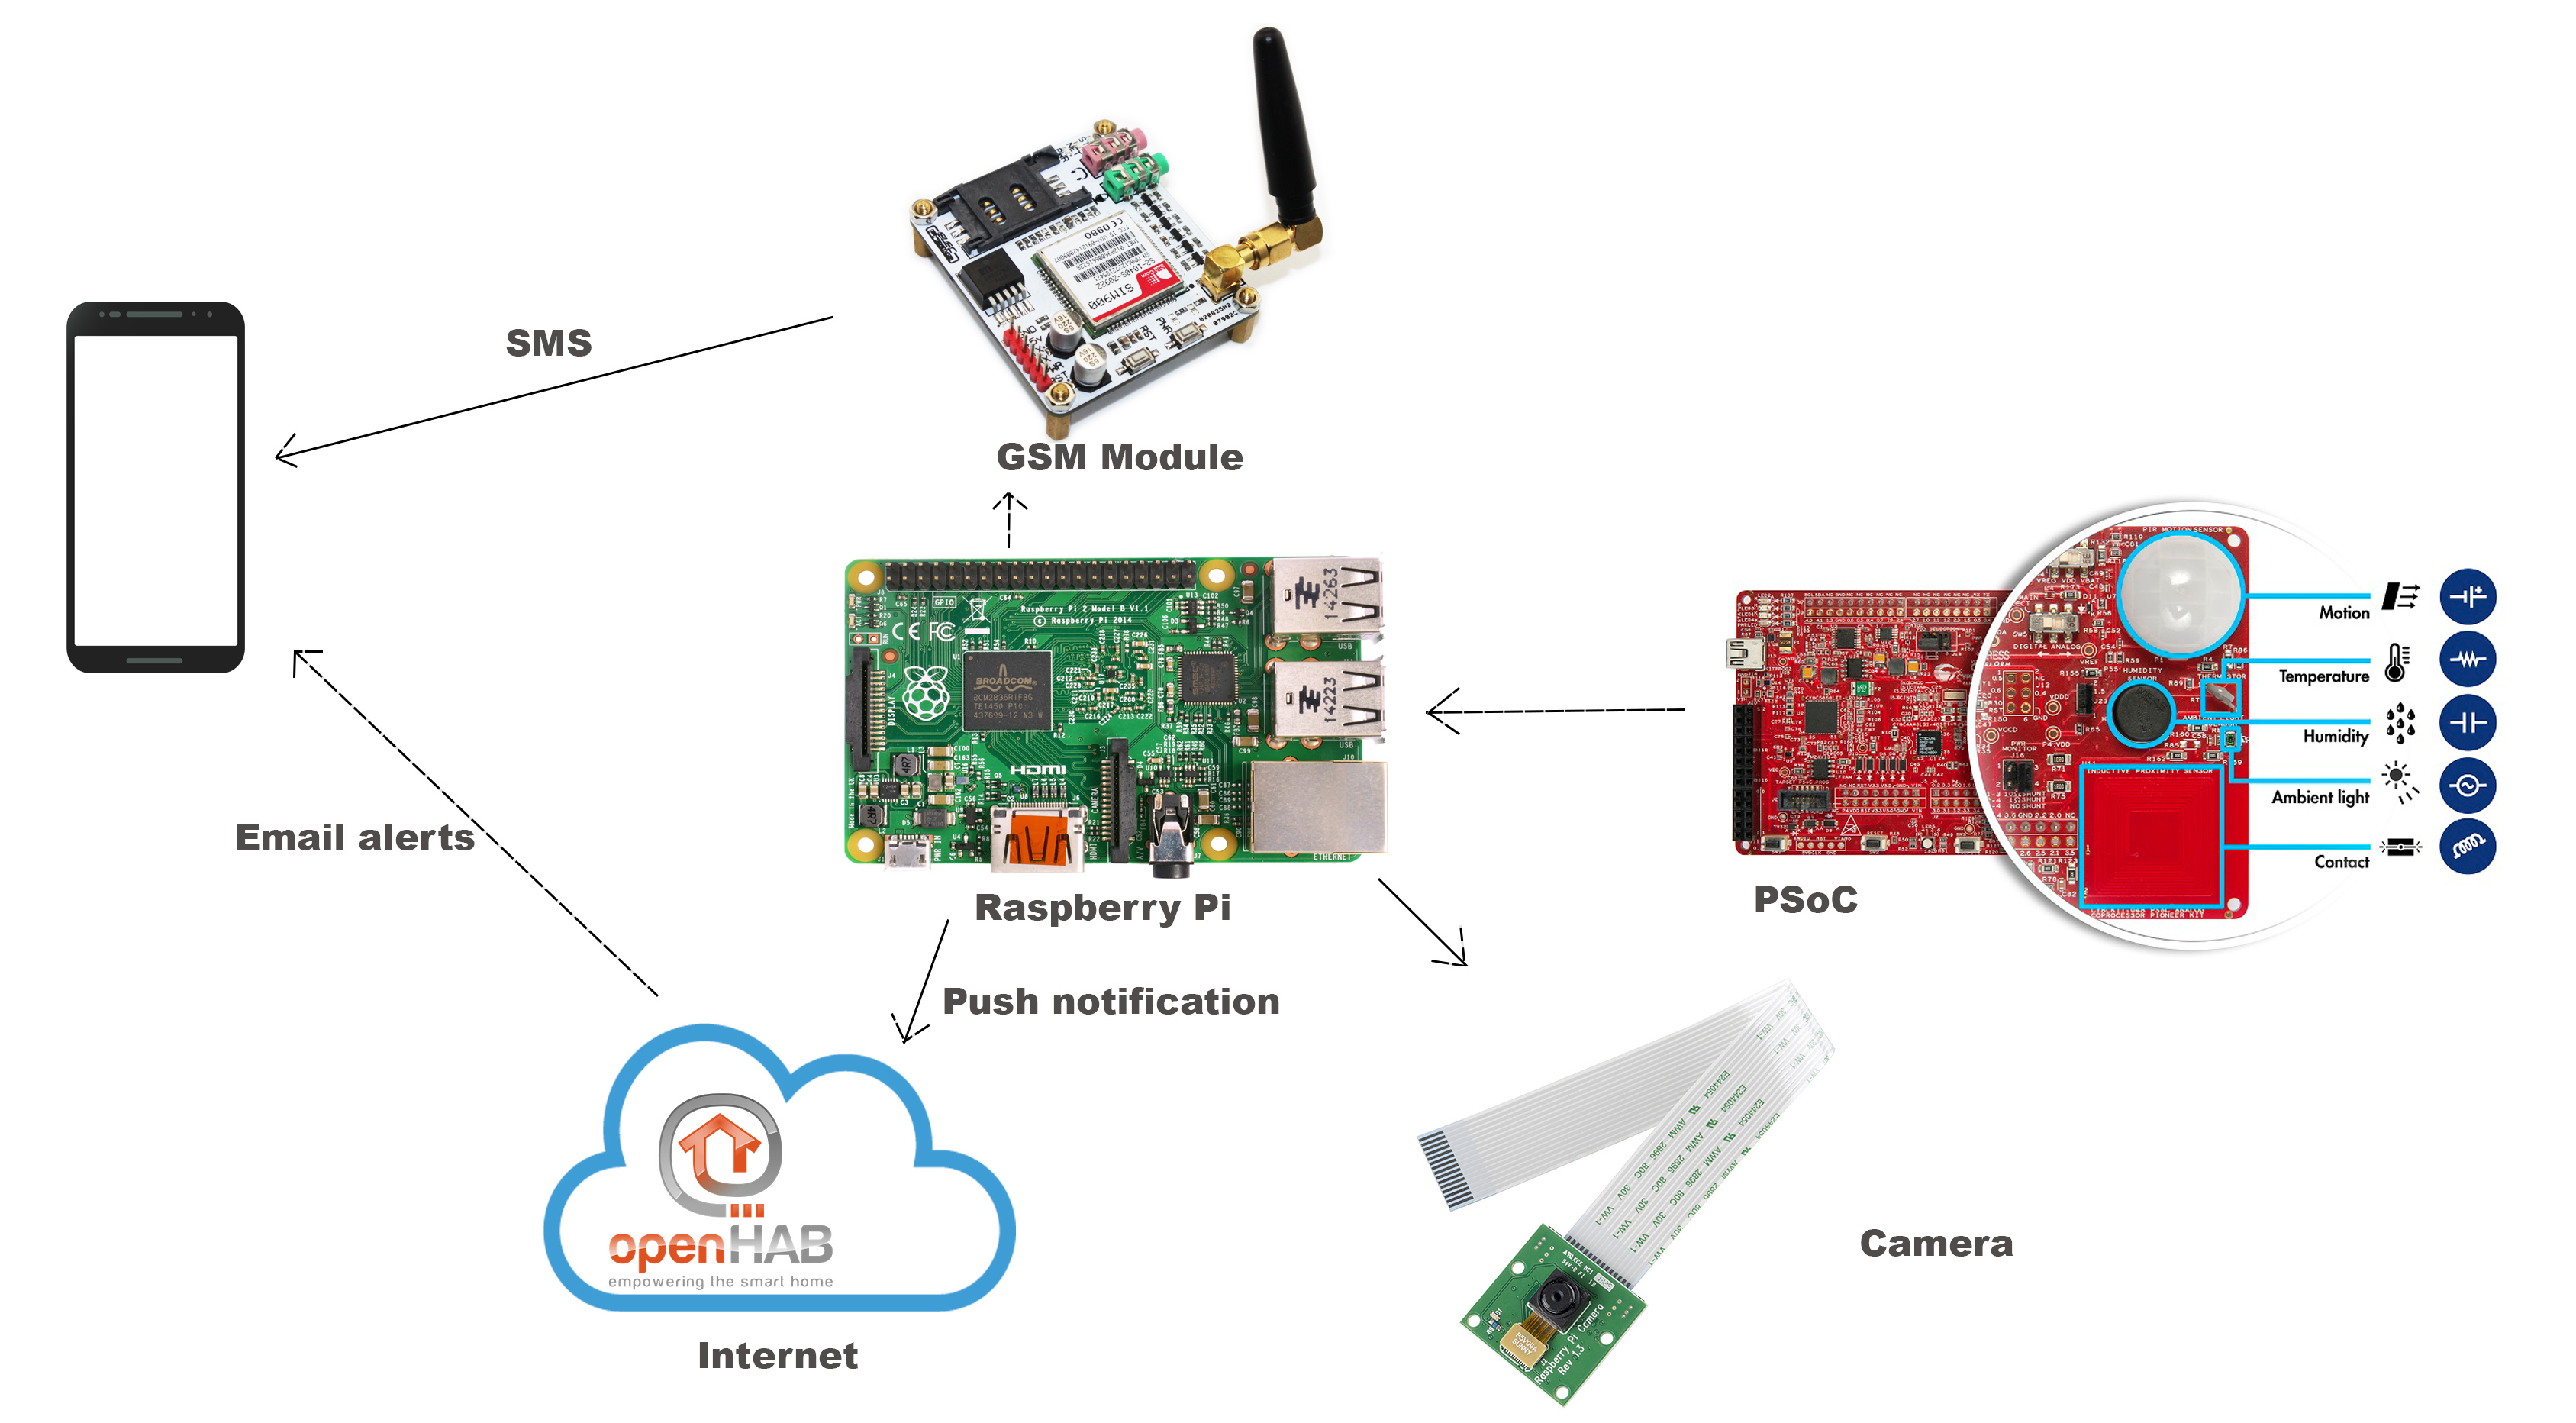
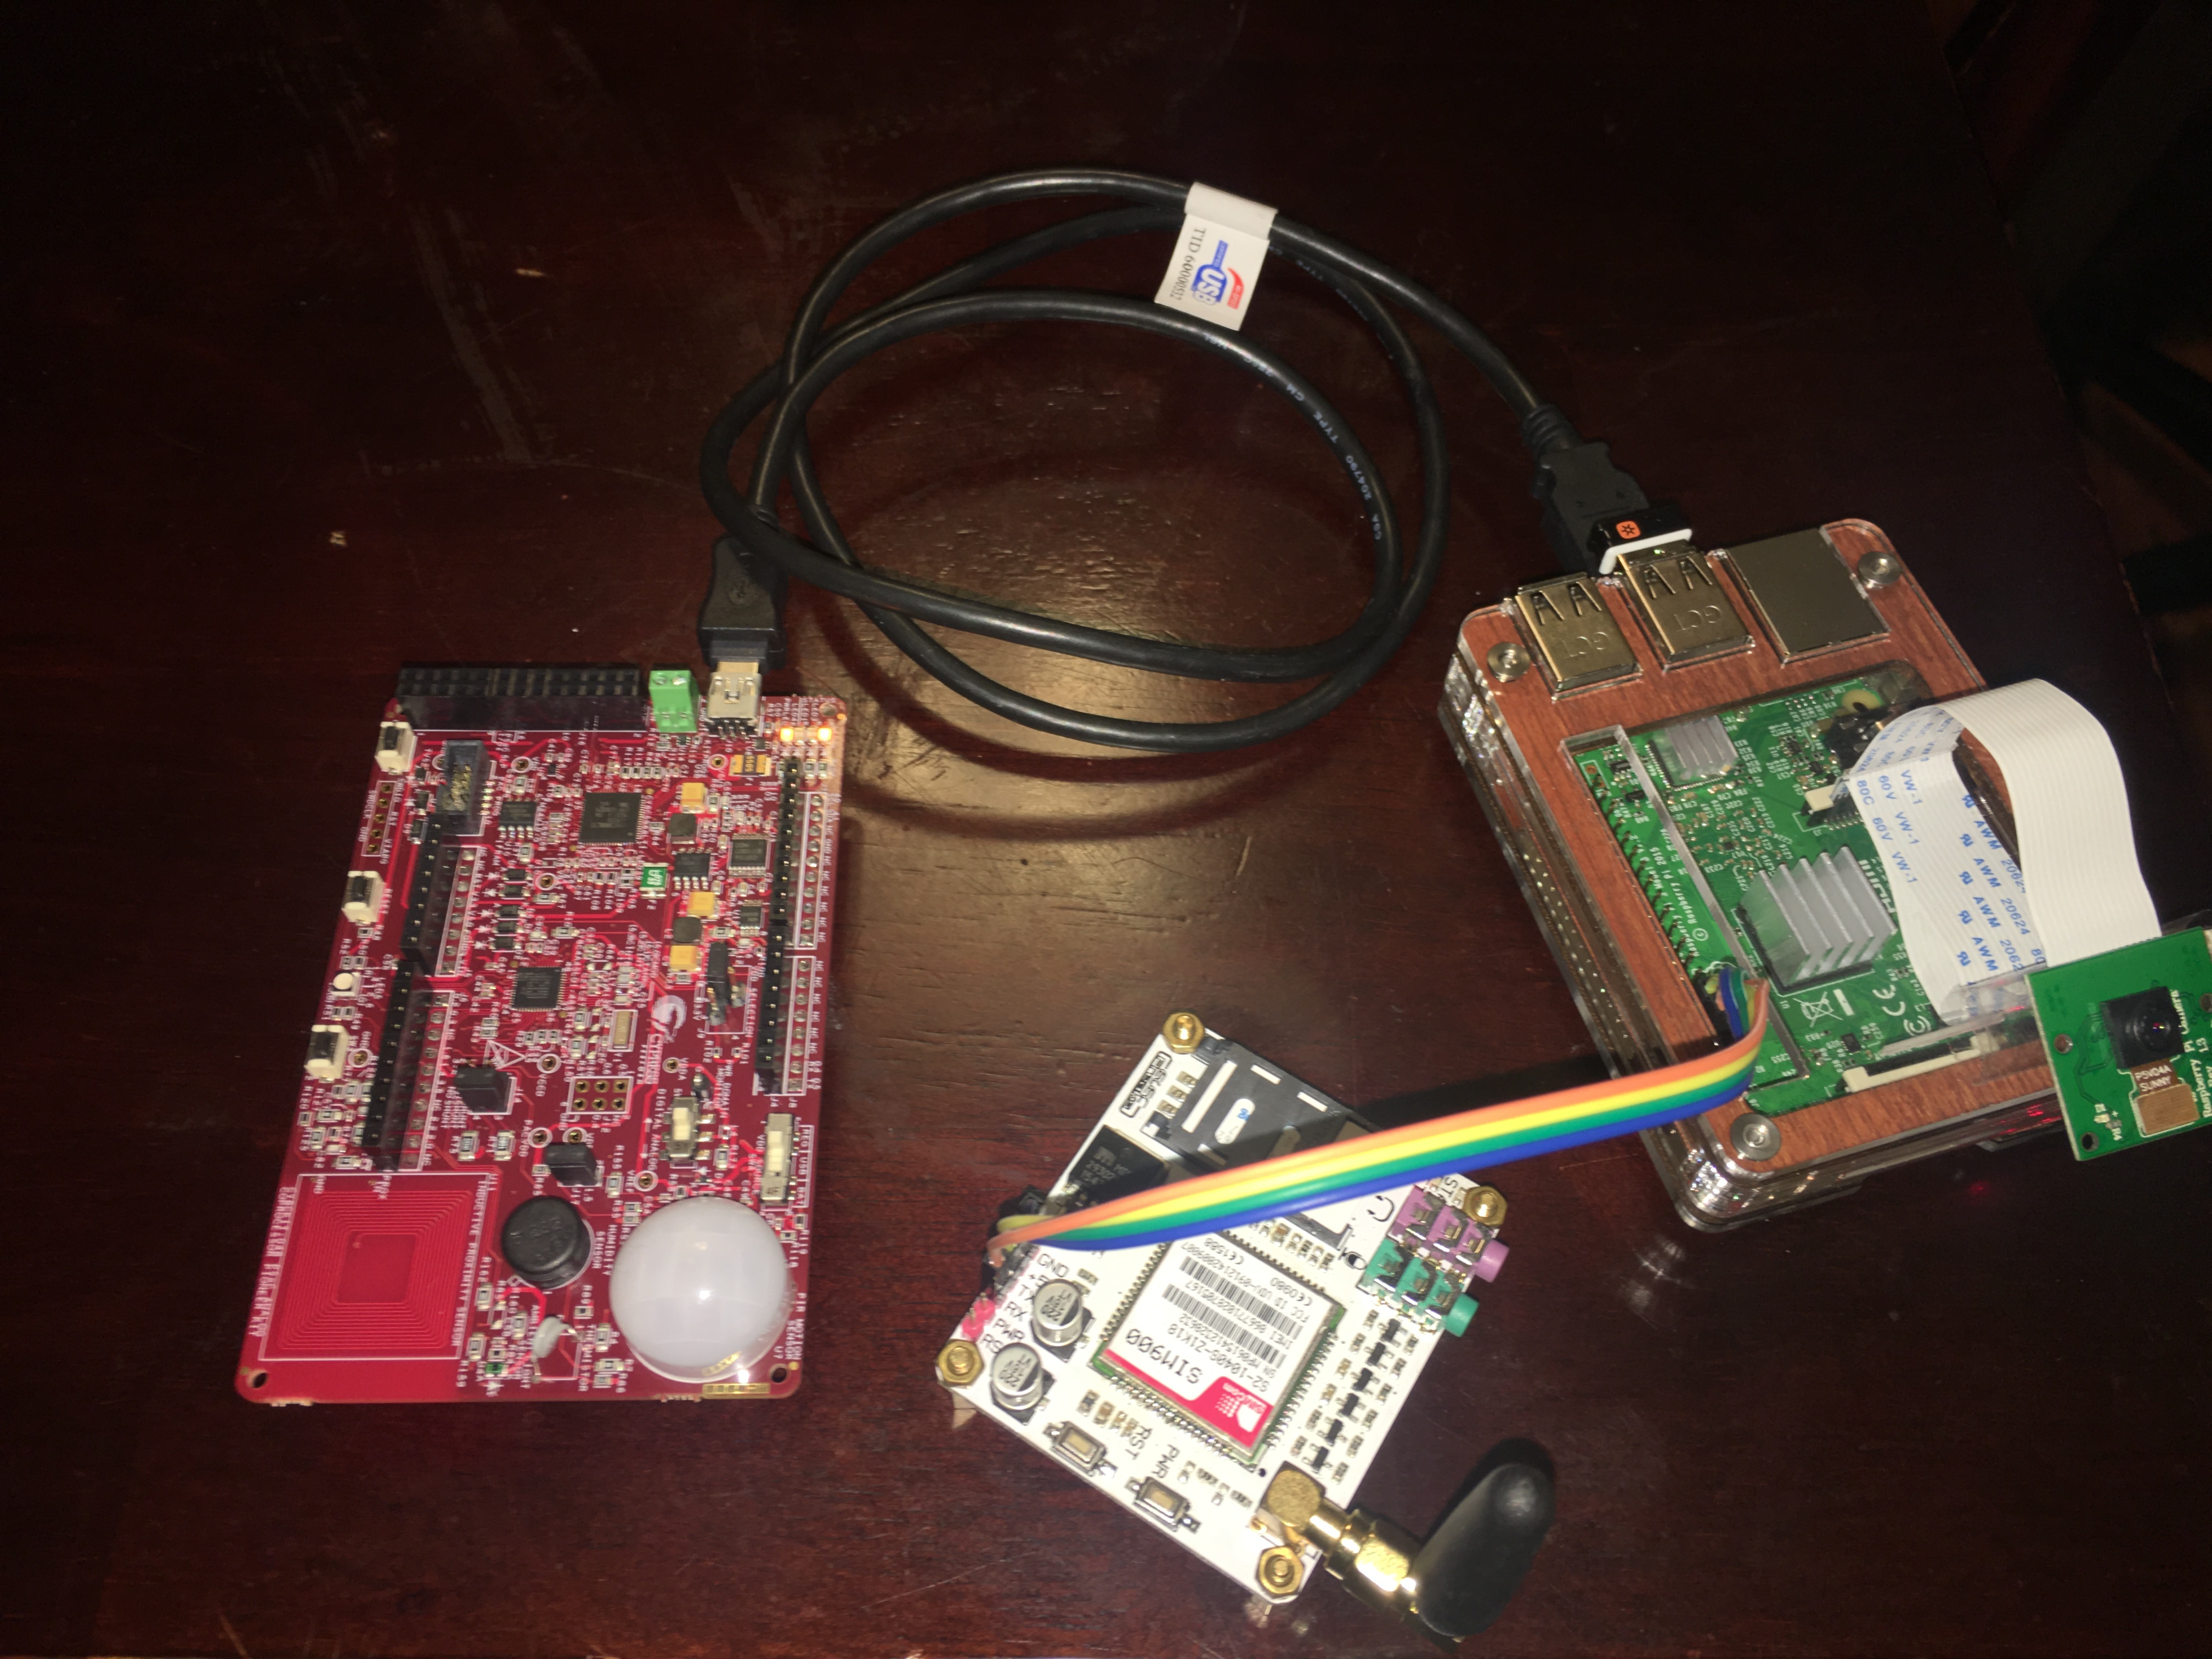
The purpose of the project is to monitor what happening in the baby room when we are not present there. To capture the event in the baby room we will use the Cypress CY8CKIT-048 PSoC Analog Coprocessor Pioneer Kit. The kit has a sensor interface composed of a PIR Motion sensor, Humidity sensor, proximity sensor, ambient light sensor and a thermistor. Theses sensors will allow to detect:
- the presence of someone in the room
- the temperature of the room
- the ambient light in the room
- the humidity of the room
Once the data collected by the kit, it will be sent to the Raspberry Pi. To notify the parents we will use:
- OpenHab: which is an open source automation software, will be used as a web server to see the video streaming of what is happening in the baby room.
- GSM module which will allow to send SMS directly to the parents.
Finally, to have a good idea of what happening in the baby room, a Raspberry pi camera will be used to start recording when the sensors will detect the presence of someone in the room.
I2C is a very commonly used standard designed to allow one chip to talk to another. So, since the Raspberry Pi can talk I2C we can connect it to a variety of I2C capable chips and modules. So, in our case we will use I2C to connect with the Cypress PSoC board. It is very useful to be able to see which devices are connected to your Pi as a way of making sure everything is working. To do this, it is worth running the following commands in the Terminal to install the i2c-tools utility.
$sudo apt-get install -y python-smbus
$sudo apt-get install -y i2c-tools
To test I2C and see all the connected device you can type the command:
$sudo i2cdetect –y 1
On the GPIO, pins labelled SCL (clock) and SDA (data) can be used for I2C. The pins labelled MOSI, MISO and SCKL can be used to connect to high speed SPI devices.
Analog Coprocessor ConfigurationThe analog coprocessor is a programmable processor which allows to work with sensors. The kit comes with a software called PSoC Creator, which allows to design circuit using the on-boards module. Thus, you can create your own design using the onboard modules. Furthermore, the kit is composed of in-build resistor, led, amplifier that you can use to model your circuit. For our project, we will use:
- The capacitance module for sensing the humidity
- The voltage module for sensing the motion
- The resistance module for sensing the temperature
- The current module for sensing the Ambient light
- The ADC module to convert the data collect from analog to digital
- The I2C module for the communication between the kit and the Raspberry Pi
The schematic above was realized using PSoC Creator project Examples (Ambient_Light_Sensing, PIR_Motion_Sensing, Inductive_Proximity_Sensing, Humidity_Sensing).
Once the design is done you can do the pin assignment.
Once the design is done and the Pin are affected, the software generates a C code of the design. It becomes now possible to initialize the modules and create buffer in which we will save the data returned by each module.
When the code is ready, we can build it and compile it on the board to test it. The testing part is done with another software called Bridge Control. This software allows to send to send request to the programmed kit and receive back the data collected.
Unfortunately Bridge Control is only available on Windows. To get connected and receive the data on the Raspberry pi I have used a library on GitHub called “Cypress-usb-i2c-bridge” (you can fin the full tutorial on Hackster.io). With this tool installed and setup I was able collect data from my PSoC board on Raspbian.
The module connection with the Raspberry PI is done using UART communication. The module works at 5V and the communication is done using the TX (Transmit)/RX (Receive) pins. The Transmit of the module is connected to the Receive of the Raspberry Pi, and the Receive of the module is connected to the Transmit of the Raspberry Pi.
Once the connection is done, we need to configure the UART communication on the Raspberry Pi. First, we need to enable the UART communication in adding the line “enable_uart=1” in the “/boot/config.txt” file. Second, we need to install the Minicom package. On the Raspberry Pi 3 the serial port is used as a terminal. Since the UART use the serial communication, we need to disable the terminal on is an enable the serial port to allow incoming communication from the module. This is done by using the “raspi-config” command, which is a graphical configuration tool for the Raspberry Pi. To run Minicom we can use the command:
$minicom –b 9600 –o –D /dev/ttyS0
and type the command:
AT+CMGF=1
AT+CMGS= “574*******”
OpenHabOpenHab is an automation Software, which offer a lot of possibilities for Internet of things development. For our project, OpenHab will be used as a server to allows to stream a real-time video when motion is detected in the baby bedroom.
OpenHab installation on Raspberry Pi is pretty tedious and I found a step-by-step installation tutorial here. A script is available at the end of the tutorial. This script will do the installation of openHab with all the dependencies needed.
After installation of OpenHab and all its dependencies, we were able to configure our streaming platform. OpenHab give you the possibility to create personalized pages for your project. After creation, the page is available as a server (http://192.168.1.21:8080/openhab.app?sitemap=baby).
In addition, it is necessary to install a streaming server that will allow to have access to the video stream remotely using the camera connected on the Raspberry Pi. To do that I downloaded a library called mjpeg-streamer on GitHub. This library allowed me to do the streaming of the Raspberry-Pi camera on a local address as a server( http://192.168.1.21:8081/?action=stream). Finally, I used this address to join it with my openHab page to be able to retrieve it there.
Once, all those different parts developed, the main goal was now to put them together. The aim was to write a code so that we can trigger the GSM module when motion is detected and send the value of the temperature, humidity and whether the light is on or not in the room. To decide it there is a motion or not, we just have to check the sensorData.motionDetected value, if it is a one we run a script shell to send the SMS to the user. To detect an efficient motion, code has been written to detect motion during 5 second before assuming that it is a motion.


Comments
Please log in or sign up to comment.