Basically, it is the first hardware that was used with Arduino UNO for wireless communication. After a few years later, it became standalone hardware that sends and receives the information through wireless medium and since it has two GPIO pins, so it can be used to trigger depending upon the conditions.
2. Why I chose this project?I chose this project because I wanted to enhance my IoT skills and to know how to control the hardware under certain conditions. This project is a basic introduction to weather notification. If this project is enhanced, then it can be used for various purposes like controlling the blinds, or opening and closing of the windows and much more.
3. Project Assembly:This project is assembled very easily and less time was spent on the soldering as compared to programming the module.
4. Procedure:First of all, I connected the ESP-01 to the Arduino IDE using FTDI FT232RL (which is also called as serial to TTL converter) then I installed the esp8266 library from the board manager or you can install the board library from the link below:
Here is the link :> http://arduino.esp8266.com/stable/package_esp8266com_index.json
Once installed, then you can upload the bootloader by clicking on the "burn bootloader" to burn the new firmware on the ESP-01 chip.
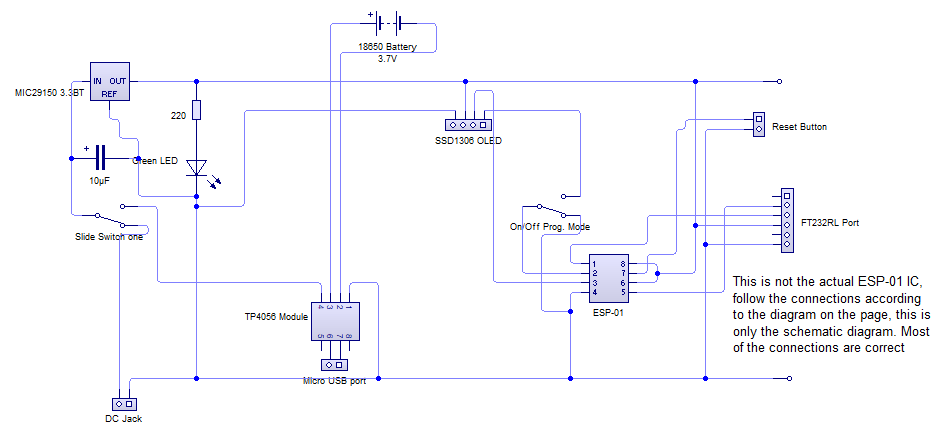
A small connection diagram of ESP-01 with FTDI 232RL is shown below:
Once done, then you need to create an account on openweather.org, and you need to set your country and city preferences, this may include where you live and such things.
Once done, then go to the "API key tab" to generate the specific API Key for your hardware.
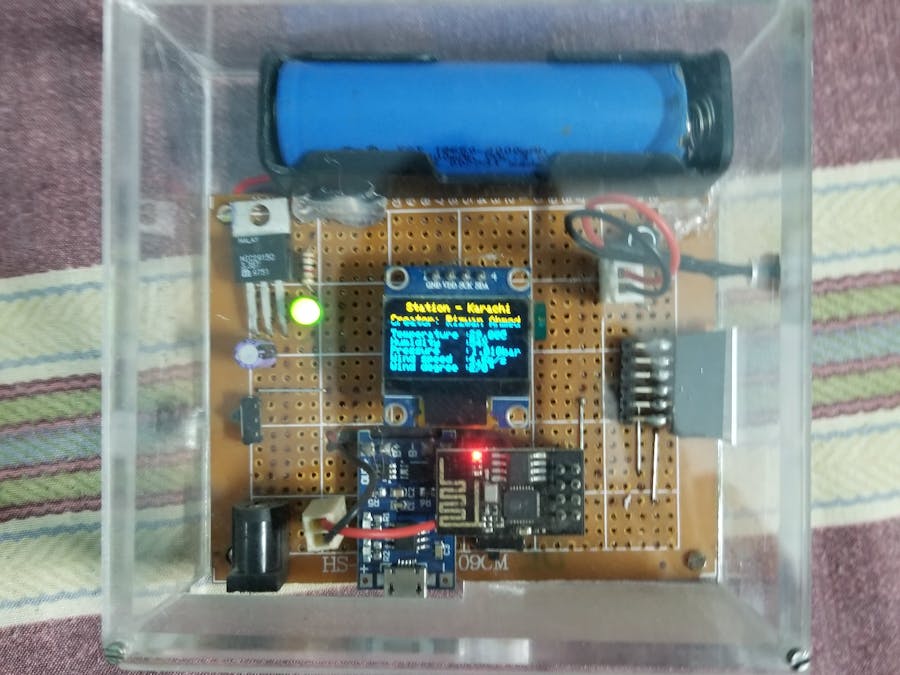
I have made a case from a 4mm approx. acrylic sheet and some holes through it.
When completed then copy the API key and your location on the notepad and save it for some time.
I have uploaded the code: just there is some you need to add in it. the rest is the same.


Comments
Please log in or sign up to comment.