After experiencing both a new boiler AND a washing machine leak in the same weekend, I searched online for a network connected water leak detector. I wanted a device I could integrate into my home automaton system, so I could both continually monitor the status of the detector (battery level etc.) and receive notifications. Unfortunately nothing quite fit the bill, so I set about making my own.
I am passionate about the Python language, and chose to develop this sensor in MicroPython due to both my familiarity with the language ,and since I can interactively prototype the code from the REPL (command line). This avoids the faff of compiling and uploading code as required by some other approaches, resulting in very rapid development.
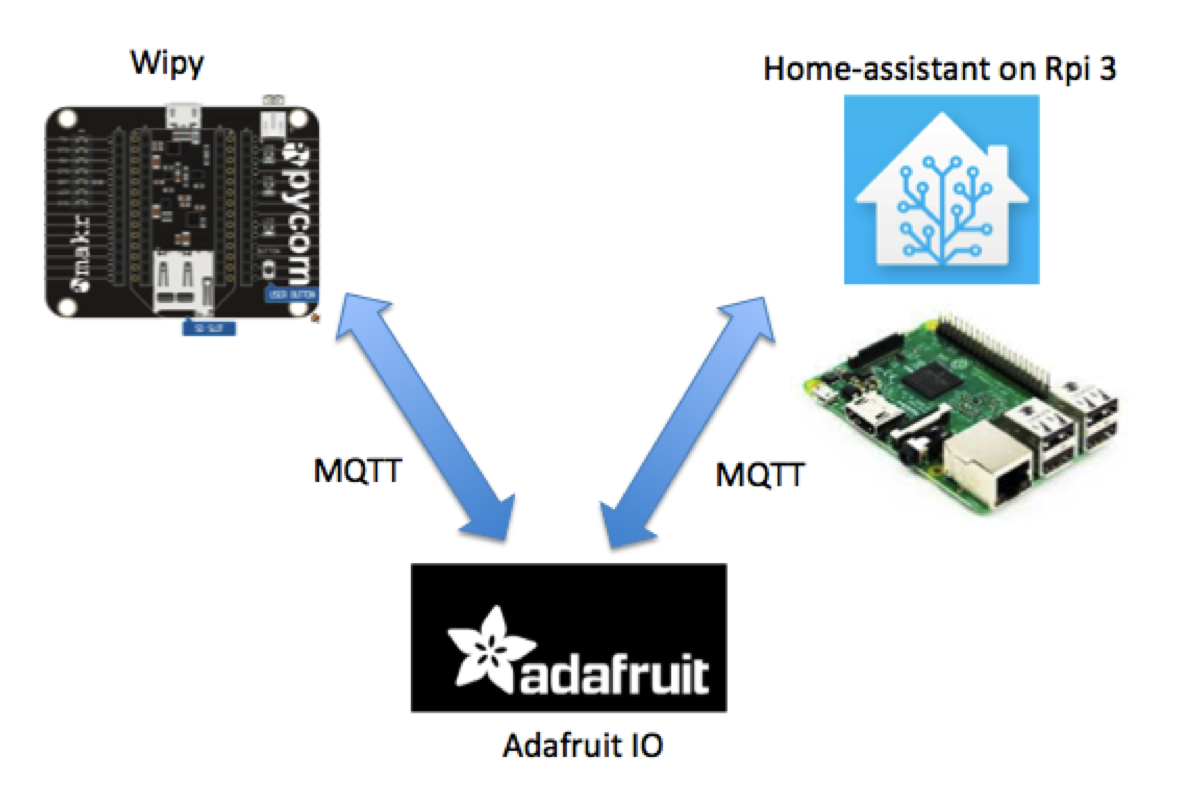
Home AssistantThere are many home automation platforms available, perhaps the most popular open source ones are openHAB and Home Assistant. I use Home Assistant as I found this much easier to setup than openHAB, and it is written in Python 3. As a very brief introduction to Home Assistant, hardware or software 'components' are added to the system by making the appropriate entries in a .yaml file. This is described in detail later. I personally host Home Assistant on a dedicated Raspberry Pi, and my devices (lights, cameras etc.) send data to Home Assistant over my network using a number of number of protocols. The approach I use in this project is to send data from my WiPy board to Home Assistant via the Adafruit MQTT broker, illustrated in the schematic below.
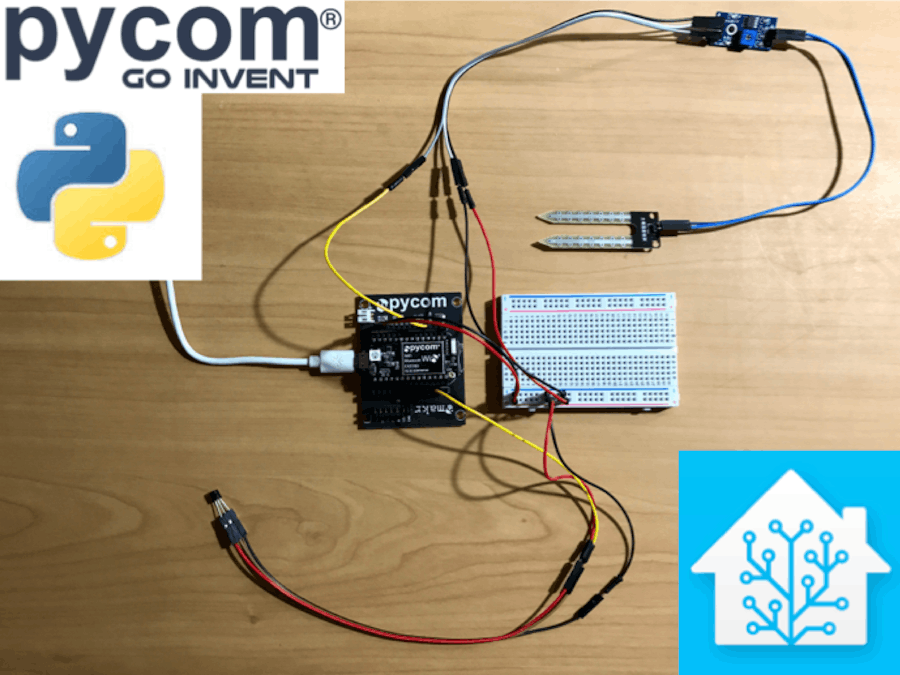
The hardware is shown in Figure 2, and the wiring is illustrated in Figure 3 on an annotated version of the board diagram available at https://www.pycom.io/resources/. I will add a Fritzing diagram when Pycom make one available. Note that the expansion board is ONLY REQUIRED for updating the WiPy firmware. For the final version of this project I will not need the expansion board, and will just need to add a 5V power source.
Temperature readings are made using the DS18B20 sensor, here powered by the 3.3 V output of the WiPy and connected via the 1-wire protocol.
Water/moisture readings are made using a cheap sensor I found on Amazon, again powered by the 3.3 V output. This sensor has both analogue and digital outputs, but I chose the analogue since the docs advise that this is more accurate, and seemed the simplest approach. The readings are a bit noisy, so I take an average of 100 readings.
Details of how to setup Wifi connection on the WiPy are provided on https://docs.pycom.io/pycom_esp32/pycom_esp32/tutorial/includes/wlan.html, but in summary, I place my wifi credentials in the boot.py file on the WiPy. Actual code to take sensor readings and send them to my home automation system is in the main.py file.
MQTTThe cloud broker I will use is provided by Adafruit, and its use is described here. Note that there is a limit on the rate that you can post MQTT data on this broker, therefore we need to adhere to this limit. If you want to publish data at a higher rate, check out CloudMQTT or host your own broker.
To use the Adafruit broker you will need to first create an account at Adafruit IO (io.adafruit.com) and make note of your user name (your_user
) and AIO key (your_pass
). These are used in defining the MQTTclient:
client = MQTTClient(client_id="example_client", server="io.adafruit.com",user="your_user", password="your_pass", port=1883)
Next I create two feeds, one called 'WiPy temperature' and another called 'WiPy moisture'. These will be automatically assigned keys 'wipy-temperature' and 'wipy-moisture' respectively. The temperature sensor data is publishing over MQTT using:
client.publish("your_user/feeds/wipy-temperature", str(curr_temperature))
Test that the Adafruit broker is receiving the data by viewing the feed on Adafruit IO.
The main.py that is loaded onto the WiPy is given below. The imported files are available at https://github.com/pycom/pycom-libraries/tree/master/examples. Note that these files are updated fairly regularly, so its best practice to ensure you are using the latest versions, particularly if you are keeping your board firmware up to date.
import pycom
import time
import machine
from machine import Pin
from onewire import DS18X20
from onewire import OneWire
from simple import MQTTClient
from network import WLAN
#
def settimeout(duration):
   pass
#
client = MQTTClient(client_id="wipy_client", server="io.adafruit.com",user="your_user", password="your_pass", port=1883)
client.settimeout = settimeout
client.connect()
#
#DS18B20 1-wire connected to pin P10
ow = OneWire(Pin('P10'))
temp = DS18X20(ow)
# Moisture sensor
adc = machine.ADC()
apin = adc.channel(pin='P16',attn=3)
# Function for taking average of 100 readings
def smooth_reading():
  avg = 0
  _AVG_NUM = const(100)
  for _ in range (_AVG_NUM):
      avg += apin()
  avg /= _AVG_NUM
  return(avg)
#
while True:
  curr_temperature = temp.read_temp_async()
  print(str(curr_temperature))
  client.publish("your_user/feeds/wipy-temperature", str(curr_temperature))
  analog_val = smooth_reading()
  print(analog_val)
  client.publish("your_user/feeds/wipy-moisture", str(analog_val))
  time.sleep(5)
  print("################")
Data is published every five seconds (to keep within Adafruits rate limit) in the True loop. Temperature data is published as is. However, the reading from the moisture sensor is pretty noisy, so the average of 100 readings is published.
Home Assistant IntegrationHome Assistant is a Python 3 event driven program which can be hosted on any machine with Python 3 installed. I personally have a dedicated Raspberry Pi 3 running my main home-assistant instance, but you run it on any machine with Python installed, including Mac, PC, NAS etc. Installation is described here.
I need to tell Home Assistant the location of my MQTT broker and create sensors (in code) to receive the data from the WiPy. Configuration of Home Assistant is performed according to https://home-assistant.io/docs/configuration/, and the final Home Assistant config.yaml file is shown below - note that a header is added by Home Assistant.
homeassistant:
 name: Wipy
 latitude: 51.0
 longitude: -0.2
 elevation: 0
 unit_system: metric
 time_zone: Europe/London
#
##### Look of sensors, icons from https://cdn.materialdesignicons.com/1.1.34/
 customize:
   sensor.temperature:
     icon: mdi:thermometer
     friendly_name: "Temperature"
   sensor.moisture:
     icon: mdi:blur
     friendly_name: "Moisture"
#
######### Some stuff
frontend:
history:
logbook:
discovery:
#
############## Services
mqtt:
  broker:
  username: your_user
  password: your_pass
notify:
 platform: pushbullet
 api_key: "Your_API_key"
 name: mypushbullet
#
#### Sesors
sensor:
 - platform: mqtt
   name: "Temperature"
   state_topic: "
   unit_of_measurement: 'Celsius'
#
 - platform: mqtt
   name: "Moisture"
   state_topic: "
#
 - platform: time_date
   display_options:
     - 'date_time'
#
######### Automation
automation:
 - alias: wipy_leak_detector
   trigger:
     platform: numeric_state
     entity_id: sensor.moisture
     below: 3000
   action:
     service: notify.mypushbullet
     data_template:
       title: "Wipy notification"
       message: Leak at {{states("sensor.date__time")}}
#
######## Set the main view
group:
 default_view:
   view: yes
   entities:
     - group.Wipy
Wipy:
  entities:
    - sensor.date__time
    - sensor.temperature
    - sensor.moisture
The .yaml file includes an automation to send a Pushbullet notification (https://www.pushbullet.com) if the moisture sensor value falls below 3000, which it does when wet. This automation is described in following https://home-assistant.io/cookbook/notify_if_over_threshold/. To do: flash the lights red if a leak is detected. I have also customized the look and feel using icons from https://cdn.materialdesignicons.com/1.1.34/.
Finally, launch Home Assistant: > hass --open-ui
Home Assistant creates a web server from which I can view the sensor data on my Mac or mobile phone by entering the URL http://home-assistant-ip:8123.
Finally, the sensor is placed under my boiler as shown below in Figure 6.
I have decided to use CloudMQTT over Adafruit since I wish to add more devices to my network, each of which will send data over MQTT. I don't want to encounter any rate limits. Note that the free plan from CloudMQTT (Cute Cat plan) is limited to 10 devices, with a total bandwidth of 10 Kbit/s which should be adequate for my use.
Sign up to CloudMQTT and on the Console page, under Manager Users, create a user WiPy and set a password for the user WiPy. Under ACLs add a rule to user WiPy on the topic wipy/temperature
and set Read and Write access to True. Repeat for the topic wipy/moisture
. Finally create a user HASS
(shorthand for home-assistant) and subscribe them to #
(a wildcard, this user has access to all topics on the broker) with Read and Write access. When completed ACLs should look like:
Next we need to edit main.py on the WiPy to use the CloudMQTT broker. First edit the client data:
client = MQTTClient(client_id="wipy_client", server="m20.cloudmqtt.com",user="Wipy", password="your_wipy_user_passwd", port=check_your_port)
Note that you will probably be using default port 1883, but check yours under Instance Info on the console.
Now edit the publish data:
client.publish("wipy/temperature", str(curr_temperature))
You might also want to change the sleep time in time.sleep()
to sample at a faster rate. I use 1 second. Now restart the WiPy and check that data is being received by CloudMQTT. On the Web Socket tab you should see the data being published under Received Messages.
Finally we need to update the Home Assistant configuration.yaml file to point to the CloudMQTT broker, using the data you set for the CloudMQTT user HASS.
mqtt:
 broker: m20.cloudmqtt.com
 port: check_your_port
 username: HASS
 password: your_hass_user_passwd
And update the MQTT sensors to subscribe to the correct topic.
sensor:
- platform: mqtt
  name: "Temperature"
  state_topic: "wipy/temperature"
  unit_of_measurement: 'Celsius'
#
- platform: mqtt
  name: "Moisture"
  state_topic: "wipy/moisture"
Now restart Home Assistant and check that you are receiving the data from CloudMQTT. Job done.
BME680
I have recently swapped out the DS18B20 temperature for the more sophisticated BME680 sensor which detects:
- Temperature
- Pressure
- Relative humidity
- Volatile organic compounds
The github repo for the BME680 and leak sensor is on Github.
This post has described how to setup the WiPy to send temperature and moisture data to Home Assistant via the Adafruit or CLoudMQTT brokers. If a leak occurs, the moisture sensor value falls below a critical value triggering a mobile notification from Home Assistant.


Comments
Please log in or sign up to comment.