The Personal Mirror
Motivation
The idea to create a mirror with additional Information is not new and there are a lot of projects with instructions in the web to create such a mirror. (e.g. here: http://michaelteeuw.nl/post/80391333672/magic-mirror-part-i-the-idea-the-mirror)
My idea is to create a mirror, which is able to recognize your face and brings up additional information which is interesting for you in case you are in front of the mirror. Maybe your calendar entries of the day or the last tweets or something else.
Almost everybody knows the app "How old are you" from Microsoft. It was written as an example of the face API (Project Oxford) and is provided as Azure Service from Microsoft.
Everybody can use it without additional costs (there are some restrictions with the number of usage (accesses per second and total accesses per month are limited), but this should be not relevant for such a project.
Current Status
The project is a work in progress and unfortunately not finished until the deadline of the Microsoft IoT Challenge. 4 weeks were definitely not enough time for me to finalize this project from the idea to the working sample besides my daily work.
Nevertheless I will keep the work running and update this Project mainly on a weekly or 2-weekly base.
Mechanical Construction
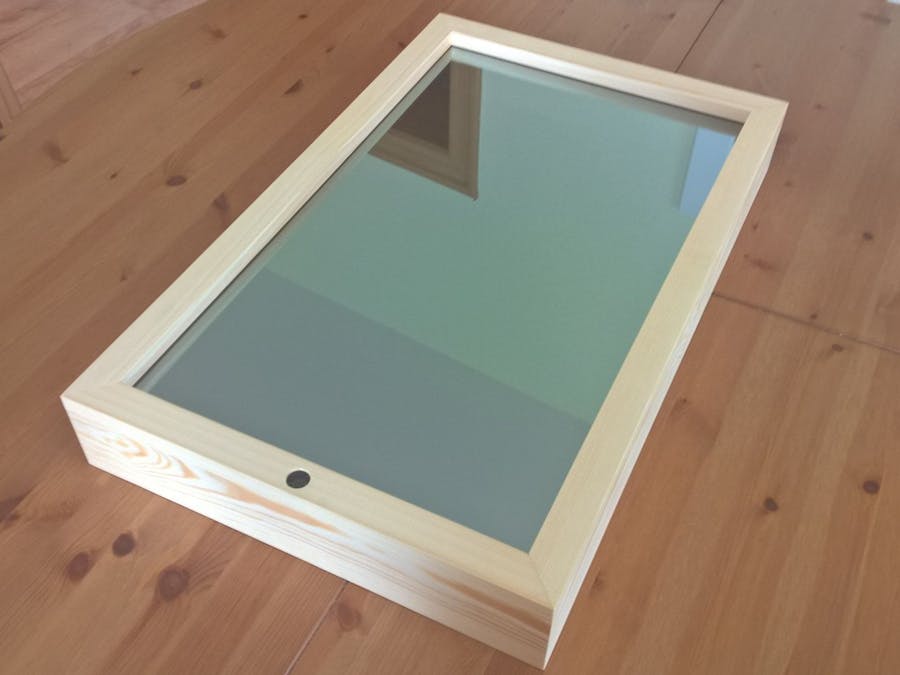
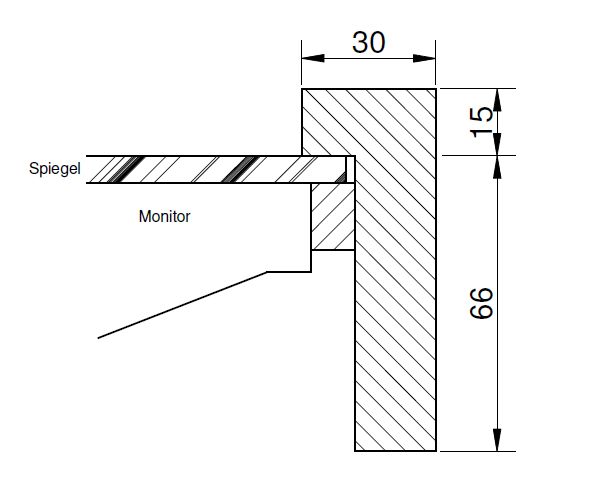
The mirror cabinet (frame) was made from pine wood. The wooden strips are glued and screwed. To have a very good looking mirror you will need a minimum of tools for wood working and some experiences. I asked a friend, a cabinet maker for the job and was very happy with the result.
The mirror glass is semitransparent and a little bit darker than a regular mirror. Behind the mirror glass, the monitor is mounted and you can read the bright parts of the screen through the mirror glass. The mirror glass itself is not cheap, I paid nearly $110 at a local glazier's workshop. Buying from Internet is a little bit cheaper, but the delivery time is 3 weeks up (here in Germany, maybe this will vary in other Countries)
I use a 24" Monitor from Benq, I think 24" is a good size with reasonably value for Money. But you can decide if you want to have a bigger or smaller Screen. It's important to use a Monitor with HDMI Input to connect it with Raspberry Pi.
For the Ultrasonic Range finder there must be an opening in the Frame.
Electrical Construction
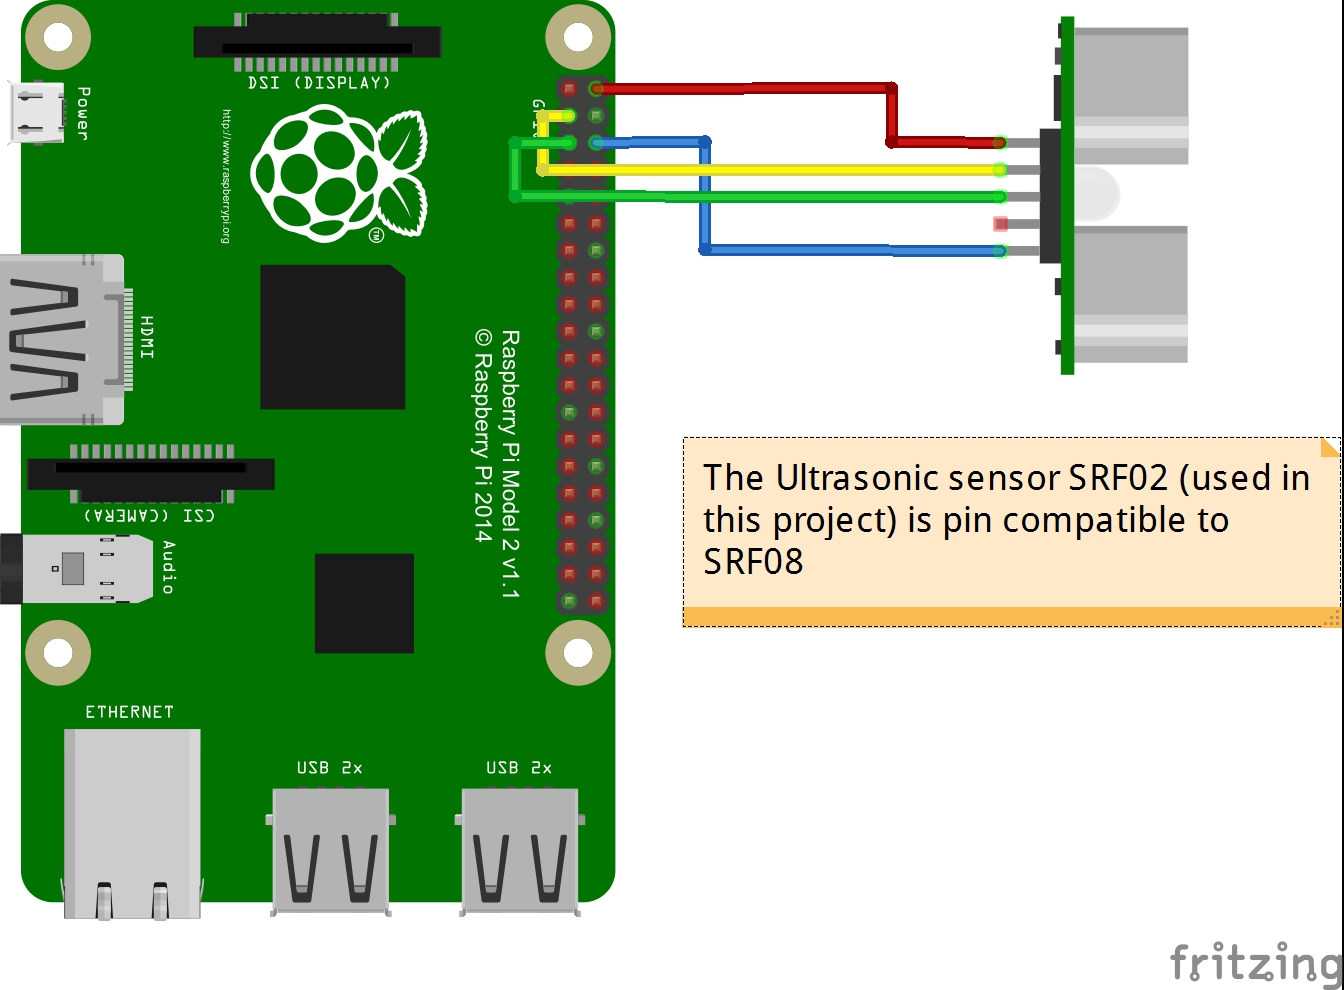
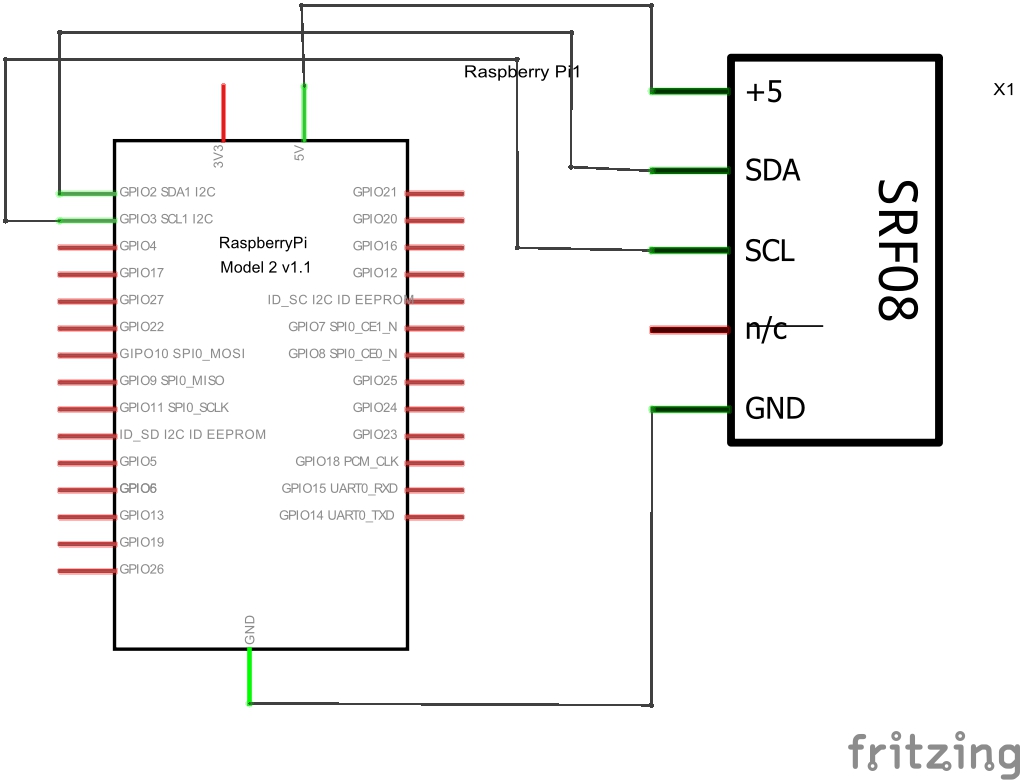
The Ultrasonic Sensor SRF02 is connected with the Raspberry Pi module with a flat ribbon cable, for the wiring connection please see the diagram below.
The monitor is connected to the Raspberry with a HDMI cable, all other parts are connected via USB connectors (1 for the Webcam and 1 is for the WiFi dongle). You will need a power supply with Micro USB jack and 5V, 2Amps.
The Ultrasonic Sensor is for detection if a person is in front of the mirror. If nobody is there, the monitor can power down to safe energy.
Software
Bringing Windows 10 IoT core to the Raspberry is very easy. There is a good step by step tutorial here: http://ms-iot.github.io/content/en-US/win10/SetupPCRPI.htm
There's also no Problem to install and prepare the Visual Studio 2015. On the Microsoft site http://ms-iot.github.io/content/en-US/win10/StartCoding.htm you can download a lot of samples for the Raspberry Pi which easy to use and work out of the box.
A good starting point for the mirror project is the Webcam example. http://ms-iot.github.io/content/en-US/win10/samples/WebCamSample.htm . For me it was much fun to see the same code working on a Raspberry, on my Notebook and on my tablet.
The next step was to integrate the Azure Face recognition Service. Here began the hard part of the work and it's still ongoing.
I followed the getting started tutorial on the Azure Website: https://www.projectoxford.ai/doc/face/Get-Started/csharp . You will need an special account for this project, it's a little bit tricky, but good described in the paper.
The next drawback for me, the paper uses the WPF libs, for the Universal Apps it has to be replaced by the Windows Runtime approach and this is a big challenge - at least for me.
When the first version of Face recognition is ready I will deploy it here in source code area.


Comments
Please log in or sign up to comment.