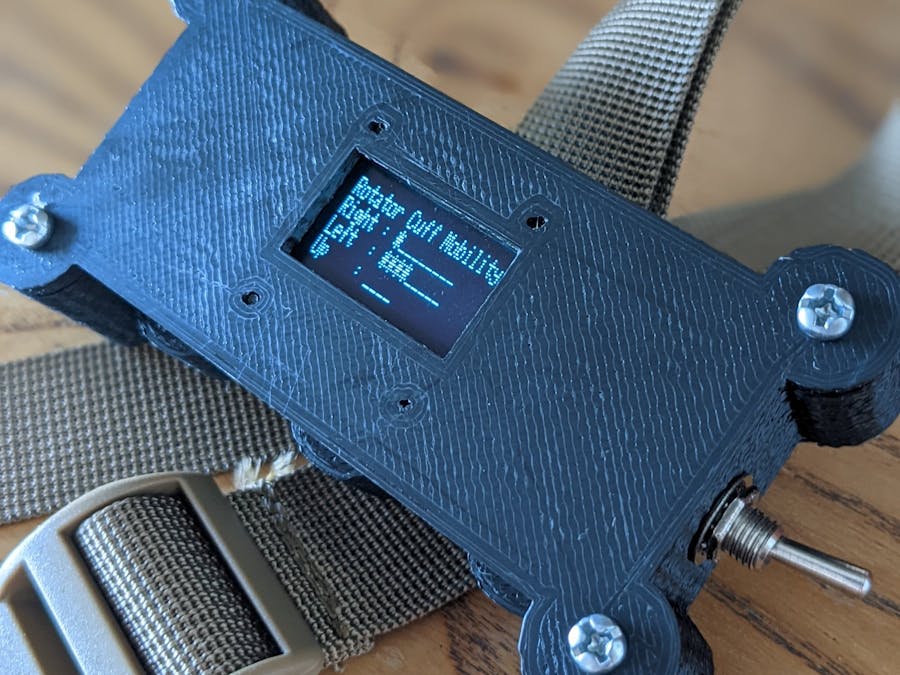
Rotator cuff injury is common in performance athletes and workers that repeatedly make overhead motions (also writers/inventors who occasionally play funk guitar)
Anyway, could a tinyML device help me to recover?
Advisory: this is just an experimental project. You should always ask your doctor about professionaltreatment.
The rotator cuff is a group of muscles and tendons that surround the shoulder joint, keeping the head of the upper arm bone firmly within the shallow socket of the shoulder. A rotator cuff injury can cause a dull ache in the shoulder, which often worsens with use of the arm away from the body. To avoid pain it is common to reduce shoulder movements. Physical therapy for rotator cuff takes more than 4 months, therefore it is expensive and some people never recovers full shoulder motion.
So what about a small AI device to recognize and track required shoulder movements?
How to track movements
Several methods could be used but there is a device specifically designed for this job: an accelerometer. Accelerometer measures acceleration. “The force caused by vibration or a change in motion causes the mass to squeeze the piezoelectric material which produces an electrical charge that is proportional to the force exerted upon it”
But, what if we don’t do movements exactly the same way? They still have to be tracked. How can we recognize those movements? With Machine Learning, we can teach the device making slightly different repetitions and then make an inference based on percentages.
How difficult is such development? With the right tools, not so complicated. It turns out there is an Arduino BLE 33 Sense with built in accelerometer and compatible with the best Machine Learning framework.
Parts- Arduino BLE 33 Sense
- Oled Screen
- Switch
- Jumper cables
- 3.7v battery
- TP4056 charger
- Custom 3d printed case
- Strap
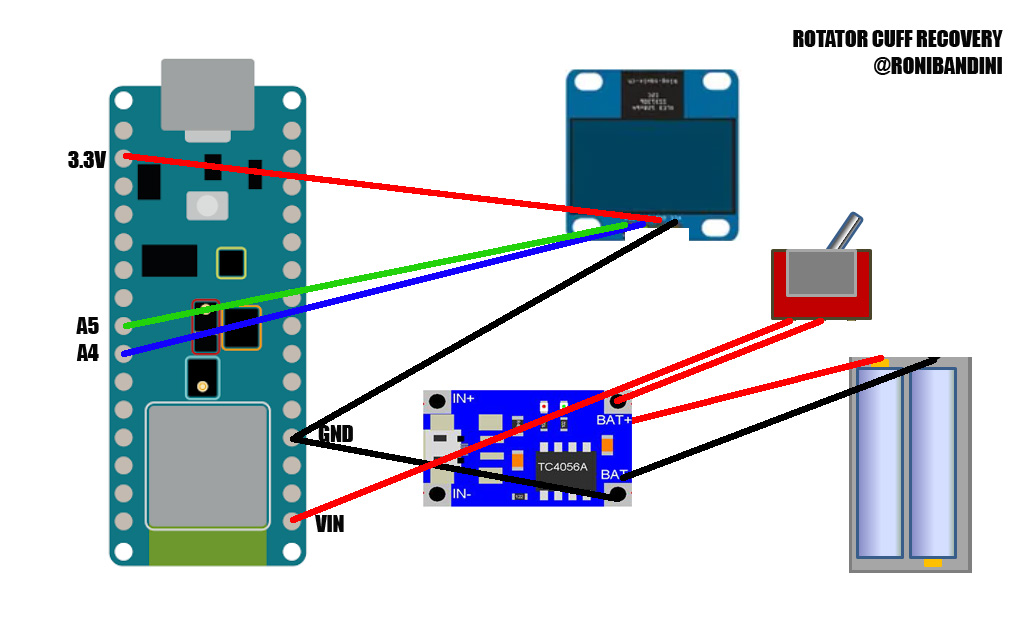
Oled Screen VCC to Arduino 3.3v, GND to Arduino GND, SDA to A4, SCL to A5. Connect the battery to TP4056 battery pins and TP4056 output to Arduino VIN and GND. You can also put a switch between TP4056 + and Arduino VIN.
Software and services3d printed caseUsing Fusion 360, the enclosure for this project was easy to design. The enclosure hast just 2 parts. It was printed with PLA. Support is required just for the body. You will also need 4 x 3mm screws and smaller screws to fix Oled screen.
Note: if you want to learn how to make your own 3d printed enclosures check out this book.
Train the modelUnless you want to train the device with new movements or simply understand how to train a Machine Learning model, you can skip this part but it is interesting to know how easy it is now to work with AI.
Go to Edge Impulse, create a free account, login to the dashboard, connect Arduino BLE 33 Sense using microUSB cable and go to Data acquisition, record new data, connect using WebUSB. A pop up window will appear to select the correct USB port and… you are all set.
Strap the BLE to your arm, set the timeframe to 180 seconds, 63.5hz, assign the tag Right and start sampling the same shoulder movement to the right over and over again with small changes, a little bit to one side, to the other, different speeds, etc. Then, do the same to the left and to the ceiling. This model was trained with 4 movements (right, left, up and idle) but of course you can use more.
Now go to Impulse Design, Create Impulse. In Time Series Data, you can setup Windows Size – data size in ms used for classification – and Size Increase for samples larger than window. Let’s use 2000 and 80. Then for frequency of the data 63.5hz
In Spectral analysis we will select 3 axis: x, y, z. For Classification we will use Keras. We will click in Save Impulse.
We will click in Spectral Features in the left bar. There we can scale axis, apply a filter and also view on device performance.
Then we go to Neural Network classifier. Set Training cycles around 35, learning rate to 0.0005, 20% of the samples for validation.
The last step is to Deploy the model to Arduino Library. A zip file will be provided. That zip file should be added as a Zip library with Arduino IDE.
If we go to Examples, the name of the project in Edge Impulse, wewill get a ready to be used inference code. Select Nano BLE 33 Accelerometer Continuous. That code will read Arduino accelerometer data and print inferences using Serial monitor.
So at this point we are not so far away to make the device. We will add to that basic inference code Oled screen libraries so we can print on screen instead of using serial monitor, and we will add counters for each movement, daily limits and anti bounce mechanism (to avoid counter increasing twice for the same movement)
Note: if you are going to download the code consider that the model was trained using left shoulder. If you need to use right shoulder, data acquisition should be made in the opposite side.
Complete code can be found in attachment section.
SettingsYou may want to change these hardcoded settings in the.ino file before uploading: number of repetitions to reach for each cycle.
int rightLimit=10;
int leftLimit=10;
int upLimit=5;
You can also change classifier parameters, like min confidence, pre defined as 65%
ei_classifier_smooth_init(&smooth, 10 /* no. of readings */, 7 /* min. readings the same */, 0.65 /* min. confidence */, 0.3 /* max anomaly */);A small demo with Spanish narration. You can enable English captions.
Final notesEven when I did the entire project - circuit, coding, data acquisition, training and enclosure - making your own device to recover from injuries still sounds like a Science Fiction tale, right?
If you want to make version 2 of the Rotary Cuff Recovery, adding eeprom permanent storage for every day movements would be useful. And a chart could be generated with that information. Also a small rotary encoder to configure settings like prediction confidence or limits for each movement.
Other worksCheck out these other projects: Literature dispenser,hacked Furby, Hunter S. Thompson ASCII art installation, hamster stock market trading
Social media


Comments
Please log in or sign up to comment.