


Hardware components | ||||||
| × | 1 | ||||
Software apps and online services | ||||||
 |
| |||||
 |
| |||||
Importing an Arduino project into MPLAB X gives the user many additional features, such as being able to set breakpoints and step through code during debugging. The user can leverage microcontroller core-independent peripheral features that are not available in Arduino.
For example, the user can create a fully featured ADC driver that supports modes such as Burst Average (very useful when dealing with noisy analog signals), tune the ADC sampling rate away from periodic noise from mains power and other sources, perform oversampling and decimation (to increase the effective number of bits in an ADC result), setting ADC thresholds or windows in hardware to trigger interrupts when the threshold conditions are met, using differential inputs (when working with Wheatstone Bridges), and much more.
Additionally, the user can leverage MPLAB X tools such as:
- Setting Watches
- Observing variables and their scope
- Observing contents of Special Function Registers (SFR) change as each line of code is executed
- IO View
- Where users can observe individual register bits and multi-bit register settings,
- Turn on and off individual bits and settings in registers, or
- Change the value of entire registers
- Code auto-completion
- CTRL + Click on variables and functions to find where they are declared
- CTRL + Esc to return
- Accessing header files to use built-in macros for register settings
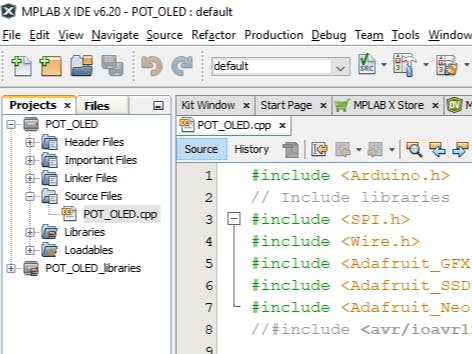
This guide will import an Arduino project that uses an AVR128DB48 Curiosity Nano dev board and the Curiosity Nano Explorer board (about to be released around mid 2024).
The project uses the potentiometer, OLED display, and NeoPixel ring on the Explorer board. Adafruit libraries for the OLED display and NeoPixels were used for the Arduino project.
The AVR-Dx (DA, DB and DD) series of microcontrollers can be used with Arduino by leveraging the DxCore library in the Arduino IDE. DxCore installation instructions for the Arduino IDE can be found here.
https://github.com/SpenceKonde/DxCore/blob/master/Installation.md
Note: It is required to install DxCore in Arduino version 1.8.x before using the Arduino Import Tool.
Note 1: There is now a NeoPixel library within DxCore that overcomes the 16MHz limitation of the Adafruit NeoPixel library and allows the microcontroller to run at clock speeds exceeding 16MHz.
Note 2: Before starting, this process requires either Arduino 1.8.x or the Arduino CLI to be installed on your machine.
Note 3: After downloading the Arduino code from this article, open the code with Arduino 1.8.x in which you have already installed DxCore, and click the Verify button. Arduino will ask you to place the file into a folder with the same name. Click OK to do that.
If you do NOT have the Adafruit_Neopixel.h and Adafruit_SSD1306.h libraries installed, you will need to do this in Arduino and build the project before importing the project into MPLAB X. To install these libraries in Arduino: Sketch -> Include Libraries -> Manage Libraries. Then search for Adafruit NeoPixel and install the Adafruit NeoPixel Library. Then search for Adafruit SSD1306 and install the Adafruit SSD1306 library. It may ask you whether you want to install all dependencies, or just the library itself. You need to install all dependencies in Arduino before importing into MPLAB X.
After installing those libraries in Arduino, go to Tools -> Board and select the AVR-DB series (no bootloader). Select the COM port your AVR-DB Curiosity Nano is connected to. Then configure the settings as shown below.
Now click the Verify button in Arduino to build the project. If it builds successfully, you are ready to import the project into MPLAB X.
If it does NOT build successfully, it is recommended you enable Verbose output during both compilation and upload. This will give detailed information on why a build or upload failed. To enable verbose mode, go to File -> Preferences and check the boxes next to Compilation and Upload (see below).
Importing the Arduino project into MPLAB X
To use the Arduino Import Tool in MPLAB X, the plugin must first be installed.
Open MPLAB X, then click Tools -> Plugins
Click on the Available Plugins tab. Next click on the Name field to sort the plugins alphabetically. Click the checkbox next to Arduino Import Plugin and then click Install. If MPLAB X asks to restart the application, click Ok. If MPLAB X does NOT ask to restart the application, a fresh start is recommended.
Now it's time to import an Arduino project!
We have provided the Arduino project described at the beginning of this article and will now import it.
IMPORTANT NOTE: Its strongly recommended to NOT use online storage such as OneDrive as you may encounter problems when importing the project. Instead store the original Arduino project and the imported MPLAB X project locally.
In MPLAB X go to File -> Import -> Import Arduino Project.
The Project Setup pop-up window will appear.
1. Navigate to the local directory where you saved your Arduino project. Select the .ino file.
2. To keep everything easy to find, I usually set the Target Project Location to match the imported sketch folder location.
3. Navigate to the Arduino 1.8.x or Arduino-CLI location on your computer. This is often under C:\ProgramFiles (x86)\Arduino
4. Under Platform, select DxCore
5. The default platform location for DxCore is C:\Users\<username>\AppData\Local\Arduino15\packages\DxCore\hardware\megaavr\<select highest version>
6. This project used an AVR DB-series (no bootloader)
7. Give your project a name. I kept the same name as the original Arduino project
8. Project directory. I used the same directory as the original Arduino project directory
9. Ensure the Copy All Dependencies box is checked
Click Next.
The Board Configuration pop-up window will appear.
1. Select the microcontroller. The Arduino project used an AVR128DB48.
2. Millis()/micros() Timer. TCB2 (recommended)
3. attachInterrupt() version: On all pins, with new implementation
4. Multivoltage I/O (MVIO): Enabled
5. Clock Speed: The Arduino project used the 16MHz internal oscillator
Note: The Arduino project leveraged Adafruit’s NeoPixel library which requires a 16MHz clock. If the user wants to include a faster clock, consider the DxCore NeoPixel library which supports faster clock speeds.
Click Next.
The Select Tool pop-up window will appear.
Select the programming tool. The Arduino project used an AVR128DB48 Curiosity Nano.
Click Next.
The tool will then start importing your Arduino project.
A pop-up will appear stating that a file has been renamed in order to build the project.
Click OK.
The project will then complete importing into MPLAB X. Two projects will appear. One is for the libraries, the other is for the project itself.
Next the compiler needs to be set up.
In MPLAB X select Tools -> Options
1. Click on Embedded
2. Click on the Build Tools tab.
3. Click Add
Next we need to navigate to the DxCore build tools.
The base directory for the DxCore build tools will be found at the following location:
C:\Users\<username>\AppData\Local\Arduino15\packages\DxCore\tools\avr-gcc\7.3.0-atmel3.6.1-azduino7b1\bin
It will then auto-populate the other fields for the C Compiler, Assembler, and Make Command.
Click OK.
You will then see AVR-GCC (v1.00) in the list of available toolchains on the left.
Click OK.
Next under MPLAB X projects, right click on the libraries project, and select Properties.
Under Compiler Toolchain, select AVR-GCC (v1.00). Click Apply.
Next, click on AVR GCC (Global Options). Under Additional Options add: -Og -g2.
Click Apply.
Next, click avr-gcc. Under Option Categories select Optimization and confirm the optimization-level field is set to s. If it is not set to s, do so now.
Click Apply, then click OK.
Now you can build the libraries project. Clean the dropdown next to the Clean and Build toolbar button and select Clean and Build project.
You will see the green Build Successful message in the lower pane.
Now you need to repeat that process for the project itself.
Right click on the project itself and select Properties.
Under Categories click Avr GCC (Global Options). Under Additional Options add: -Og -g2.
Click Apply.
Next, click avr-gcc. Under Option Categories select Optimization and confirm the optimization-level field is set to s. If it is not set to s, do so now.
Click Apply, then click OK.
Now you can build the libraries project. Clean the dropdown next to the Clean and Build toolbar button and select Clean and Build project.
You will see the green Build Successful message in the lower pane.
Now you can program the microcontroller, set breakpoints in your code, enter debug mode, and step through your code.
To set a breakpoint, click on the line number next to where you want to set the breakpoint.
Now you can begin debugging the project. Click the Debug button on the toolbar.
You can now use the microcontroller's onboard peripherals with much more control than Arduino gives you.
For example, you could write a fully featured ADC driver to take many samples in a single burst to mitigate random noise. You could change the sampling duration to tune the ADC away from periodic noise (such as mains power noise). You could perform a differential ADC read (useful for Wheatstone Bridges).


Comments
Please log in or sign up to comment.