A GPU these days can be harnessed to do all sorts of pattern recognition. The NVIDIA Jetson Nano is a pretty cool board that brings the power of GPU computing to the edge. The Developer kit has a CUDA compatible GPU that lets it run Deep Learning applications on the Edge.
AimWhat I'm going to show you today is how to use the Jetson Nano as the brains of a rover. If you already have an Arduino powered rover/bot, you can easily add the Jetson Nano as a high-level decision making circuit that can make decisions off of input like Images, Video, Sound basically any sensor data.
The first part of the code consists of an Arduino sketch that shows how to use a simple binary communication protocol that can send and receive integers, floating points etc. The Arduino here acts as a client. Communication.h defines the interface for sending sensor data.
The server will be the Jetson nano, processing and responding with commands that instruct the bot to do stuff. communication.py contains the code for collecting, processing the sensor info and responding with commands.
Refer to the repo for more instructions.
Let us go through an overview of my build for the rover.
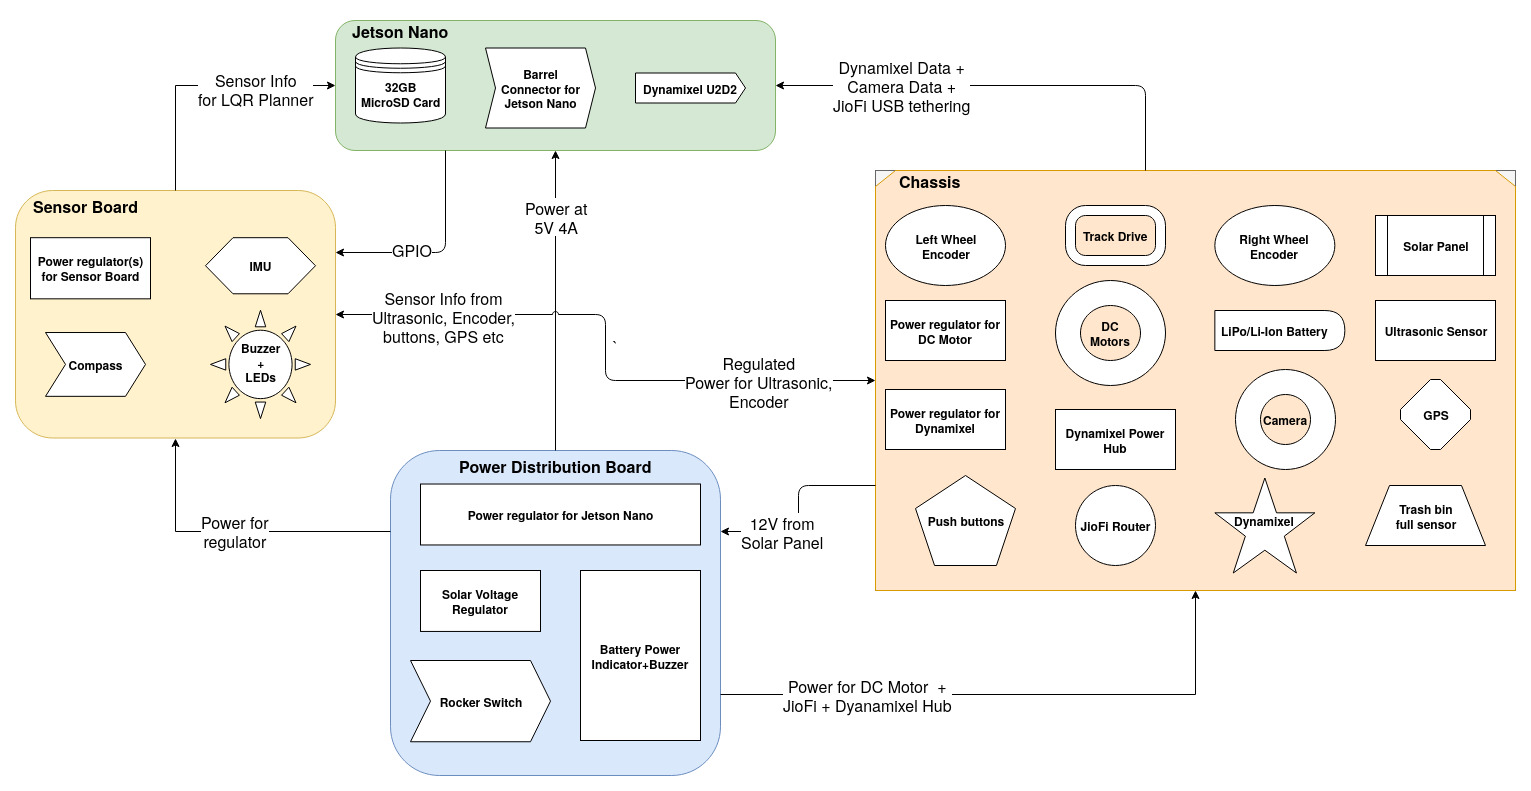
StructureThe Basic structure of the rover is as below:
A few things to note are that the Jetson Nano mounting screws are M2, whereas spacers I have are all M3. I super-glued some M2 nuts on top of the M3 spacer and voila M3-M2 hybrid spacers!
Step One : Collect the parts for the CircuitThe main part of the custom circuit-board consists of a single perfboard mounted as the first layer on the rover above the Chassis. This layer consists of:-
1. The arduino
2. The magnetometer/IMU
3. Distance sensor (HC-04)
4. Motor Driver L293D
5. On/Off Switch
6. Buck Regulator
7. Any other application specific hardware you want to add
Step Two: Solder the prototype circuitThis bit varies depending on the purpose of the robot. I've not added the circuit diagram for the specific bot I've made, but it looks something like this.
1. Assemble the Chassis - In the case of the Adafruit chassis mentioned in the parts list, I had to assemble the aluminium plates with the motor in between. Install the wheels and mount the optical rotary encoder along with the discs. This is also the time to mount the battery holders and the Li-ion batteries.
2. Mount the perfboard on top of the chassis using spacers.
1. Next, setup the Jetson Nano on top of the perfboard using another set of 4 spacers.
2. Then connect the Jetson Nano to the Arduino board using a USB cable, so that the Jetson is able to communicate with the Arduino using it's Serial port at `/dev/ttyUSB0`
3. Connect the Raspberry Pi Camera module v2 and the 4G/WiFi Router
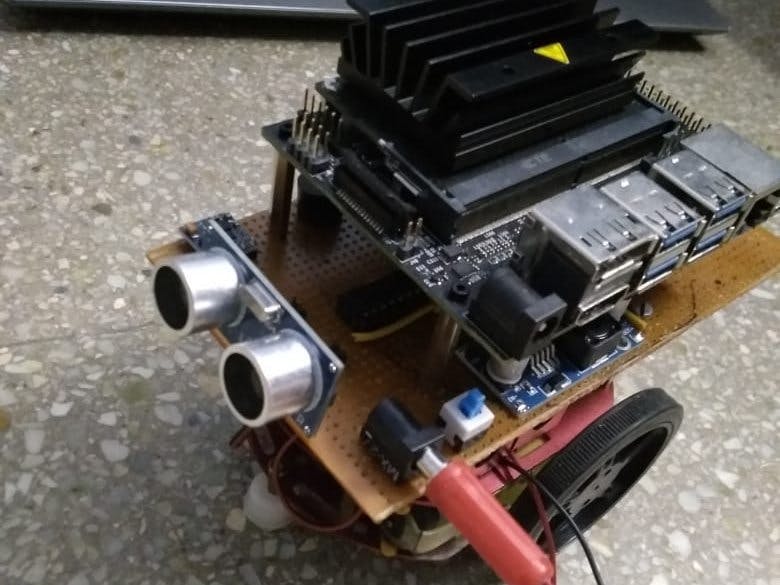
Finally you should have something like this:-
Flash the ino file on the arduino
Step Four: Flash the Jetson with JetcardUse Balena Etcher to flash the JetCard image onto the 32gb/64gb MicroSD Card. It is a readymade image for the Jetson Nano containing the requisite libraries for AI/Deep Learning
Install the following python libraries as well - pyserial
pip3 install pyserialThe linked repository at roverCode contains the code to calculate the magnetic heading using sensor info from the Arduino and returns commands to navigate to the magnetic north direction using the shortest turn.
1. Clone the repo onto the jetson nano
2. Change directories into the jetson-nano-plastic-detector/serial-communication
3. The following command will run the Jetson code to control the bot and make it navigate automatically to magnetic north.
python3 communication.pyUse this as a starting point to go out and make your own AI powered Arduino rover! The repo is all yours to fork.
Thanks for Reading.


Comments
Please log in or sign up to comment.