On the Google Cloud site we have to log in to the account and, before using cloud, you have to give your credit card details. Some of the features are free to use like here we are using MySQL database which is free to use.
https://cloud.google.com/
- Go to Console, you will see a page like this.
- Go to the Cloud SQL Instances page in the Google Cloud Platform Console.
- Before creating instance you have to select project or create new one. Click Create instance.
- Click Choose Second Generation.
- Enter an ID for the instance. You do not need to prepend the project ID onto the instance ID.
- If you want to configure the instance for high availability, select the Create failover replica check box.
- If needed, set any of the other optional instance settings.
- Click Create.
- After the instance finishes initializing, select the instance to open it.
- Click Access Control > Users.
- Click Change root password and provide a password for the 'root'@'%' MySQL user.
- Go to the Cloud SQL Instances page in the Google Cloud Platform Console.
- Record the IP address of the instance.
- Log in to the client machine where your MySQL client is installed.
- Click What's my IP to determine the IP address of the client machine.
- In the Instances page in the Google Cloud Platform Console, click the instance to open its Overview page.
- Click Access control > Authorization.
- Under Authorized networks, click Add network and enter the IP address of the client machine where your MySQL client is installed.
IP ADDR :- 182.73.177.102 // Global IP
- Click Done, then click Save at the bottom of your page to save your changes.
- Connect to your instance, either with SSL or without SSL.
(This should be done on a RASPBERRY PI)
Start the MySQL client:
mysql --host=[INSTANCE_IP] --user=root --password
Example:-
mysql --host=130.211.196.243 --user=root –password
Enter the root password at the prompt. Verify your connection by listing the databases on the instance:
mysql> show databases;
| Database|
| information_schema | | mysql |
| performance_schema |
- Go to the Google Cloud Platform Console.
- Click the Cloud Shell icon towards the right in the tool bar. The Cloud Shell takes a few moments to initialize.
- At the Cloud Shell prompt, use the built-in MySQL client to connect to your Cloud SQL instance:
gcloud beta sql connect [INSTANCE_ID] --user=root
Example:-
gcloud beta sql connect 130.211.196.243 --user=root
- Enter your root password.
- Verify your connection by listing the databases on the instance:
mysql> show databases;
| Database|
| information_schema | | mysql |
| performance_schema |
Instance
Instance details
Using Cloud Shell
1. Raspberry Pi configuration for static IP
- Go to directory:
cd /etc
- Then open file by command
sudo nano dhcpcd.confand at last add these line and save it.
 interface eth0
static ip_address=182.73.177.100
interface wlan0
static ip_address=182.73.177.102           //GLOBAL IP
static routers=182.73.177.97              //Default gateway
static domain_name_servers=182.73.177.97
- Go to directory:
cd /etc/network
- Then open interfaces file by command, sudo nano interfaces and add these lines:
in iface eth0 static
address 182.73.177.102
netmask 255.255.255.248
gateway 182.73.177.97
- After that check whether IP is changed to static or not,if not then use this command. Flush the Raspberry Pi IP by using command:
sudo ip addr flush dev eth0
sudo ifup eth0
2. MySQL Installation and Setup
sudo apt-get update
sudo apt-get upgrade
To install MySQL
sudo apt-get install mysql-server mysql-client
Once the installation begins, you will be asked to provide a master password for your MySQL installation. Ensure you choose a good secure password, and it’s a good idea to give MySQL a different password to the one you use to access your Raspberry Pi.
Log in to MYSQL
mysql -u root -p
password: -------------------------
- Create database
mysql > create database db_name;
E.g. create database tempsens;
- Create user:
mysql > create user db_user;
E.g. create user ruchir;
- Grant privileges:
mysql> grant all on db_name.* to 'db_user'@'lacalhost' db_password';
E.g. grant all on tempsens.* to 'ruchir'@'localhost'12134';
- Use command to change database and create table.
use tempsens
- Create table:
create table weatherData (
weatherDataID int(11) AUTO_INCREMENT NOT NULL,
datetime TIMESTAMP DEFAULT CURRENT_TIMESTAMP,
humidity decimal(4,2) NOT NULL,
tempC decimal(4,2) NOT NULL,
constraint weatherData_PK primary key (weatherDataID)
);
- To see tables:
show tables;
- To see elements in table:
describe [table_name];
E.g. describe weather Data;
- To see data in table:
SELECT * FROM [table_name];
E.g. SELECT * FROM weatherData;
Install Adafruit_Python_DHT library
sudo apt-get install build-essential python-dev git
git clone https://github.com/adafruit/Adafruit_Python_DHT.git
cd Adafruit_Python_DHT/
sudo python setup.py install
Install MYSQLdb
sudo apt-get install mysql-server python-mysqldb
Program
import MySQLdb
import subprocess
import re
import sys
import time
import datetime
import Adafruit_DHT
sensor = Adafruit_DHT.DHT11
pin = 4 # GPIO numbering (Pin # 7)
# Open database connection
dbconn = MySQLdb.connect("localhost","root","password","tempsens") or die("could not connect to database")
cursor=dbconn.cursor()
# Continuously append data
while True:
timestamp = datetime.datetime.now()
today = timestamp.strftime("%d/%m/%Y %H:%M:%S")
print today
# Run the DHT program to get the humidity and temperature readings!
humidity, temperature = Adafruit_DHT.read_retry(sensor, pin)
print 'Temp={0:0.1f}*C Humidity={1:0.1f}%'.format(temperature, humidity)
# MYSQL DATA Processing
print"SQL Injected!"
cursor.execute("INSERT INTO weatherDataa (ts,humidity,tempC ) VALUES (%s, %s, %s)", (timestamp, humidity, temperature))
dbconn.commit()
#cursor.close()
time.sleep(5)
Example:
dbconn =MySQLdb.connect("130.211.196.243","root","password","db_name") or die("could not connect to database")
Pin Diagram of RPi
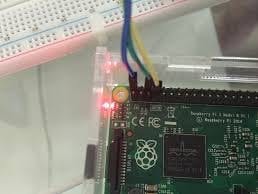
Connections of RPi and DHT11
For connecting to the Cloud: You must have a Global IP and you must authenticate the System IP (Raspberry Pi) to Google Cloud. The IP that is generated after generating instance should be used in the Raspberry Pi Python script. (localhost is replaced by IP 130.211.196.243)
Database users should be the same for both RPi and Cloud.


Comments