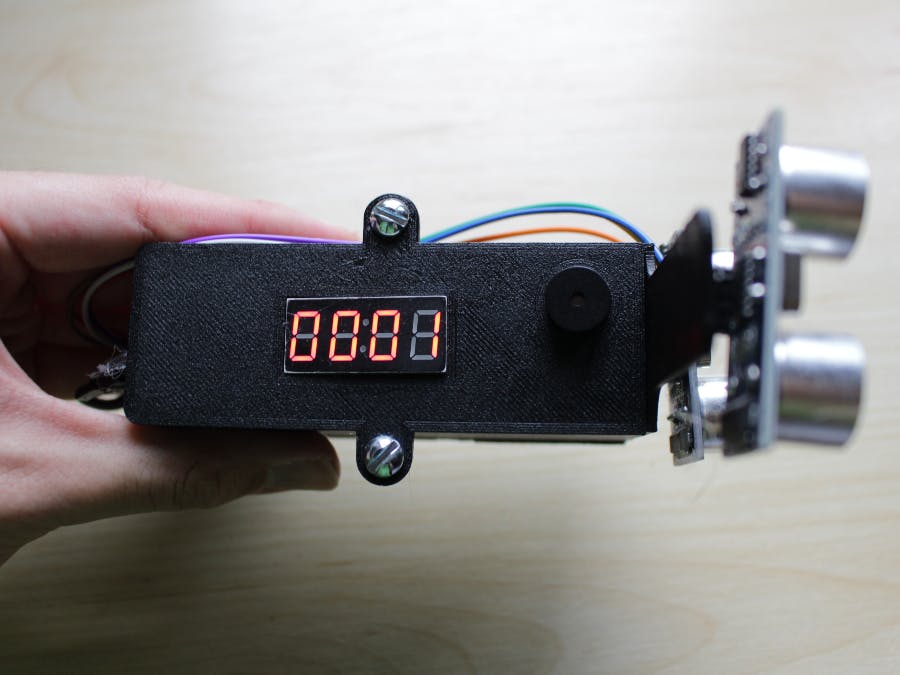
With the Coronavirus pandemic still very much a problem, practicing social distancing and staying away from others is especially important. However, this is difficult to do in enclosed and crowded areas.
Here is where the Room Occupancy Counter can help. It keeps track of the number of people in a room or building by increasing a counter when people enter and decreasing the counter when people leave. Once the number of people in an area surpasses the maximum number of people allowed (which can be set by the user), an alarm will go off until the number of people is within bounds again.
This can prevent buildings and rooms from being over crowded, which can help to limit the virus's spread by making social distancing easier to practice.
VideoInstructionsHardware Instructions
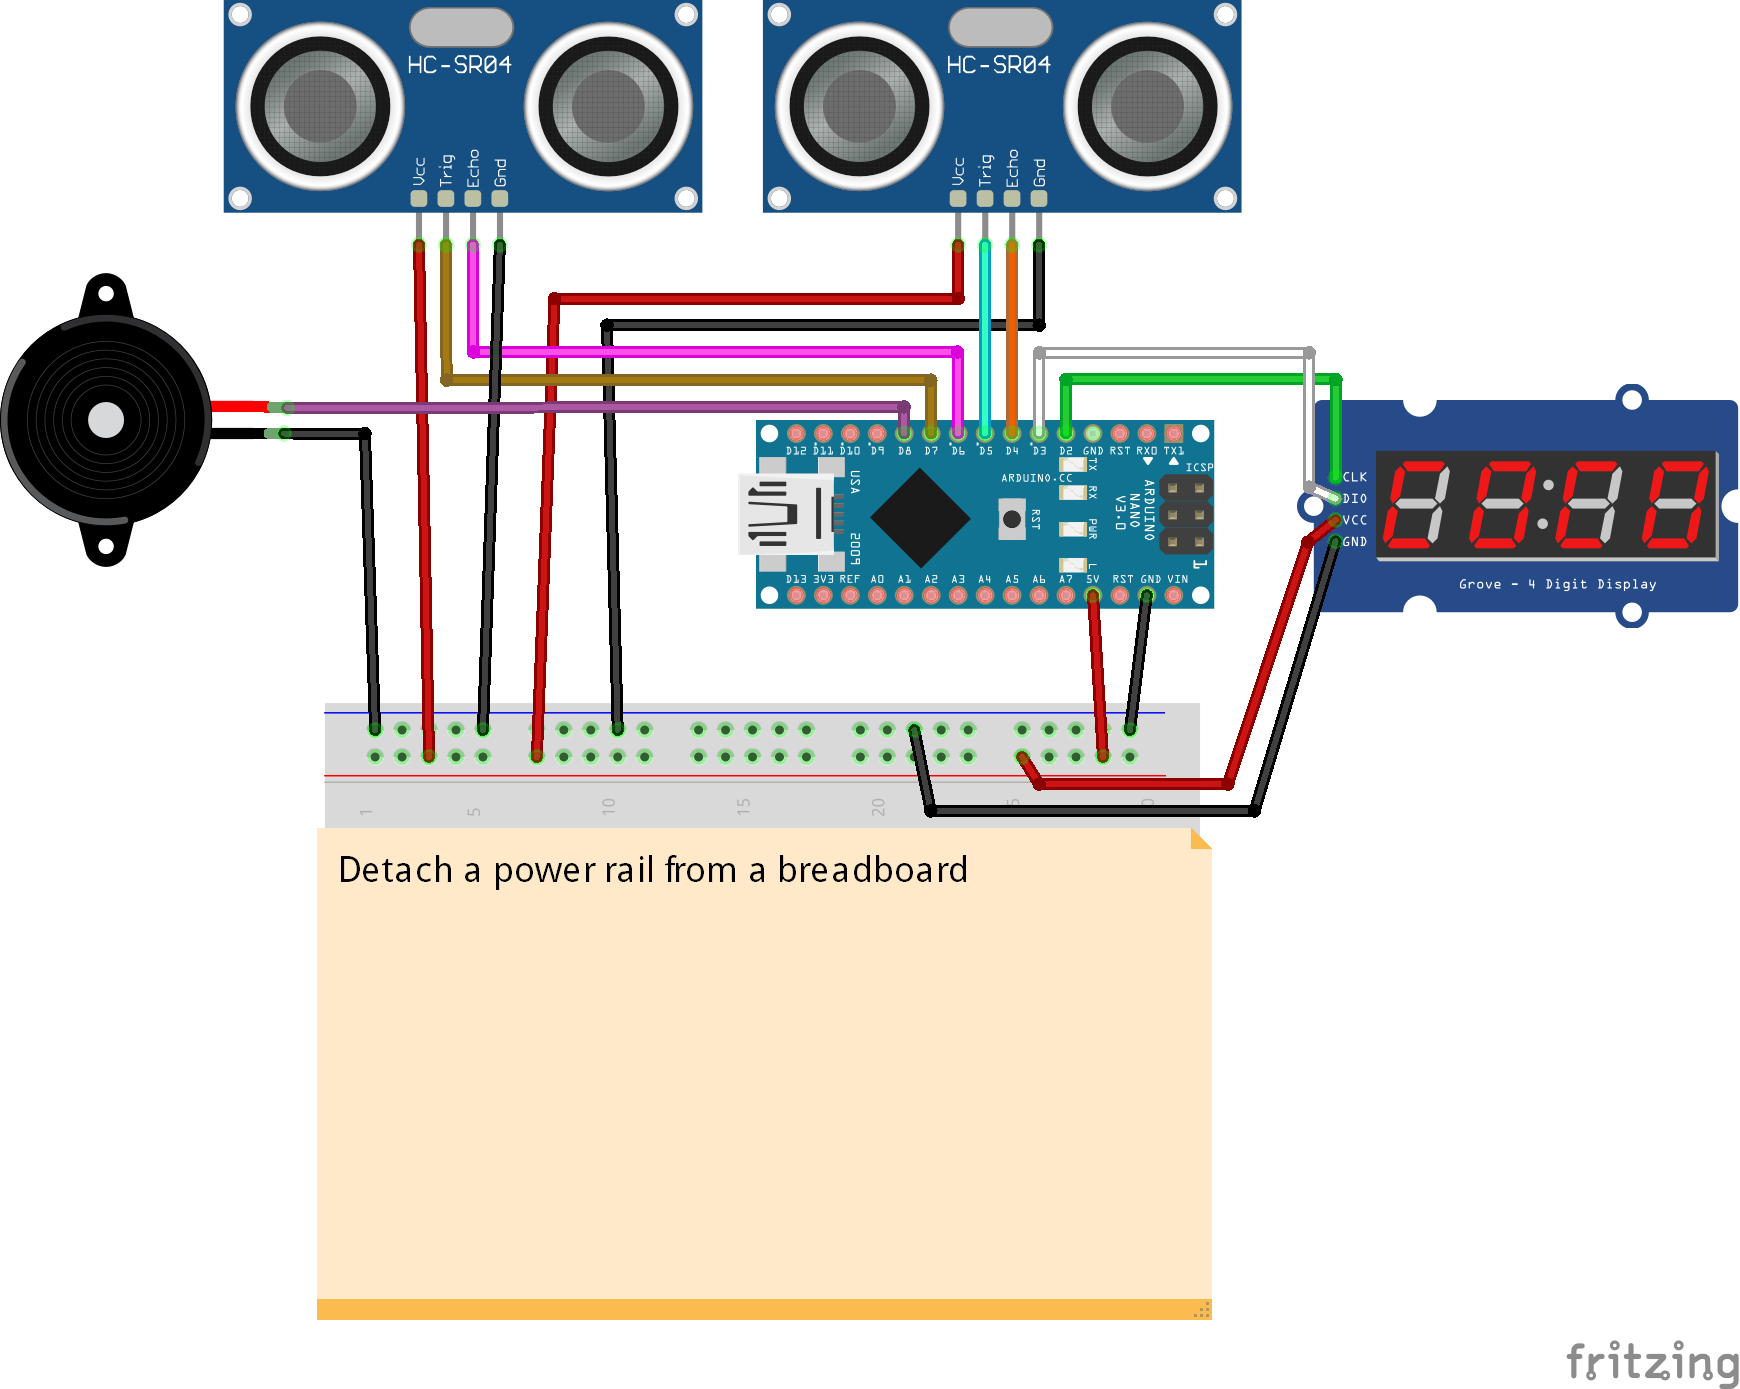
1.) Build the circuit based on the schematics found in the "Schematics" section on the bottom of the page. To save space, detach a power rail from a breadboard and use that instead of the entire breadboard. Also attach the USB cable at this point.
2.) Download and 3D print the enclosure files found in the "Custom parts and enclosures" section.
Alternatively, you can build the enclosure with cardboard: print out the "Cardboard Cutout Template" in the "Custom parts and enclosures" section, attach the printed template to a piece of cardboard, and cut it out. Next, glue or tape the sides together.
3.) Hot glue the ultrasonic sensors to the part of the enclosure that juts out. There should be a roughly 40mm space between the sensors.
4.) Hot glue the display and buzzer to the lid. Then place the rest of the device into the enclosure and screw the lid close.
To help save space, place the breadboard power rail under the Arduino and between the Arduino's pins like so:
Software Instructions
1.) Download the code found in the "Code" section on the bottom of the page and open the code using the Arduino IDE.
2.) In the Arduino IDE, change the "maxPeople" variable on line 1 to the maximum number of people you want to allow before the max occupancy alarm goes off.
3.) Install the TM1637 library to the Arduino IDE. To do this go to Sketch > Include Library > Manage Libraries. Type "TM1637" in the search bar, then install the first result that appears.
4.) Upload the code to the device.


Comments
Please log in or sign up to comment.