Back-up collision has been a major problems, The U.S. Center for Disease Control reported that from 2001–2003, an estimated 7,475 children (2,492 per year) under the age of 15 were treated for automobile back-over incidents. About 300 fatalities per year result from backup collisions. By 2018 all the cars sold in United States will require a mandatory backup camera.
How do we solve the problem?Most of the cars in the market today still do not have backup camera, that includes about half of the the cars that's being sold in the US today, and much more than half across the globe. We can solve this problem by installing a camera on the back of the car, using the space of license plate.
Walabot will be able to detect the distance of the target closest to the vehicle.
Intel RealSense R200 camera will give us a greater detail on what's being seen, including low light situation.
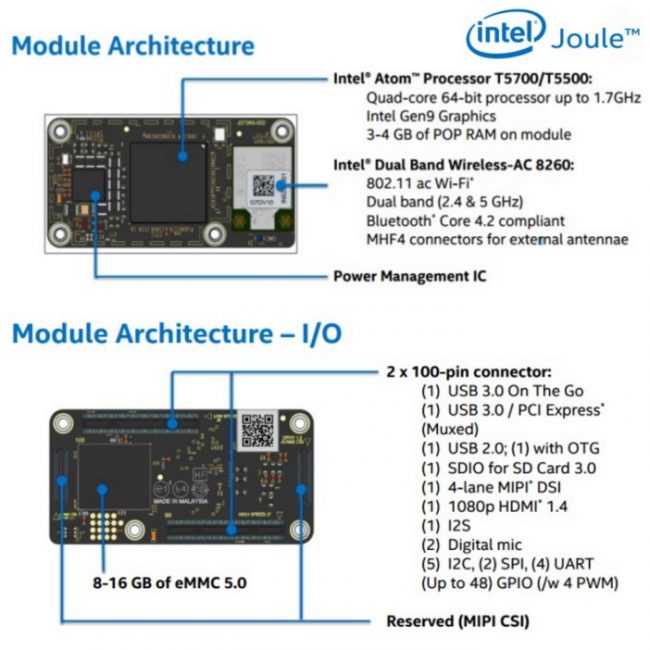
Intel Joule developer kit is powerful enough to run RealSense cameras along with Walabot. Raspberry Pi isn't powerful enough to run a RealSense 3D camera, in which we can add a lot more features in the future that can improve functionalities of the car. Same version can be used with Pi with a normal USB camera, but it won't be good for night time.
Android phone/tablet being used to display the Backup Camera, this is to reduce the cost of an additional screen. iOS version can be built upon request.
Through of those components, we will be able to build an Rear End Vision that shows user the back of the car.
Step 1: Gather hardwares you need- Intel Joule
- Walabot Pro
- Intel R200 RealSense Camera
- Android phone/tablet that runs 5.0 or higher
- Car's adaptor for plug output and 12VDC AC Adaptor (this is for demo to power up the Joule, production version will contain different power mechanism)
- USB Hub for hooking up camera and Walabot (USB3 for Camera and USB2 for Walabot)
- DC to AC Direct Plug-in Power Inverter
- Generic 3D printer to print out the custom built license plate frame
Since we've decided to go with Linux route, follow the guide https://developer.ubuntu.com/core/get-started/intel-joule to install Ubuntu on Joule. Ubuntu gives us great flexibility to run an actual operating system on a IoT based chip.
Because we are using Android phone/tablet to save the cost on bill of material, also more accessible to the users, we will be using motion library to host the camera similar to the security cameras. Once Ubuntu is installed and connected to wifi, we can open the terminal and use following command. We first connect the camera to Joule via USB3 port then do the following steps.
sudo apt-get update
sudo apt-get install motion
b. Copy configure files:
mkdir .motion
sudo cp /etc/motion/motion.conf ~/.motion/motion.conf
c. Configuring the file, for those who are familiar with ubuntu can install Sublime to do easier text editing, otherwise we can edit it inside command line.
sudo nano ~/.motion/motion.conf
d. After plugging in R200 camera, we can change the following lines in motion.conf
This is to put it in the background mode:
# Start in daemon (background) mode and release terminal (default: off)
daemon on
This is to use RealSense Camera's camera view.
# Videodevice to be used for capturing  (default /dev/video0)
# for FreeBSD default is /dev/bktr0
videodevice /dev/video2
Changing the width and height, 1280 x 720 worked great for me, but you can play around with the dimensions to see what fits your need.
# Image width (pixels). Valid range: Camera dependent, default: 352
width 1280
# Image height (pixels). Valid range: Camera dependent, default: 288
height 720
I set this to 30, the higher you set the number the more computing power it would require. You can play around to see what the benchmark for it, but 30 has worked great for me.
# Maximum number of frames to be captured per second.
# Valid range: 2-100. Default: 100 (almost no limit).
framerate 30
Since we are always streaming back of the car, we can set a dedicated port, we use 5001
###########################################################
# Live Stream Server
############################################################
# The mini-http server listens to this port for requests (default: 0 = disabled)
stream_port 5001
# Quality of the jpeg (in percent) images produced (default: 50)
stream_quality 50
# Output frames at 1 fps when no motion is detected and increase to the
# rate given by stream_maxrate when motion is detected (default: off)
stream_motion off
# Maximum framerate for stream streams (default: 1)
stream_maxrate 60
# Restrict stream connections to localhost only (default: on)
stream_localhost off
You can then run ifconfig and figure out the ip address and run in terminal, the port will be 5001.
motion
If there are no errors, it's easy to check the camera from your computer using the ip, fix the errors such as permission problems if there are any.
Once this runs, we can add this to startup application in Ubuntu.
motion.conf is being attached in the code section, you can check out more settings there.
Step 4: Setup WalabotWith camera in place, we still need to setup walabot, this can detect the distance between the vehicle to the object behind, giving a clear vision on how we should
a, download the deb file from http://www.walabot.com/WalabotInstaller/Latest/walabot-maker.deb
Follow instructions from http://api.walabot.com/_install.html#_linuxInstall to install Walabot API so it can be imported to python projects.
There is an mistake on the website on the part where it's installing Walabot API https://walabot.com/api/_pythonapi.html#_installingwalabotapi where it states
python -m pip “/usr/share/walabot/python/WalabotAPI-1.0.21.tar.gz”
That should be
python -m pip install "/usr/share/walabot/python/WalabotAPI-1.0.21.tar.gz"
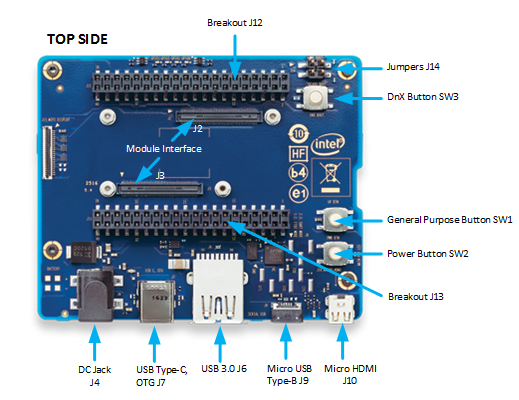
b. connect Walabot Pro via USB 2, I couldn't get the usb3 work but usb2 works fine connecting to linux. Since Joule only have one USB3 port, connect an additional USB2 port to accommodate Walabot Pro here
c. Test out the Walabot project such as https://github.com/Walabot-Projects/Walabot-SensorTargets by running following command in the folder
python SensorTargets.py
This should give you a good test to see whether Walabot is running correctly, as well as how to measure distance on things you want. The DistanceMeasure example was not too consistent on the measuring, and zPosCm seems to be extremely accurate, so I've decided to use the zPosCM for the demo.
d. We still need to pass the data to the display device, since we are running this on android to reduce cost of material, we can use sockets. We use following code to setup the socket and udp in python.
MYPORT = 5002
import sys, time
from socket import *
s = socket(AF_INET, SOCK_DGRAM)
s.bind(('', 0))
s.setsockopt(SOL_SOCKET, SO_REUSEADDR, 1)
s.setsockopt(SOL_SOCKET, SO_BROADCAST, 1)
Following command will broadcast data on update
s.sendto(str(targets[0].zPosCm), ('255.255.255.255', MYPORT))
e. When this is done, we can set it up in Startup Application
e. Walabot is now setup and transferring data via UDP, full python code can be seen in the code attachment area. Screenshot below is the print out of what it should look like when there is no area. The code is attached in the code section.
We are creating our own wifi hotspot for android device to transfer data through. Using following command at start will automatically set it up. This is being used for Ubuntu 16.04 or later, as this is being used. We will be automatically connect this via Android app in the next step. Use this command at the Startup Applications.
nmcli device wifi hotspot con-name vehicle-rear-vision ssid vehicle-rear-vision band bg password safedriving
Inside walabot's python file, we will also update it where we will be sending udp message to devices that's connected via private hotspot. This is to ensure no packet being lost.
out = os.popen('ip neigh').read().splitlines()
for i, line in enumerate(out, start=1):
    ip = line.split(' ')[0]
    s.sendto(str(targets[0].zPosCm), (ip, MYPORT))
Android app is built for the displaying the device, mainly because it reduces bill of material as otherwise a separate screen can be both expensive and difficult to install. As for this project we can use Android phone/tablet.
Android focuses on 3 parts that we've done earlier,
- Connect to the wifi hotspot created via IoT device (Intel Joule)
- Stream the RealSense Camera via motion through wifi
- Measuring distance from Walabot target through udp
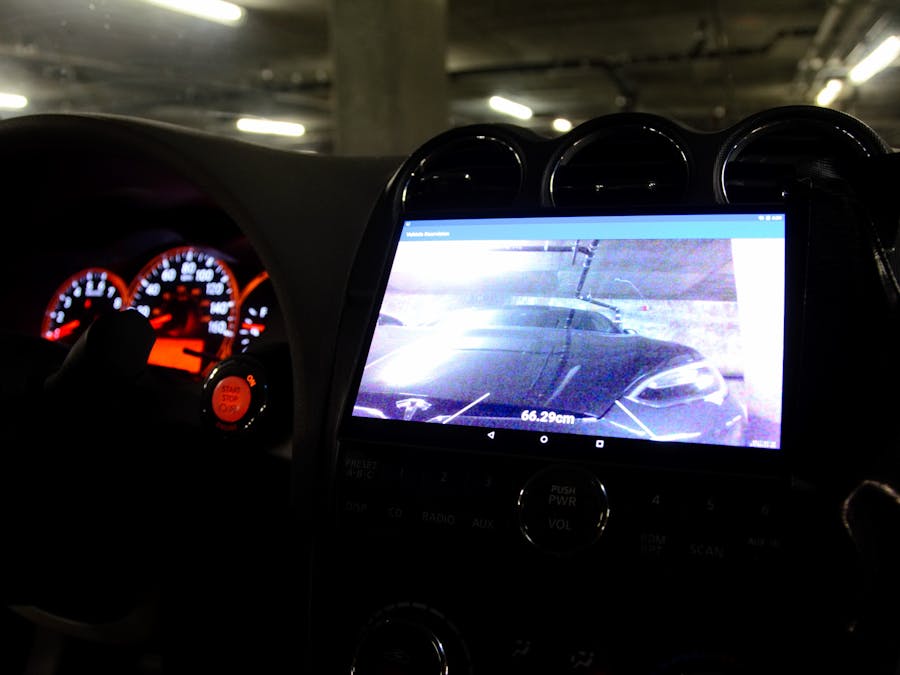
After setting up everything and install the Android app (open sourced here), you will be able to see the camera working along with walabot.
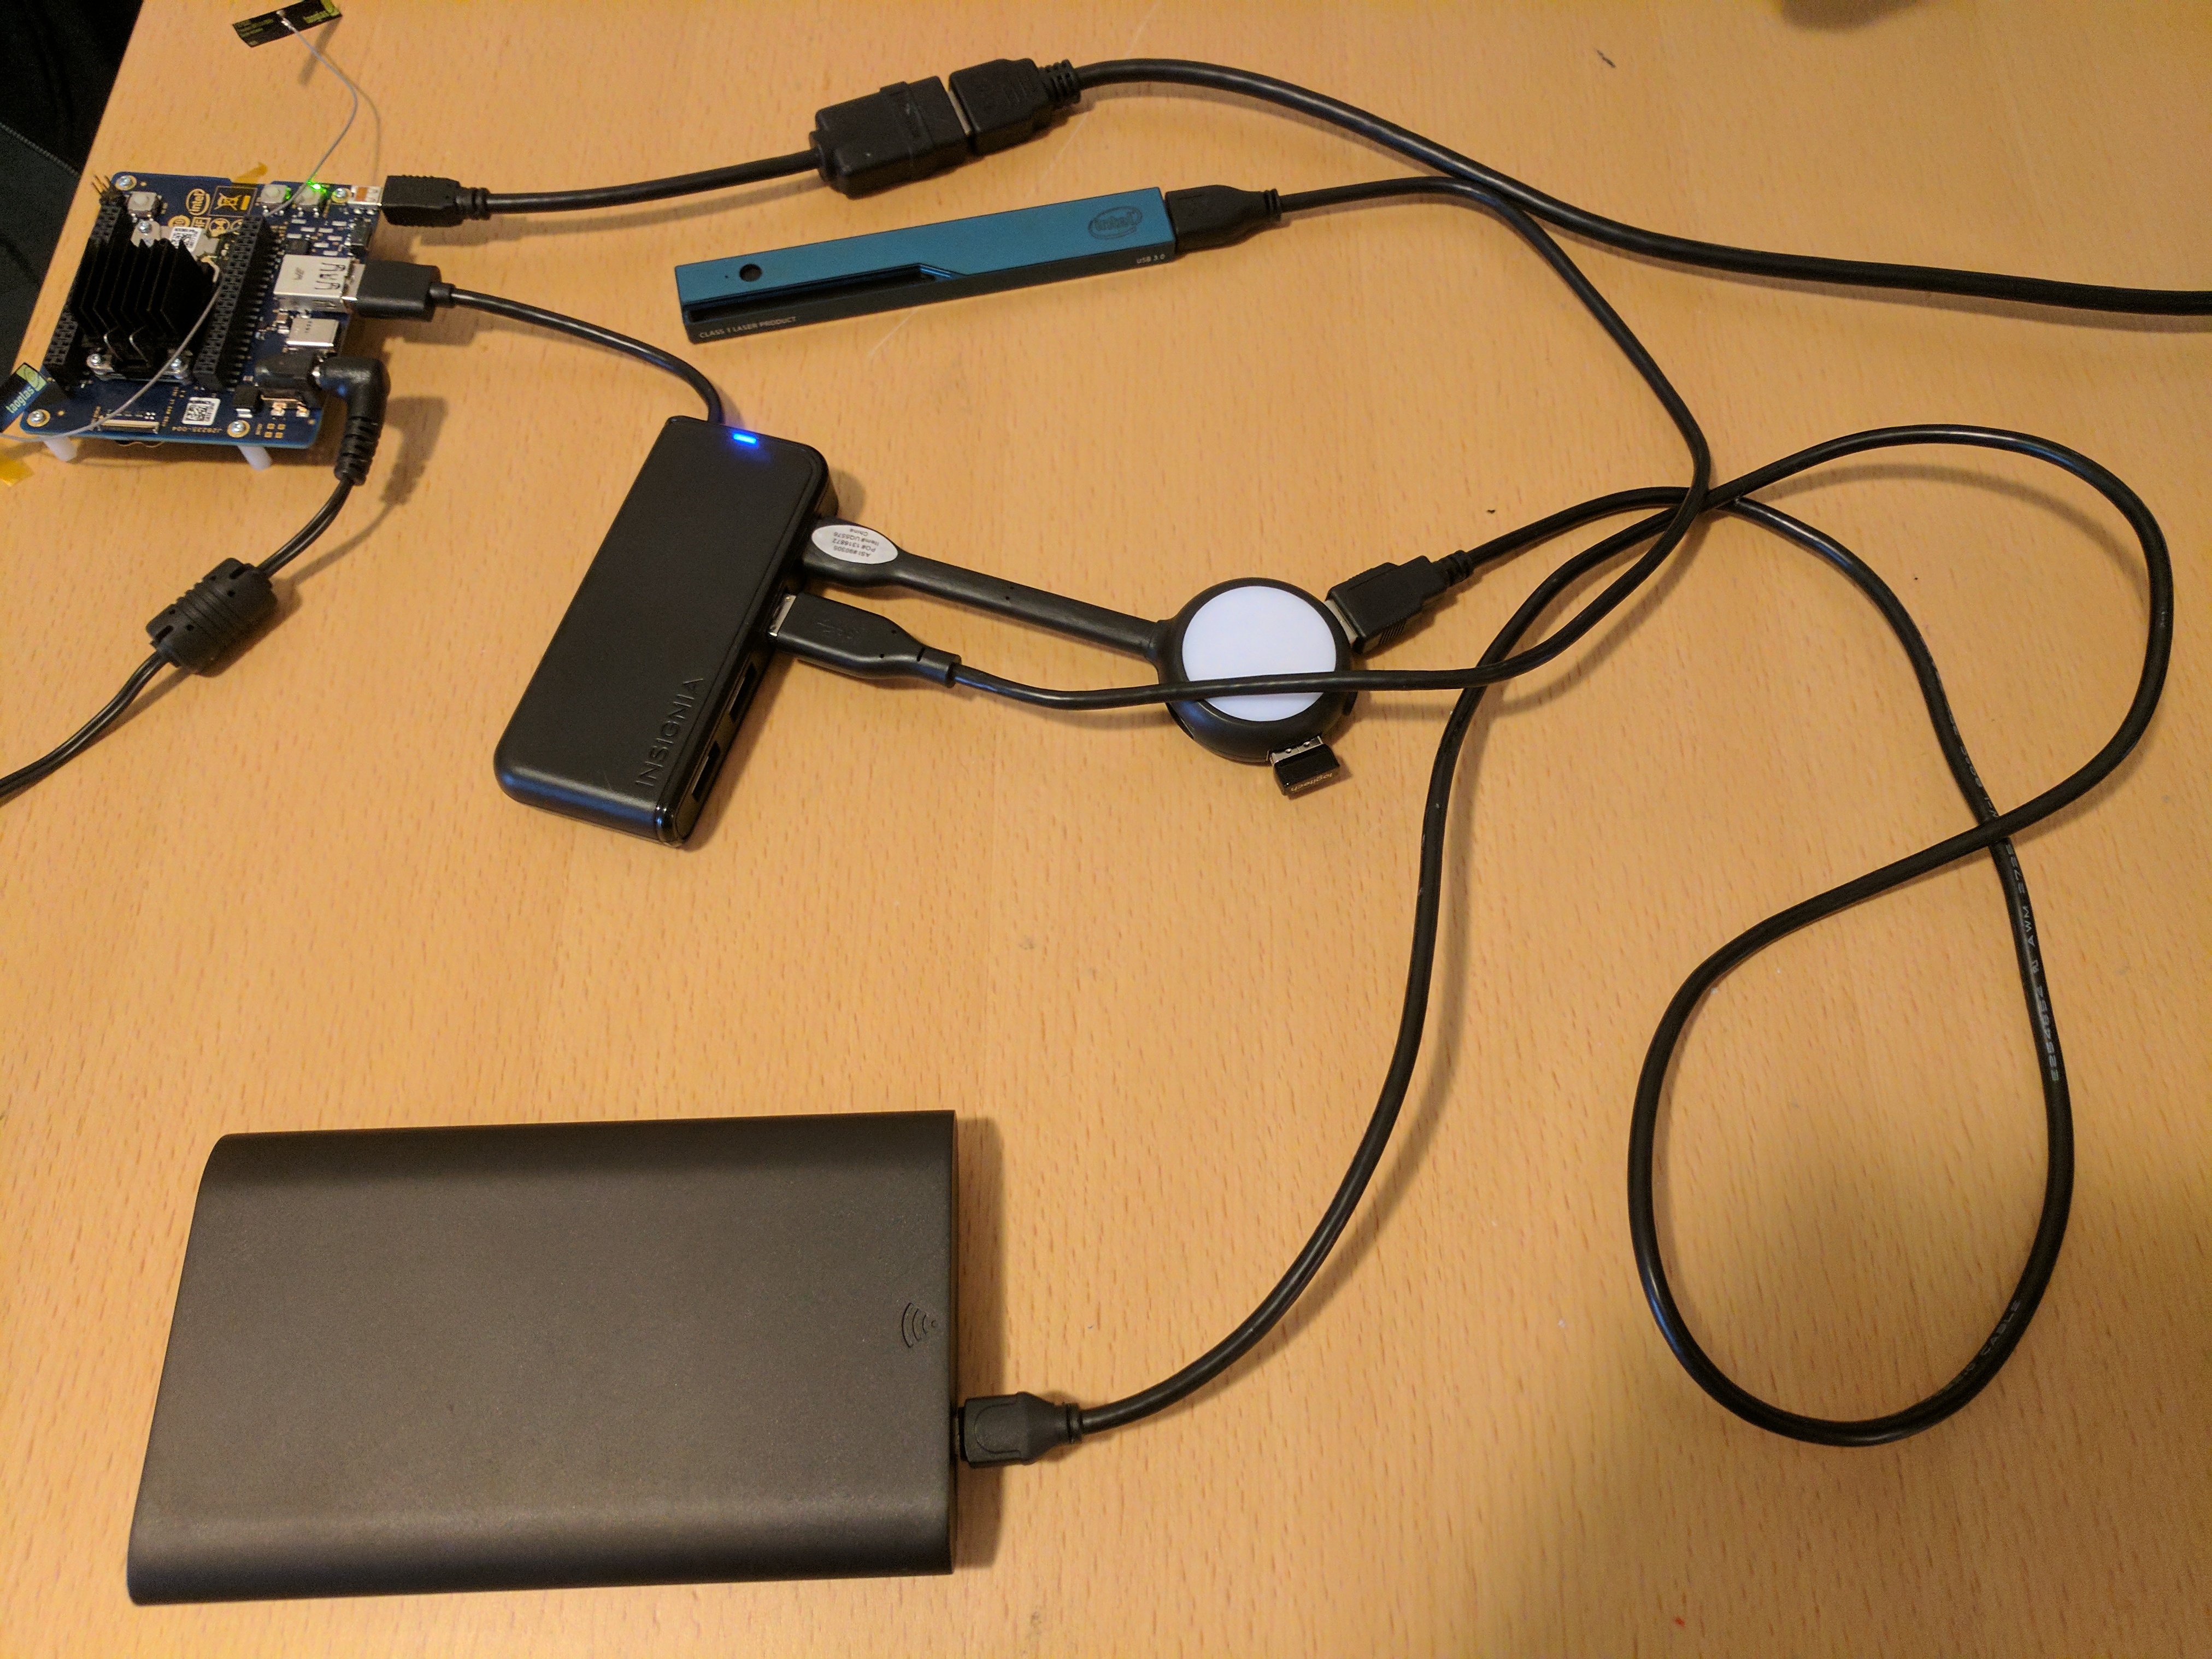
Now we got everything running, we should have a basic setup of all the components attached. When we start the Joule board, the hotspot should be automatically setup, motion and walabot app will start along with it, and when we turn on our android app we should be able to stream from the camera. This means the keyboard/mouse and the monitor are no longer needed for the IoT device to function. If any problems happens at this moment such as libraries not installed right we should fix it before proceeding to the next step.
3D printing the casing that can hold the camera is very important.
In building the Hardware, we should have our custom 3D printed casing ready for the camera. Since this is a prototype it can get a little loose, but when we build out custom license plate holder we are expecting all the components to be inside the holder.
Now that we've made everything working, we will be able to test it out on a real car. Since this is a prototype things can be a little rough, we use duct tape for some of the components.
In order to power up the Joule IoT Kit, we used a DC to AC Direct Plug-in Power Inverter, then simply just ran a long power outlet to the trunk.
We will have the front part and back part. This is just a prototype right now, next version would integrate the chips inside the license plate holder.
And for the front part, we can either use a phone holder or just duct tape Android Tablet.
Using this tool, we can back up car safely to other cars and able to monitor pedestrians. You can watch the demo video at the beginning. The project's goal is to encourage safer driving practices.
The prototype is working, but it is no where near it's final. We will keep improve upon current prototype. Our next version will try to shrink down all the hardware components where it can fit into the smart license plate itself.


_copy_P5AWOdT4dX.png?auto=compress%2Cformat&w=48&h=48&fit=fill&bg=ffffff)
.png?auto=compress%2Cformat&w=48&h=48&fit=fill&bg=ffffff)


Comments
Please log in or sign up to comment.