UPDATE 10/29/2017 Please check enhancements to this project (in connection with Bluesound's Node) in https://www.hackster.io/saka/automate-bluesound-s-node-with-amplifier-and-alexa-control-3fbc9e
A vast quantity of home entertainment devices on market (TVs, receivers, amplifiers, DVDs, CD and more) are equipped with a serial port RS-232. Most of the people don't even realize how prevalent it is (look at the back panel of your equipment), as it is rarely used. It has been mostly a domain of professional installers, as the equipment has been expensive and difficult to set up. And as long as it is not more convenient than an IR remote why bother anyway. Advent of personal assistants like Alexa changes the equation on the convenience side- what if I could just say my commands. And we see more and more of the entertainment devices and appliances come with voice control; however, what can you do with your legacy ones? There is some internet-connected equipment that you can use but it is still limited. I have for instance the Logitech Harmony, where the hub links with Alexa, so can to some degree control almost any device. But it is expensive and has some limitations (for instance if your equipment is hidden in a cabinet, you might need an external IR dongle).
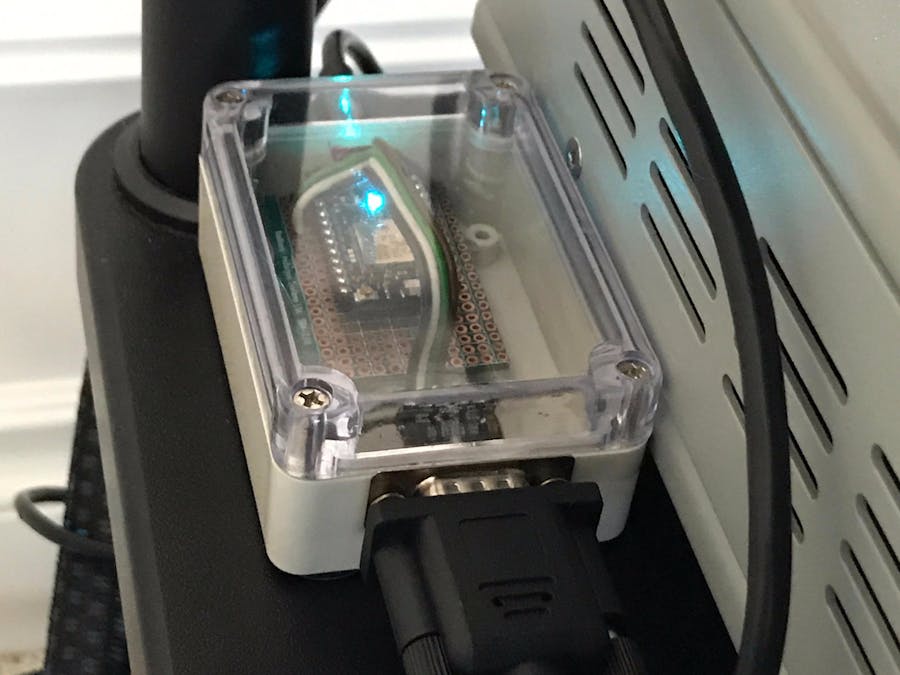
What I developed is an inexpensive controller (roughly $30-40 bill of material, depending how fancy you want to go on enclosure and cabling), using a Photon Particle ($19) and a Nulsom RS232 to TTL converter ($10 on Amazon).
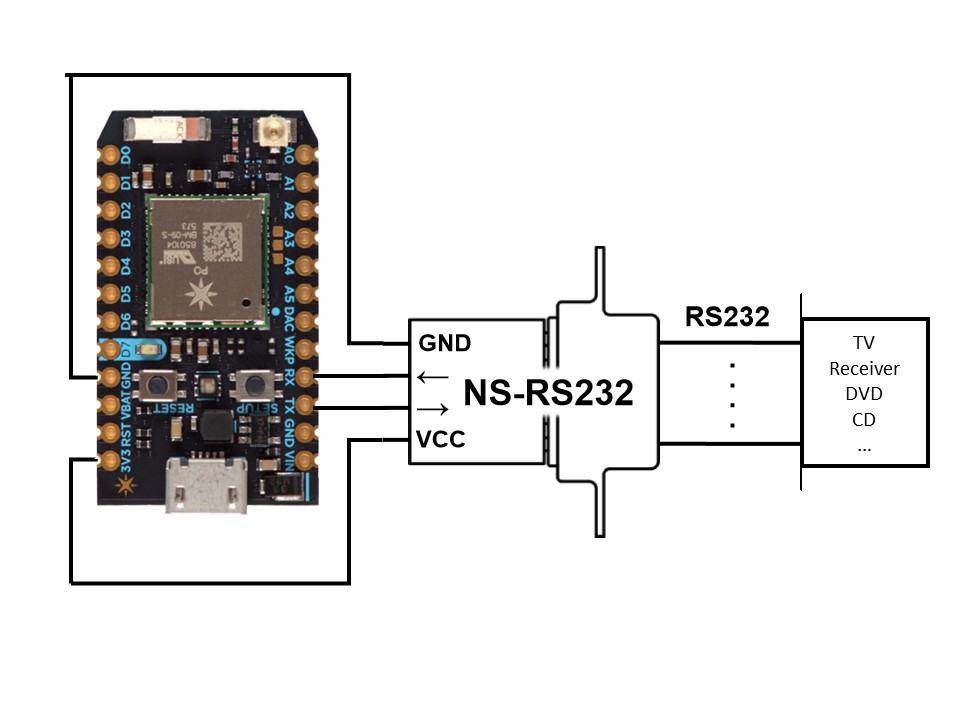
The hardwareThis is the easy part. You connect the Particle Photon to the RS232 converter according to this schema:
That's it!
Particle Photon CodeFor setting up your Photon refer to the documentation on https://docs.particle.io/guide/getting-started/intro/photon/
Otherwise, the code is straightforward- it just passes the command received from the Lambda function, where the whole intelligence of the solution resides.
Only thing to pay attention to here is the command
Serial1.begin(9600, SERIAL_8N1);
This has to be adapted to the particular setting of your device. The above setting is the most typical one, so might work. But try to find the manual (you'll need it anyway for the syntax of the RS-232 commands) and check what the settings that apply to yours. You can find the documentation how to apply that setting here: https://docs.particle.io/reference/firmware/photon/#begin-
Setting up Alexa APIYou need a developer account with Amazon, if you don't have one you can sign for free. Go to https://developer.amazon.com/alexa
In the developer console go to Alexa Skills Kit:
Then create a new skill:
You need to select:
- Smart Home Skill API in the Skill Type
- Name can be anything you like
- Payload version v3 (new APIs that Amazon released recently)
Once you save it, a unique Application ID is created, you'll need that later on for the Lambda function:
Press Next, Next and go to the configuration window.
In order to configure this window, you need few parameters that you'll get from executing a Curl command (you can download the program if you don't have it; you execute in a terminal window):
curl https://api.particle.io/v1/clients -d name=your_name -d type=web -d access_token=particle_token -d redirect_uri=""https://layla.amazon.com/api/skill/link/code_in_alexa"
Where:
- name => your choice, just keep it simple (I used Krell, which is the make of my amplifier)
- access_token => here you need to go to the Particle IDE and under Settings copy the Access Token
- redirect_uri => you get this in the Alexa Skills configuration window (see picture)
The response to the Curl command would look something like:
{"ok":true,"client":{"name":"your_name","type":"web","secret":"
These are the Oauth parameters that you need to finish the Alexa skills configuration. Here what you set:
- Authorization URL: https://api.particle.io/oauth/authorize
- Client Id: your_name-number result from the Curl command
- Scope: profile
- Access Token: URI https://api.particle.io/oauth/token
- Client Secret: secret_code result from the Curl command
Leave all the rest defaults. You done with the Alexa Skills setup! Off to Lambda configuration.
Lambda ConfigurationFor this part you need an AWS account. You can create one at https://aws.amazon.com/
Before we can configure Lambda we need to set the right permission. In the AWS Console, go first to IAM, Roles, and create a new role. You need to attach the AWSLambdaBasicExecutionRole, should be enough. Then choose a name for it, I used Alexa_particle.
In the Console go to Lambda and make sure you select N. Virginia as region; currently the speech API are only supported there. Then create a new function:
Select "Author from Scratch" and fill the info:
- Name: your choice
- Existing role: the role you created in IAM
Once you created the function go to triggers and select Alexa Smart Home, for the Application Id you need to copy it from the application you created in the Alexa API section.
Next go to configuration and copy the code from this project (krell.js):
Few edits you need to do:
- Set the variable "particleId" to your device ID, you can find it in the Particle IDE under devices.
- You need to change the commands to your specific device (and potentially the logic what happens); you'll find it on the internet or you can always contact the support team of the manufacturer (what I did). You'll get a list of commands, similar to this:
- Depends what your device support, you might want more or less than I did; you find the full documentation and reference here https://developer.amazon.com/docs/smarthome/smart-home-skill-api-message-reference.html
If you have done all the steps correctly, when you go to your Alexa app, under Skills/ Your Skills it should show the Alexa application you created (e.g. Krell_Serial). In the app go to Smart Home/ Devices and do a discover. Should see the controller as Stereo (if you haven't changed the friendly name in the Lambda code. Once you connect the HW to the serial port of the device you want to control, it should react to the Alexa commands (e.g. "Alexa, stereo on", "Alexa, set volume to 40 on stereo").
DebuggingIf something does not work, you can configure the test events in the Lambda function. The easiest way is to go to the reference documentation https://developer.amazon.com/docs/smarthome/smart-home-skill-api-message-reference.html and copy the response from the interfaces you want to test, for instance for switching on looks like this:
You need to change the token and deviceId to your particle, how to find those was described earlier in the article.


Comments
Please log in or sign up to comment.