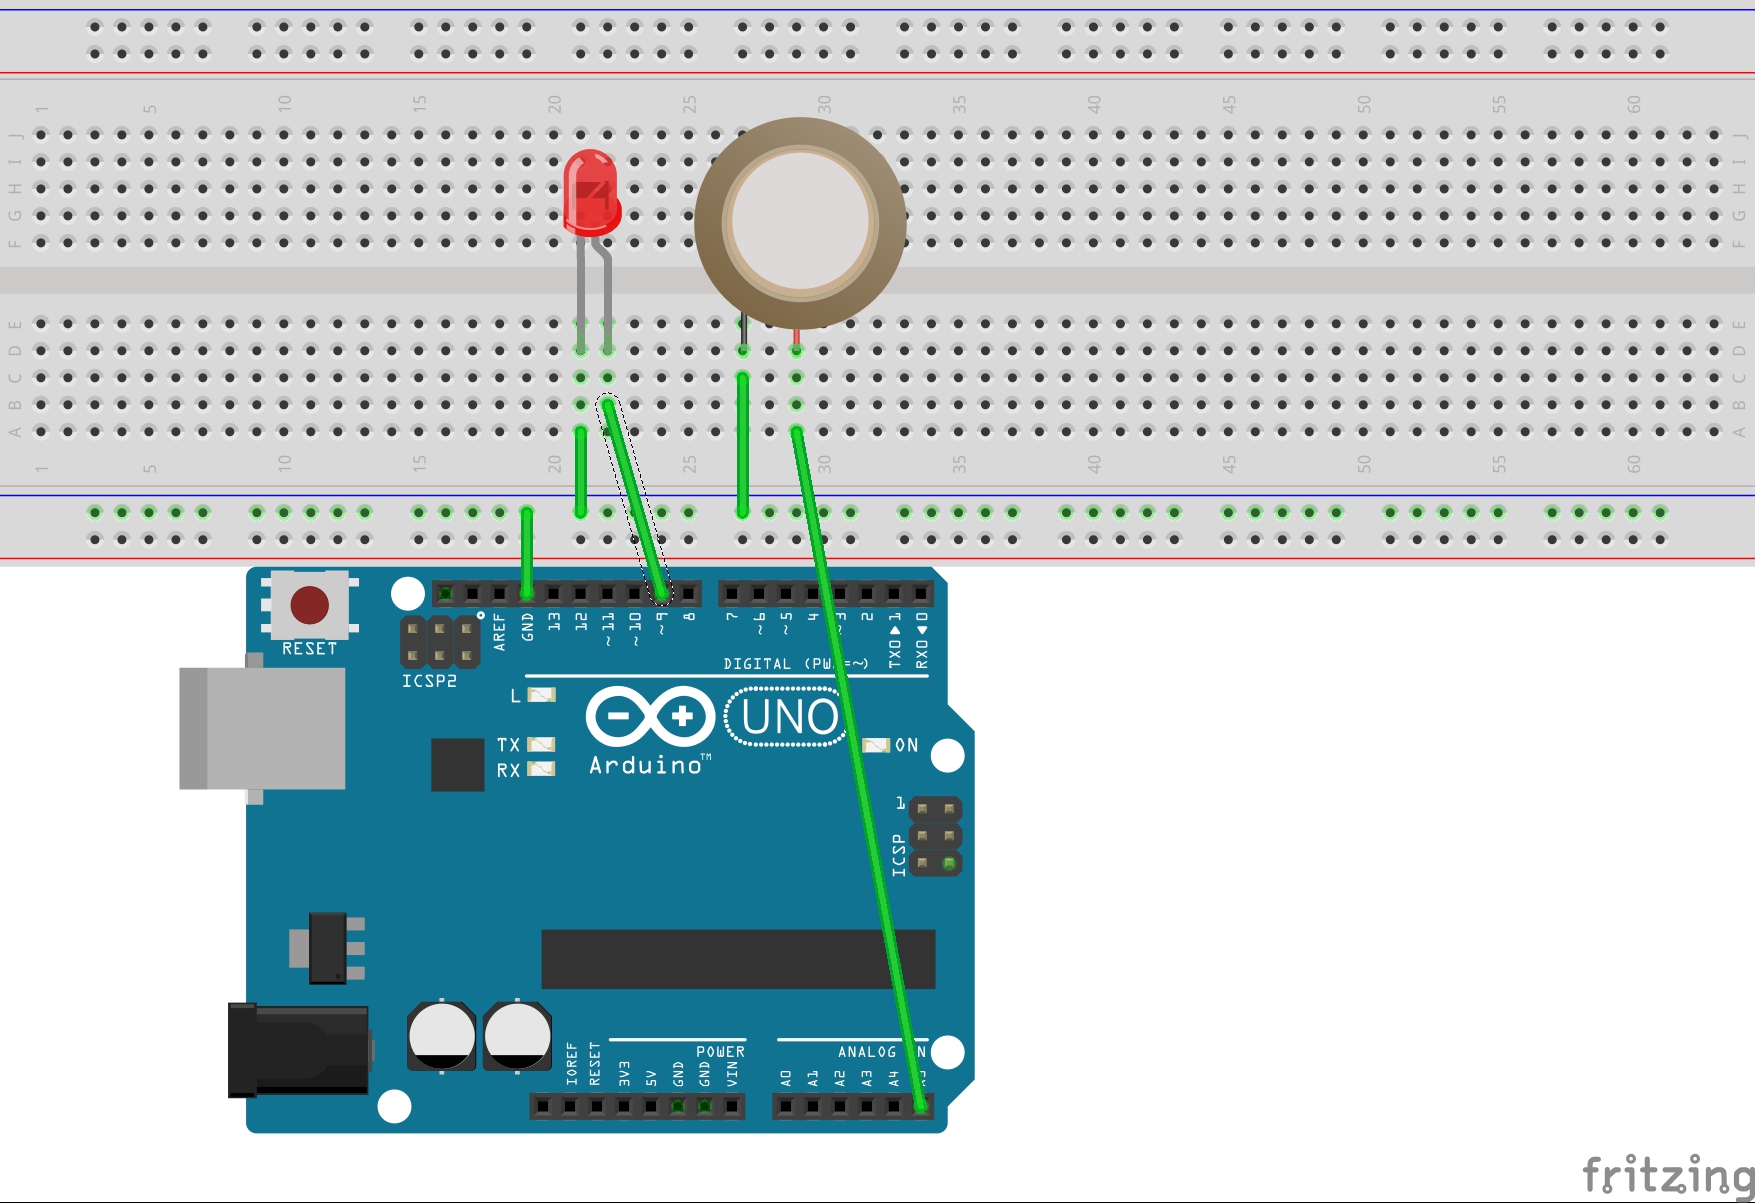
In this project, we will create a Piezo Knock Sensor using Arduino. A piezo disc generates an electric charge when knocked or squeezed, which can be read by the Arduino to detect knocks or pressure.
What We Will Learn in This Section- How to set up a Piezo Knock Sensor with Arduino.
- How to read sensor data from a piezo disc.
- How to control an LED based on sensor input.
Understanding how to interface sensors with Arduino is fundamental in creating interactive projects. This project will give you hands-on experience with reading sensor data and controlling outputs based on that data.
Components ListCircuit Diagram (With Connection)First, make sure your Arduino is powered off by unplugging it from the USB cable. Then, connect your components as shown in the diagram:
- Connect the Piezo sensor to Analog Pin 5 (A5) on the Arduino.
- Connect one end of a resistor to the same Analog Pin 5 and the other end to the ground.
- Connect the LED to Digital Pin 9 with an appropriate current-limiting resistor.
- Connect the ground pin of the Arduino to the ground rail of the breadboard.
int ledPin = 9;        // LED on Digital Pin 9
int piezoPin = A5;     // Piezo on Analog Pin 5
int threshold = 120;   // The sensor value to reach before activation
int sensorValue = 0;   // A variable to store the value read from the sensor
float ledValue = 0;    // The brightness of the LED

void setup() {
  pinMode(ledPin, OUTPUT); // Set the ledPin to an OUTPUT
  // Flash the LED twice to show the program has started
  digitalWrite(ledPin, HIGH); delay(150); digitalWrite(ledPin, LOW); delay(150);
  digitalWrite(ledPin, HIGH); delay(150); digitalWrite(ledPin, LOW); delay(150);
}

void loop() {
  sensorValue = analogRead(piezoPin); // Read the value from the sensor
  if (sensorValue >= threshold) {     // If knock detected set brightness to max
    ledValue = 255;
  }
  analogWrite(ledPin, int(ledValue)); // Write brightness value to LED
  ledValue = ledValue - 0.05;         // Dim the LED slowly
  if (ledValue <= 0) { ledValue = 0;} // Make sure value does not go below zero
}
- Initialization: The LED is connected to Digital Pin 9, and the Piezo sensor is connected to Analog Pin 5. The
thresholdvariable sets the sensitivity of the sensor. - Setup Function: The LED pin is set as an output. The LED flashes twice to indicate the program has started.
- Loop Function: The sensor value is read from the Piezo sensor. If the value exceeds the threshold, the LED brightness is set to maximum. The LED then dims slowly.
After uploading your code, the LED will flash quickly twice to show that the program has started. Knock or squeeze the sensor, and the LED will light up and then gently fade back down to off. Adjust the threshold value in the code to match the sensitivity of your Piezo disc.
Further LearningThis book will help you gain more knowledge about Arduino: Beginning Arduino.


_ztBMuBhMHo.jpg?auto=compress%2Cformat&w=48&h=48&fit=fill&bg=ffffff)


Comments
Please log in or sign up to comment.