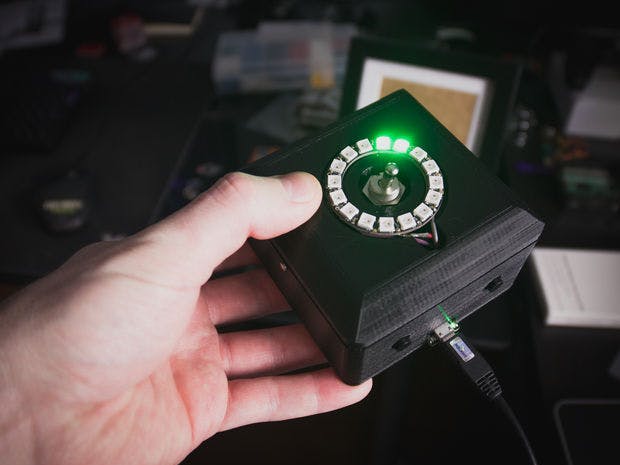
The Arduino Geocache Locator is a small device that lets you program in GPS locations, and then you can use the LEDs on the top as a navigation tool to get to your location. I love making gifts for my family members for Christmas, especially for my little nephew, and I have wanted to pursue this idea for awhile, so I thought it would make a great gift for him for Christmas this year.I also created a small story about having to locate 4 missing stones which I have hid around his town in various locations. He can go and find these geocaches when they go out to explore.
Step 1: Watch Part 1! Building the Hardware.Part 1 gets you through building the hardware. There is a part 2 video further down this tutorial, which is on the how the firmware works.
Step 2: Get the Parts and Tools!Parts:
- Plastic Threading Screws
- Big Heat Shrink Tubing
Tools:
Step 3: 3D Print the BodyGet the files from here: https://www.thingiverse.com/thing:2717651
Step 4: Solder the Headers on Everything.Since we're going to use jumpers, you will need to solder on pin headers to each of the components that need them to connect, which is pretty much all of them. This also means we can reuse these components for later projects without having to desolder anything!
Step 5: Install Components in CaseIt is time to install the hardware(GPS, trinket, compass, charger, booster, and battery) into the case you 3D printed earlier. The GPS trinket and charger can be screwed down using plastic threading screws. The booster, compass, and battery can be double sided taped. Leave the neopixel and the power switch disconnected for now. They will be hooked up after.
Step 6: Connect the JumpersFollow the pinout setup below. I used jumper blocks made out of pin headers that were soldered together. I then covered them with heat shrink to ensure they would not short on anything. The buttons will be internally pulled up, so that means you will connect the other side to GND.
Power Booster
- IN -> Battery +
- GND -> GND
- OUT -> 5V Jumper Block
GPS (hookup guide)
- VCC -> 5V Jumper Block
- GND -> GND
- TX -> RX Trinket
- RX -> NC
Compass
- VCC -> 3.3V Jumper Block
- SDA -> SDA Trinket
- SCL -> SCL Trinket
- GND -> GND
Trinket M0
- BATT -> 5V Jumper Block
- GND -> GND
- USB -> Charger +
- Pin 4 -> Button 1
- RST -> Button 2
- Pin 1 -> In Neopixel Ring
Neopixel Ring
- 5V -> 5V Jumper Block
- GND -> GND
- IN -> Pin 1 Trinket
The buttons can be fixed to the back of the case by using a small amount of plastic with holes put in them. They are then screwed to the 3d printed body.
Step 8: Cover the Jumper BlocksTo ensure that the jumper blocks do not short out on each other, add some heat shrink tubing over them and heat it up.
Step 9: Attach Switch and Neopixel Ring to LidAttach the neopixel ring to the lid by applying double sided tape to half of it. Stick it down to the side that is raised on the lid(in the circle). Use 2 jumper cables(or 1 longer one) to extend the length of the jumpers so the lid can remain off while you attach the switch and neopixels. Feed the wires through the hole in the lid down to the trinket.
Step 10: Watch Part 2!Now its time to watch video part two and understand how the firmware works. Upload the code to the trinket to test out the components before you install them in the 3D printed case. The firmware can be found here on Github: https://github.com/IdleHandsProject/ArduinoGeocacheLocator
Step 11: Test It Out!Time to put the lid back on and hit the switch! Hopefully everything starts up and its all connected properly.
Step 12: Hide Your GeocachesFind some hidden away locations to place your geocaches. Record the location using your smart photo(google maps) and then place those coordinates in the firmware(watch the video to find out where).
For me, I created a little story as to why my nephew needs to go find the locations. It just adds to the gift a little more and makes it more exciting.
Step 13: Go Hunting!The fun part is going out to hunt!
Step 14: Support These Projects!If you think I have earned it, please consider subscribing to my YouTube Channel. I will be doing a lot more cool open source projects like this one in the future, and I would love for you to join along.
If you want to support me on the next level, and have some cash to spare. Please check out my Patreon. The more patrons I receive, the more complicated and intricate projects I can develop and share to the world. I want to make cool stuff, and make that cool stuff free and public for everyone else to make as well.


Comments
Please log in or sign up to comment.