


Hardware components | ||||||
 |
| × | 1 | |||
 |
| × | 1 | |||
| × | 1 | ||||
| × | 1 | ||||
| × | 1 | ||||
Software apps and online services | ||||||
 |
| |||||
 |
| |||||
This was a final project (week-long) for the Code Fellows Python 401 Advanced Software Development course taught by Cris Ewing. There are still many un-implemented features which may continue to be worked on in the future, as this project is still in the somewhat "early" stages.
DescriptionPython web application for a smart lock powered by Raspberry Pi. It features facial recognition for security. This code is for the main Django server.
The project consists of three components: the Raspberry Pi, the Django server, and the Flask server. The Django server is where a user can register an account along with their Raspberry Pi controlled lock.
- From the main Django site, a user can control the lock with the press of a button, take pictures, train the facial recognition software, and monitor who has attempted to enter.
- The Flask server is responsible for two-way communication with the Raspberry Pi using a socketIO connection (which is essentially a connection that stays alive). Most Raspberry Pi's will be behind a firewall on a local network, and the Flask server allows commands to be sent from the Django server to the Raspberry Pi.
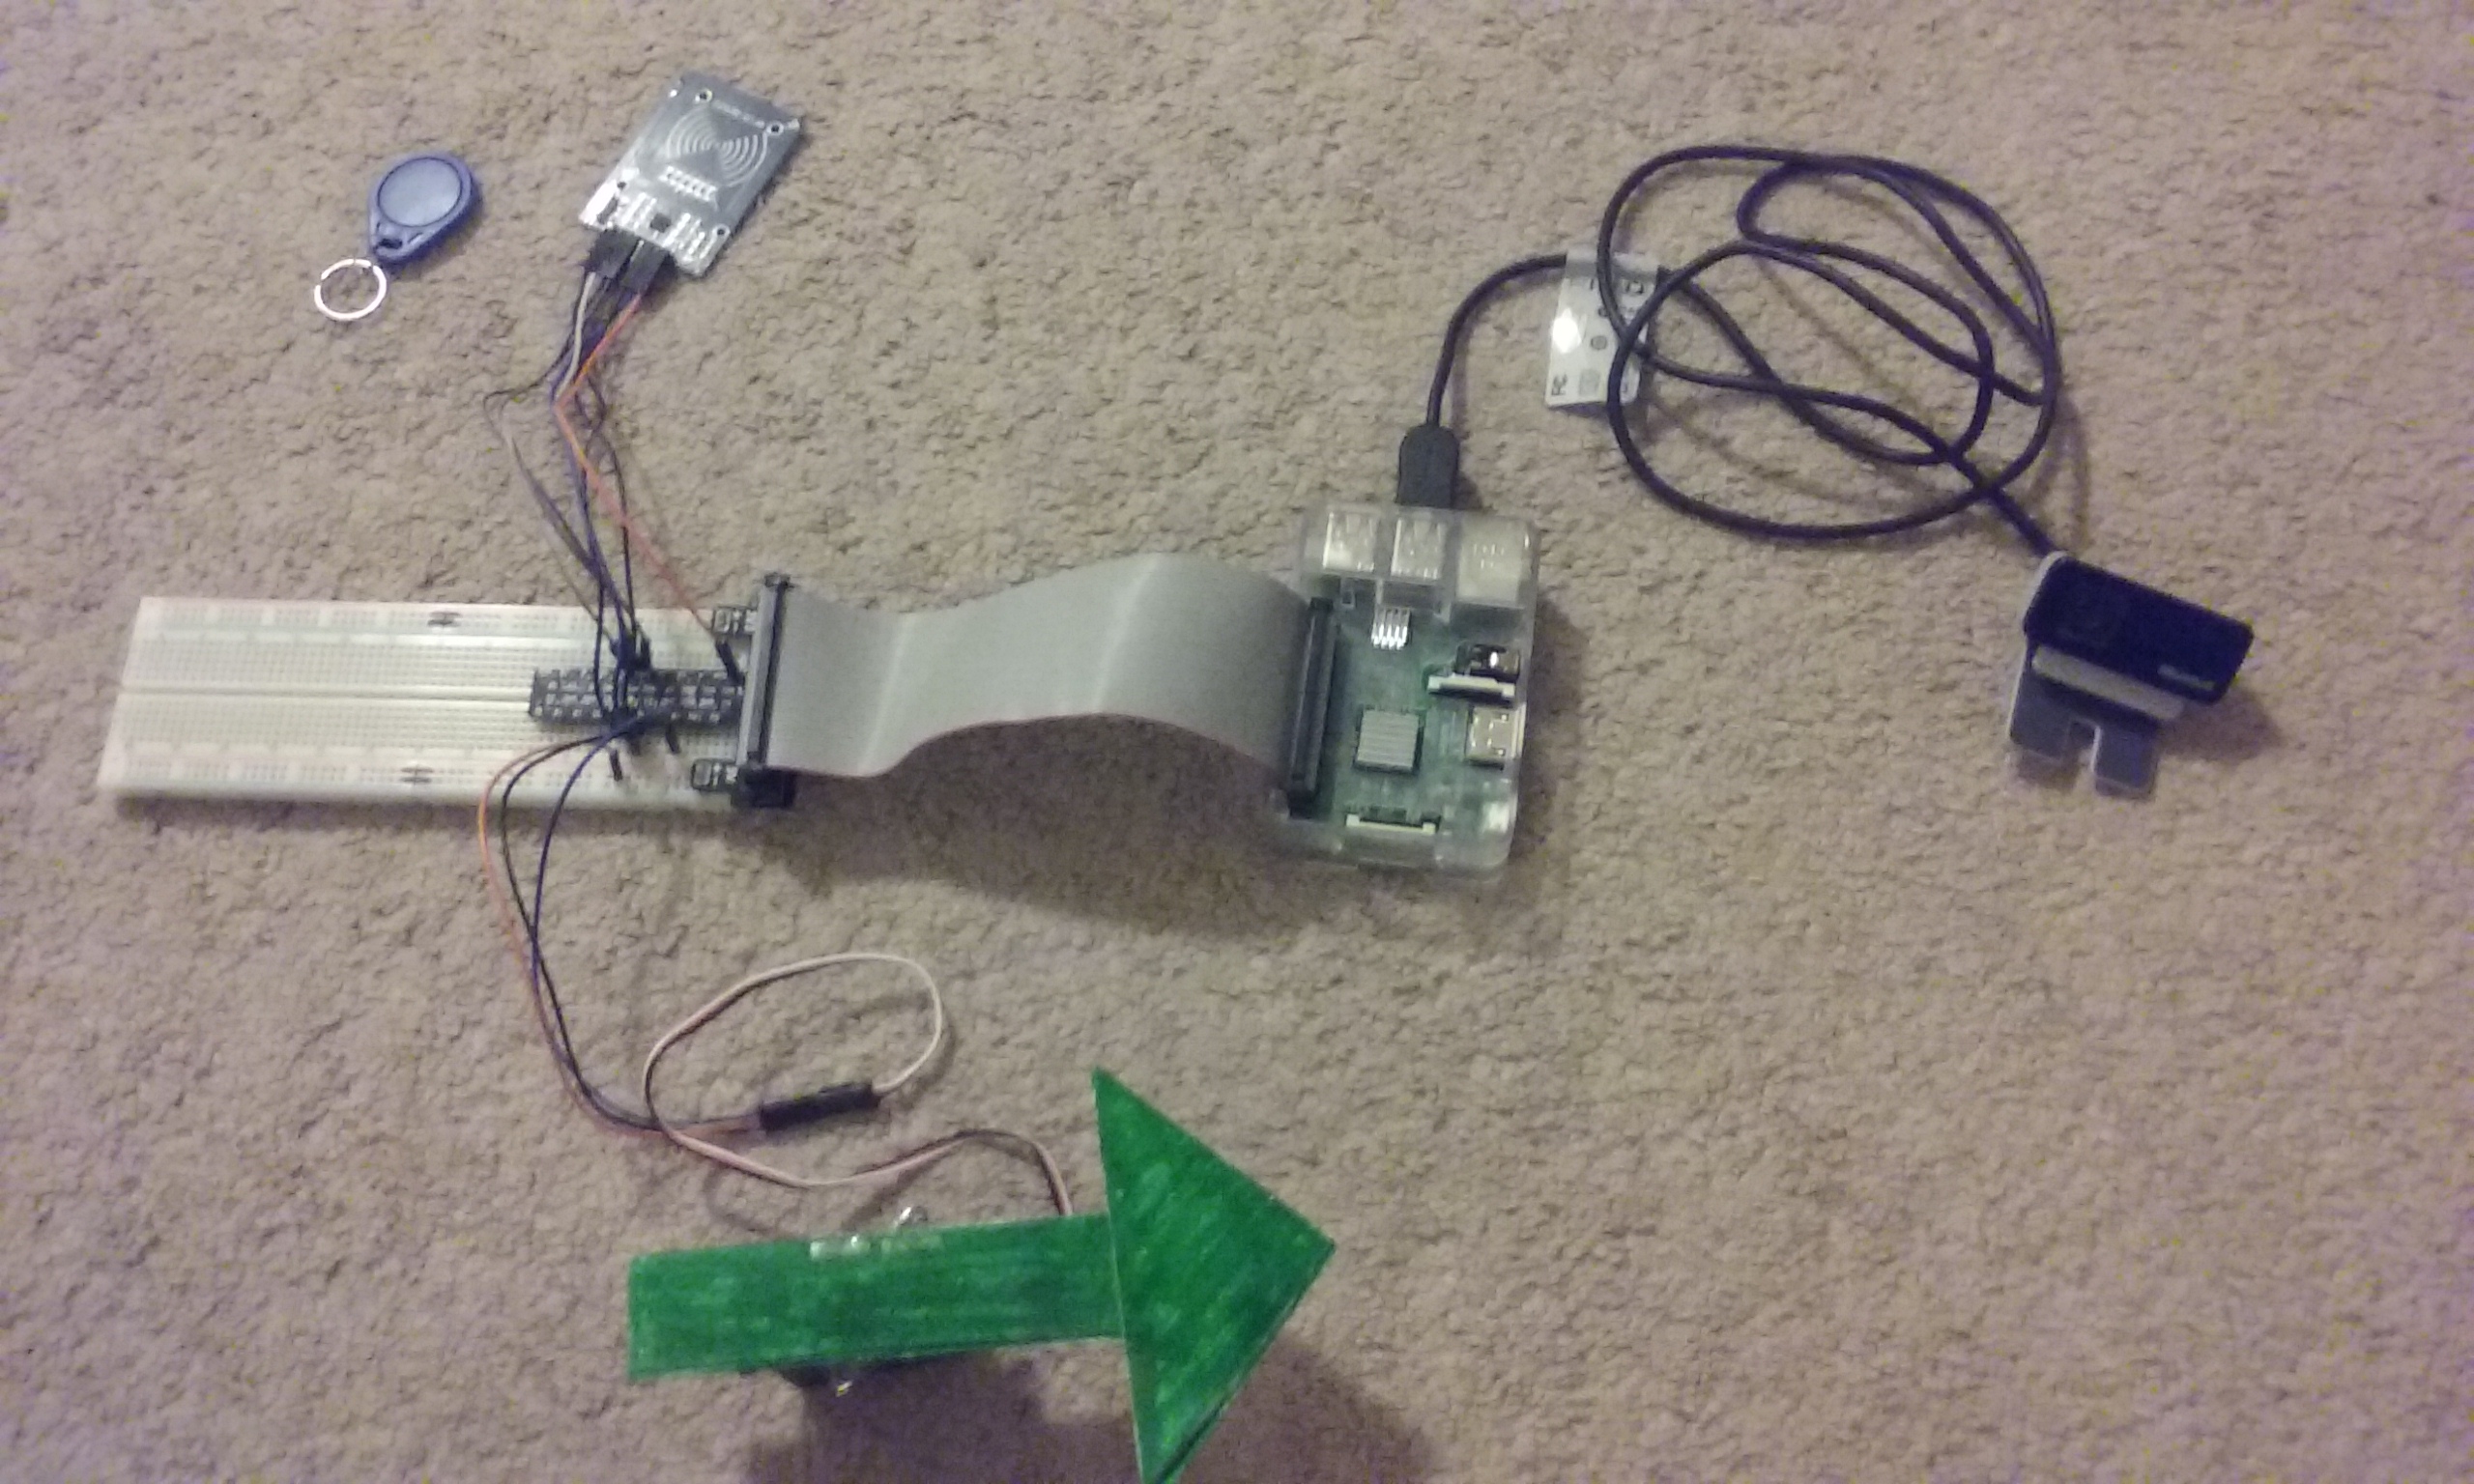
- The Raspberry Pi is connected to a motor (attached to a lock), a webcam, and an RFID scanner.
Once everything is set up, a user can open a lock by first scanning their RFID card, and then having a picture of their face taken, which gets sent together to the Django server for authentication. The Raspberry Pi uses facial detection to identify a human face, and the Django server is responsible for actually recognizing the face and issuing commands to unlock the lock.
Here is a video of our presentation (sorry, no sound). The Django server has been trained to recognize each of my teammates, but the lock only belongs to me (David, in the green flannel), and you can see that it only unlocks when the Raspberry Pi takes my picture and sends it off to the Django server to verify my identity. The testing starts about 10:00 minutes in.
Notes for if you want to replicate this:
- Instructions: https://github.com/Secured-Pi/Secured-Pi
- The repos are still being cleaned up so that it will be easy to follow and set up on your own without having to do TOO much reverse engineering on your own!
- Also, there are a few hard-coded IP addresses that are in the code. You will have to modify those if you wish to replicate this project.
- Training the facial recognition can be tricky. We created a view to help the process, but it has not been tested. We actually created our recognition .yml file using pictures we took. In the source code, dealing with the facial recognition, there are some notes about this, and how the files should be named, etc. If you have not done this before, this may take a bit of time to learn and nail down. If you do decide to enable the facial recognition, I would recommend training with the same camera the Pi will use, and I would also recommend taking photos in the place/lighting where you will be verified. It also helps to train multiple people so that the recognition will not believe that everyone is, in fact, you!
The basic equipment
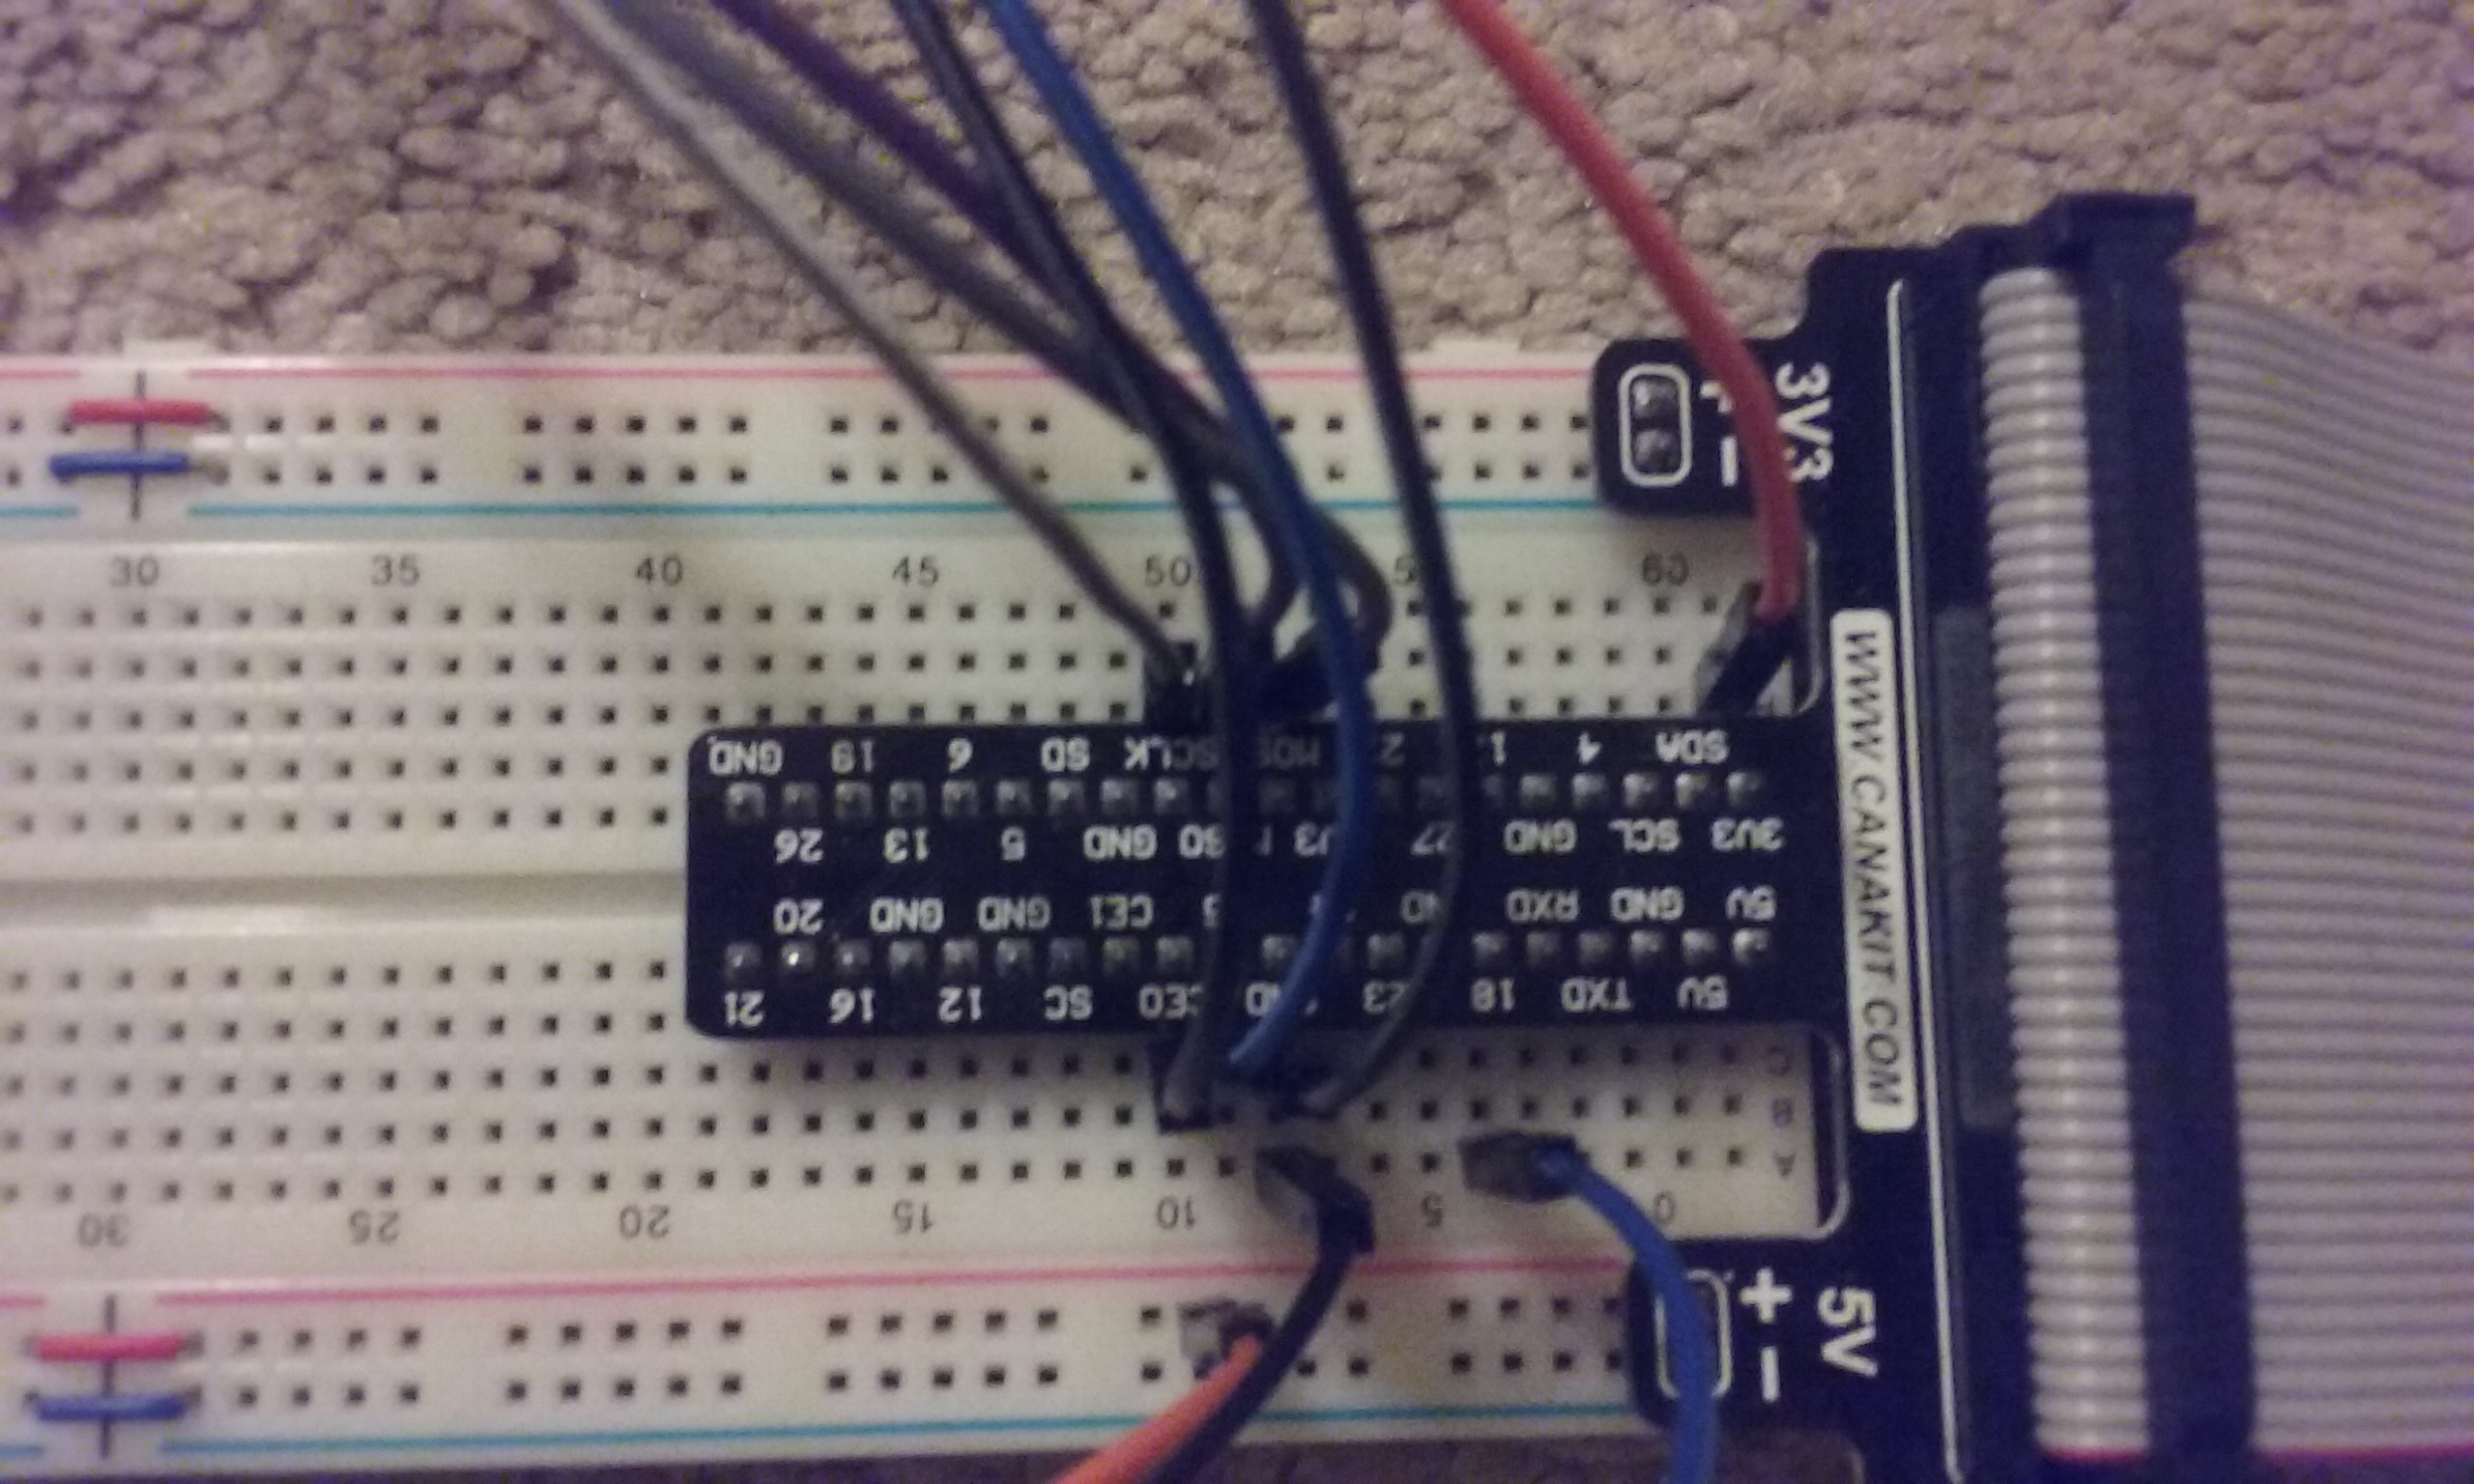
Breadboard close-up.
scanner | board
-------------------------------
SDA | CEO
SCK | SCLK
MOSI | MOSI
MISO | MISO
IRQ | (None)
GND | GND
RST | GPIO (#25)
3.3v | 1
For the motor:
motor | board
-------------------------
white | 18
black | GND
red | power


Comments
Please log in or sign up to comment.