selimrecep
Published © GPL3+

A step to use Blynk for IoT!

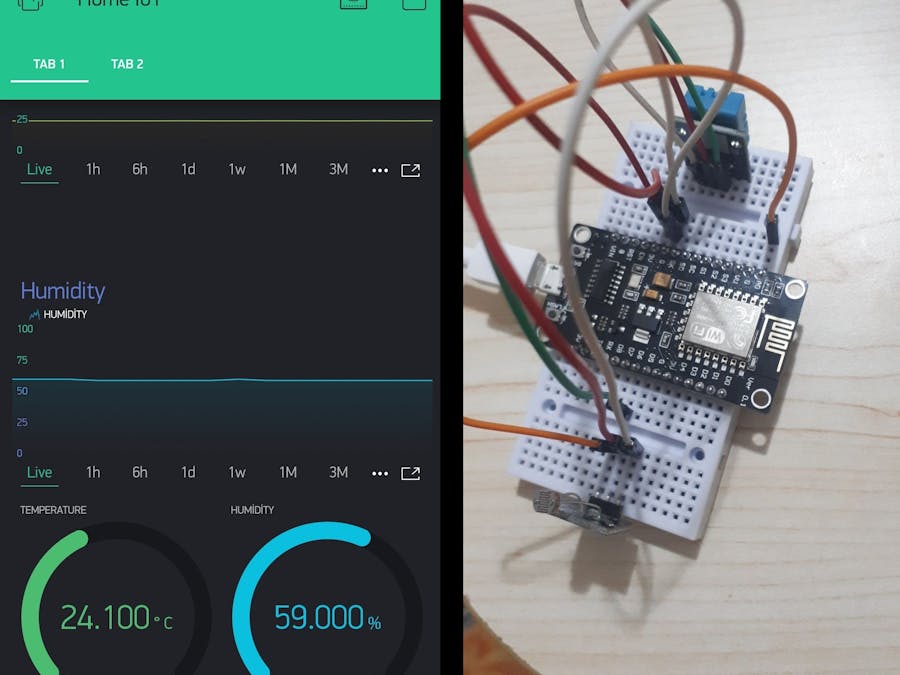
Practising IoT using DHT11 Sensor and LDR Sensor for sending data to Blynk!

BeginnerShowcase (no instructions)896
A step to use Blynk for IoT!

Things used in this project

Hardware components

NodeMCU ESP8266 Breakout Board
Mine is black, though.
×1
Gravity: DHT11 Temperature Humidity Sensor For Arduino
DFRobot Gravity: DHT11 Temperature Humidity Sensor For Arduino
Mine is a cheaper one :)
×1
LDR Module
I've used a LDR module, but again, you can just use a plain LDR component with a resistor, google it
×1
Jumper wires (generic)
×1
Micro-USB to USB Cable (Generic)
Used for programming NodeMCU.
×1
Breadboard (generic)
Any breadboard will do it
×1

Software apps and online services

Blynk
Blynk
You can setup your own Blynk server: https://github.com/blynkkk/blynk-server

Hand tools and fabrication machines

Smartphone
To use Blynk app

Story

Read more

Schematics

The general diagram

This is the main part (well, only one) of the project

Code

sketch.ino

C/C++
It is the main sketch part.
/* This is the main file which should has a name of "sketch_XXX.ino" */
#include <ESP8266WiFi.h>
#include <BlynkSimpleEsp8266.h>
#include "DHT.h"

/* Replace DHTSensorPin's value (which is 12) with your GPIO pin! :) */
#define DHTSensorPin 12

/* You should choose DHT22 instead if you got DHT22. */
#define DHTType DHT11

DHT dht(DHTSensorPin, DHTType);

int minimumDhtSamplePeriod;

/* Prototypes */
void wifiSetup();
void cloudSetup();

/*
 * You can get this token from your e-mail! Don't forget, it's a secret! Keep it secure.
 */
char token[] = "XXXXXXXXXXXXXX";

/*
 * Wifi configuration to connect.
 */
char ssid[] = "SSID_HERE";
char pass[] = "PASSWORD_HERE";

void setup() {
  Serial.begin(9600);

  wifiSetup();
  cloudSetup();

  dht.begin();
  minimumDhtSamplePeriod = 2000;
}

void loop() {
  /* You can put another code there, but please don't use delay as much you can (you still can use for small values, like 50 micro seconds) */
  cloudLoop();
  programLoop();
}

/*
 * Init wifi
 */
void wifiSetup() {
 
  WiFi.begin(ssid, pass); 
  while (WiFi.status() != WL_CONNECTED) {
    Serial.println("Trying to reconnect...");
    delay(2000);
  }

  Serial.println("WiFi connected!");
}

/* ---------------- CLOUD FUNCTIONS ----------------- */
void cloudSetup() {
  // Blynk.begin(auth, ssid, pass...) wasn't used because I wanted to make cloud and wifi functions seperate.
  Blynk.config(token); /* You can use Blynk.config(token, "XXX.XXX.XXX.XXX", PORT_NUMBER); format if you want to install Blynk server into your own VPS. (Default port is 8080) */

  
  while(Blynk.connect() == false) {
    Serial.println("Trying to reconnect to Blynk again");
    delay(2000);  
  }

  Serial.println("Connected to Blynk!");
}

void cloudLoop() {
  Blynk.run();  
}

main.ino

C/C++
This is other part, don't forget to include this with same folder with "sketch_XXX.ino" !!!
/* Don't forget to include this file too! If you can't add more file, you should add this into end of "sketch_XXX.ino" file :) */
int timePassed = millis();


void programLoop() {
  float temp, humidity, light;
  if (millis() - timePassed > minimumDhtSamplePeriod) {
    
    humidity = dht.readHumidity();
    temp = dht.readTemperature();
    timePassed = millis();
    
    if (isnan(humidity) || isnan(temp)) {
      Serial.println("An error occured");
      return;
    }

    light = 1024 - analogRead(A0);
    Blynk.virtualWrite(V2, temp);
    Blynk.virtualWrite(V3, humidity);
    Blynk.virtualWrite(V4, light);
  }
}

DHT-sensor-library

I've used it for DHT11 sensor

Credits

selimrecep

selimrecep

0 projects • 2 followers

Comments