Hackster is hosting Hackster Holidays, Ep. 4: Livestream & Giveaway Drawing. Watch previous episodes or stream live on Wednesday!Stream Hackster Holidays, Ep. 4 on Wednesday!
seyyidahmedtopbas
Published © GPL3+

Temperature,Humidity Measurement Using Arduino with ESP8266

Im using esp8266 with arduino uno

IntermediateFull instructions provided20,946
Temperature,Humidity Measurement Using Arduino with ESP8266

Things used in this project

Hardware components

Arduino UNO
Arduino UNO
or arduino nano
×1
ESP8266 ESP-01
Espressif ESP8266 ESP-01
×1
DHT11 Temperature & Humidity Sensor (4 pins)
×1
Breadboard (generic)
×1
Jumper wires (generic)
×1

Software apps and online services

Arduino IDE
Arduino IDE
MATLAB Think speak web

Story

Read more

Schematics

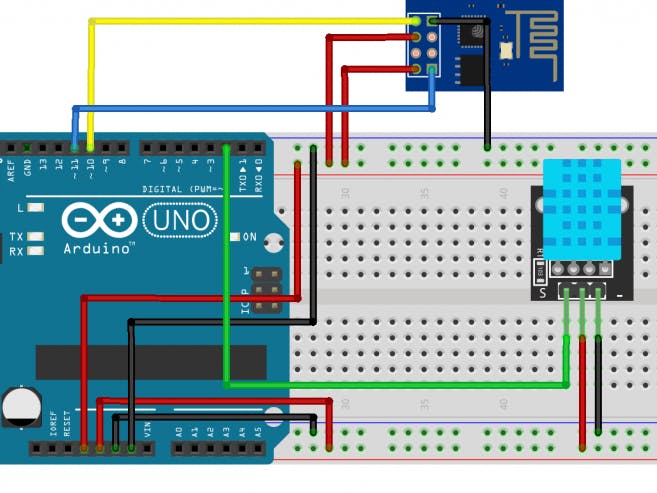
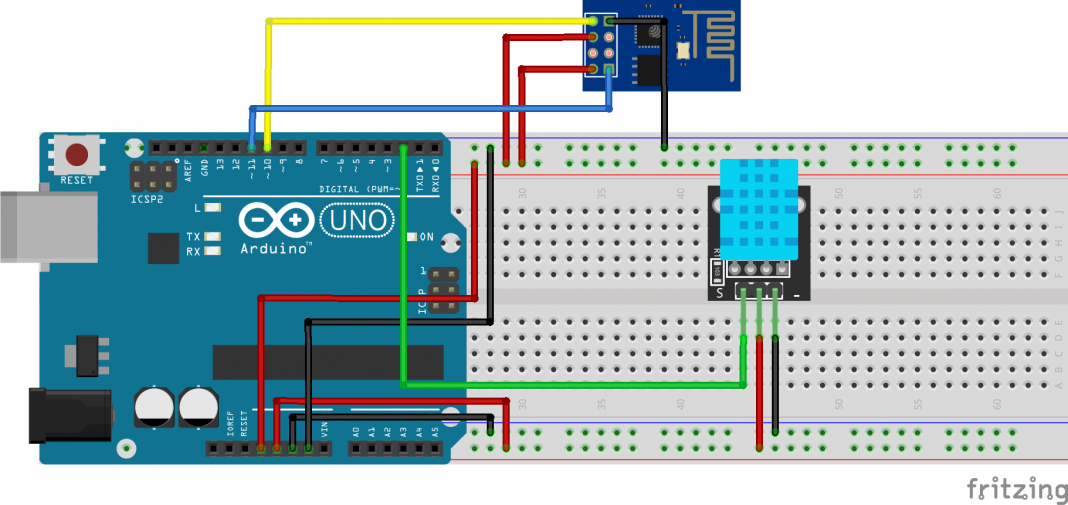
the shematic

Code

The code

C/C++
#include <dht11.h>
#include <SoftwareSerial.h> 
                                  

String agAdi = "network";                 // We write the name of our network here.    
String agSifresi = "network password";           // We write the password of our network here.

int rxPin = 10;                                               //ESP8266 RX pini
int txPin = 11;                                               //ESP8266 TX pini
int dht11Pin = 2;

String ip = "184.106.153.149";                                //Thingspeak ip adresi
float sicaklik, nem;

dht11 DHT11;

SoftwareSerial esp(rxPin, txPin);                             // We make serial communication pin settings.

void setup() {  
  
  Serial.begin(9600);  // We are starting our communication with the serial port.
  Serial.println("Started");
  esp.begin(115200);                                          // We are starting serial communication with ESP8266.
  esp.println("AT");                                         // We do the module control with the AT command.
  Serial.println("AT  sent ");
  while(!esp.find("OK")){                                     // We wait until the module is ready.
    esp.println("AT");
    Serial.println("ESP8266 Not Find.");
  }
  Serial.println("OK Command Received");
  esp.println("AT+CWMODE=1");                                 // We set the ESP8266 module as a client.
  while(!esp.find("OK")){                                     // We wait until the setting is done.
    esp.println("AT+CWMODE=1");
    Serial.println("Setting is ....");
  }
  Serial.println("Set as client");
  Serial.println("Connecting to the Network ...");
  esp.println("AT+CWJAP=\""+agAdi+"\",\""+agSifresi+"\"");    // We are connecting to our network.
  while(!esp.find("OK"));                                     // We wait until it is connected to the network.
  Serial.println("connected to the network.");
  delay(1000);
}
void loop() {
  esp.println("AT+CIPSTART=\"TCP\",\""+ip+"\",80");           // We connect to Thingspeak.
  if(esp.find("Error")){                                      // We check the connection error.
    Serial.println("AT+CIPSTART Error");
  }
  DHT11.read(dht11Pin);
  sicaklik = (float)DHT11.temperature;
  nem = (float)DHT11.humidity;
  String veri = "GET https://api.thingspeak.com/update?api_key=9D9YPGYTPOO0QKMR";   // Thingspeak command. We write our own api key in the key part.                                   
  veri += "&field1=";
  veri += String(sicaklik);// The temperature variable we will send
  veri += "&field2=";
  veri += String(nem);// The moisture variable we will send
  veri += "\r\n\r\n"; 
  esp.print("AT+CIPSEND=");                                   // We give the length of data that we will send to ESP.
  esp.println(veri.length()+2);
  delay(2000);
  if(esp.find(">")){                                          // The commands in it are running when ESP8266 is ready..
    esp.print(veri);                                          // We send the data.
    Serial.println(veri);
    Serial.println("Data sent.");
    delay(1000);
  }
  Serial.println("Connection Closed.");
  esp.println("AT+CIPCLOSE");                                // we close the link
  delay(1000);                                               // We wait 1 minute for sending new data.
}

Credits

seyyidahmedtopbas

seyyidahmedtopbas

2 projects • 0 followers

Comments