Updated 10/14/2020. Q2 mosfet should be p-channel one. For instance, A19T. The sche
In this project I will show how to convert old table lamp into LED lamp that allows to change the brightness. Also, I will show how to use rotary encoder to manage the lamp and turn it on and on.
First of all you need and old boring Gas-discharge lamp that you are going to turn into modern adjustable light source. Then you need 12v led strip about half of meter length. Please, check your lamp length and cut led strip accordingly. The controller supports up to 3 independent leds.
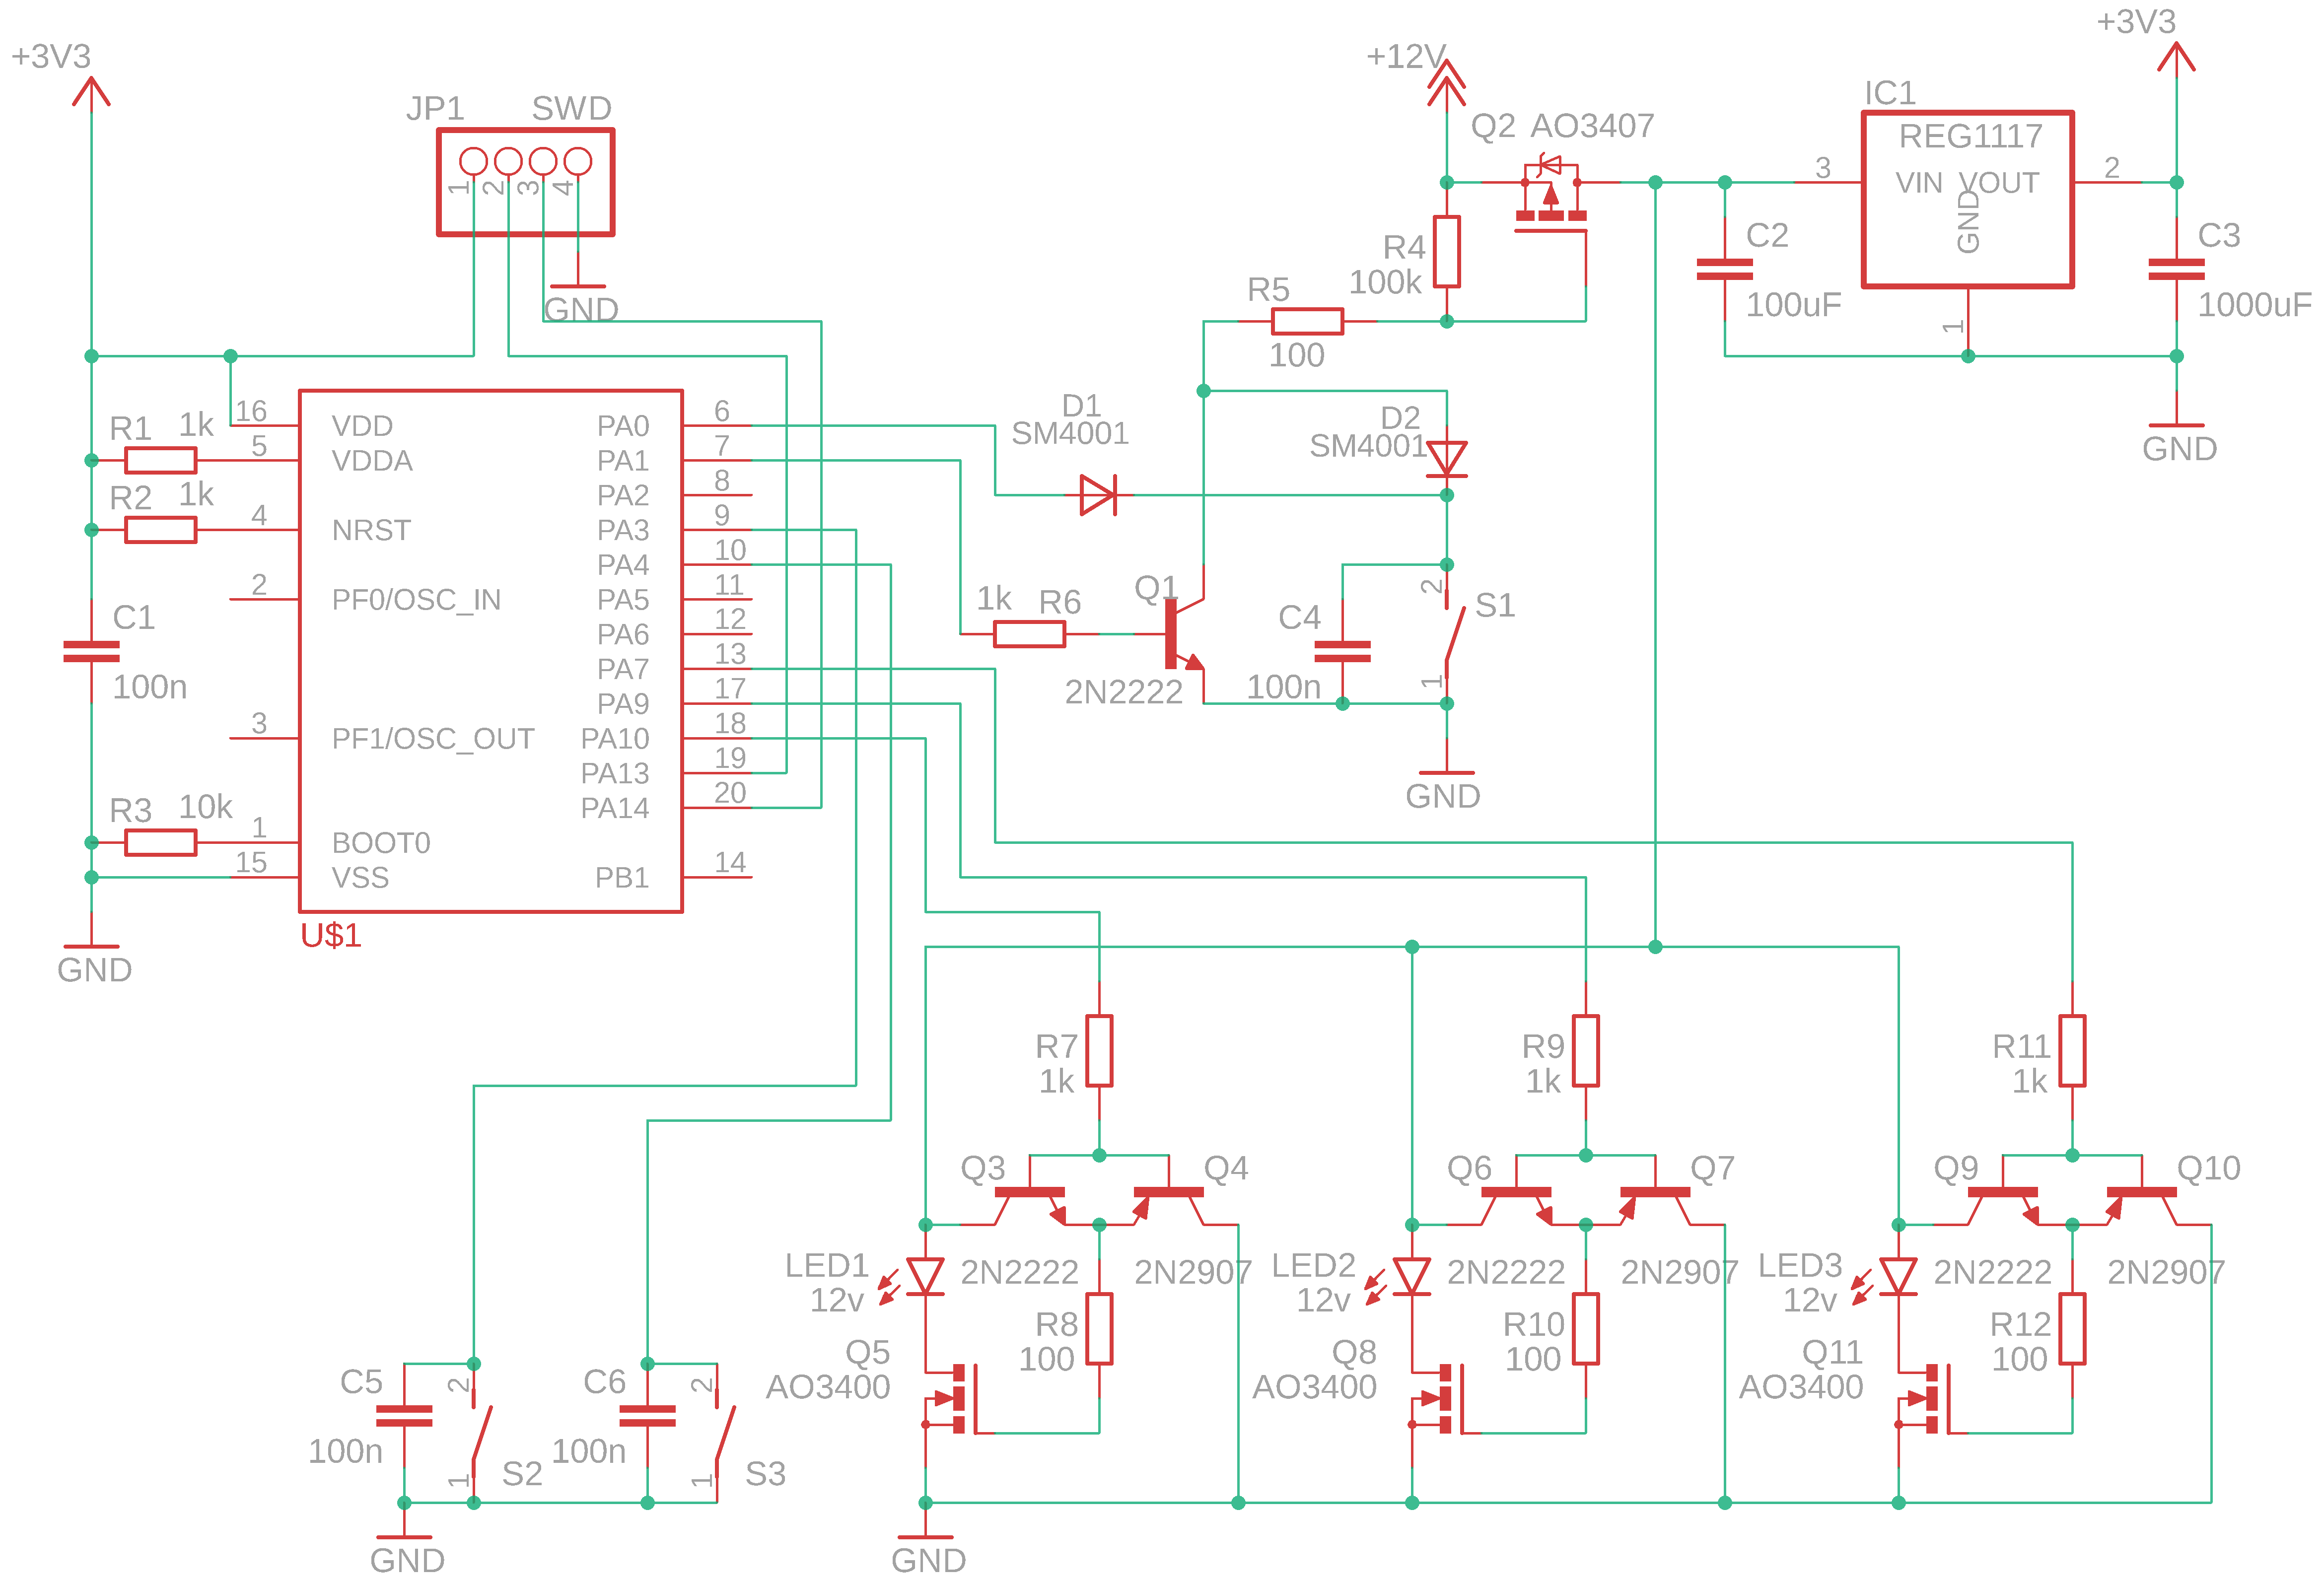
The tiny stm32 micro controller (STM32F030F4P6) does all the magic. As far as you can see, LED1, LED2 and LED3 are independent led strips that are managed by the high-frequency (31 kHz) PWM signal so the flickering is not a case in this project.
S1, S2 and S3 are the "switches" of the rotary encoder with a push button. S1 is a push button, S2 and S3 are the encoder pins.
The external 12v 1A power supply required to power the schematics.
When you plug the cord into AC outlet, the controller has no power so lamp is off. When you push and hold the encoder (see S1 on the schematics) the p-channel mosfet Q2 open and supply the power to the LEDs and to the micro controller. As soon as the micro controller starts, it activates PA1 pin and supply power the the Q1 transistor, so the mosfet Q2 would keep open. When you press the encoder button, it would change the PA0 pin status as encoder does usually.
The controller schematics
The lamp can work in two modes: discrete and smooth. In the discrete mode, the led strip can be activate completely from one to three. When you rotate the encoder, you can switch on or off the led completely. In the smooth mode, you can adjust the brightness of the led more smoothly. First the first led would be turned on and the brightness would increase up to maximum, then the second led strip would be activated and so on. Press the encoder lightly to toggle the modes.
Flash firmware to the controllerTo flash prebuilt firmware to the controller the st link v2 programmer and ST link utility are required.
Download the STM32 ST-LINK utility from st site. Install the utility in your system. Launch the ST-LINK utility, connect the programmer to the 4pins SWD interface of the controller, press "connect" button. The main window should display the memory content of the STM32F030F4P6 micro controller. Press flash button to write the firmaware to the micro controller.
Note: Do not connect ACpower to the controller while it is connected to the usb programmer. The micro controller can be damaged in this case.
Enjoy your modern LED adjustable light.


Comments
Please log in or sign up to comment.