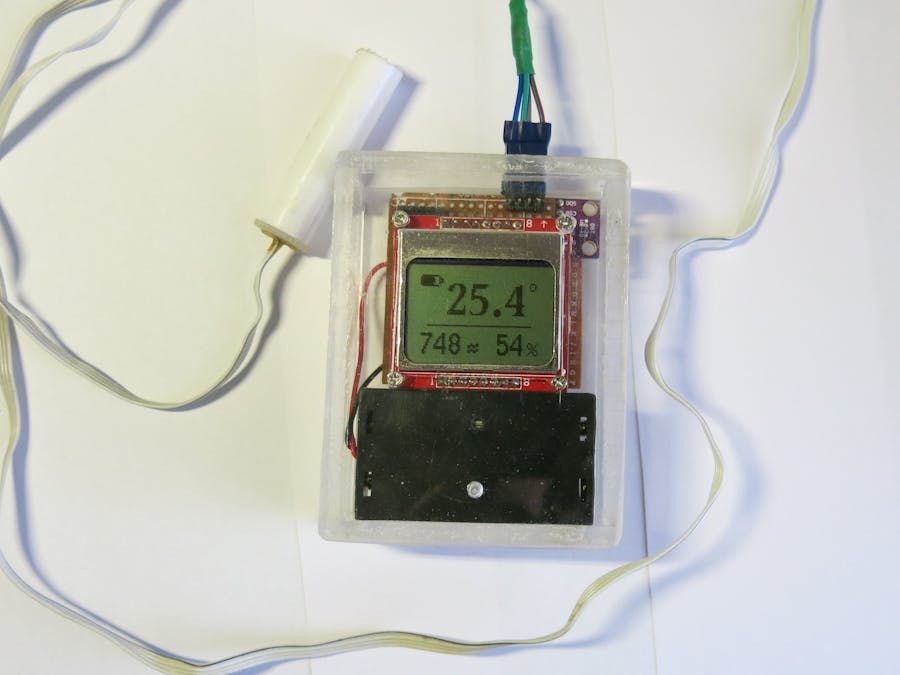
The plastic outdoor thermometer has gone with the wind some day. The double sided scotch became too weak on the sunlight to hold the thermometer on the window. Today anyone can look for the current weather conditions and forecast in the Internet, but sometimes the simple outdoor thermometer is more convenient. But the Arduino people could build their own outdoor sensor.
Life on the batteryYou can use Arduino pro mini running on the two AA size batteries. The main problem is the power consumption of this board. The battery life is about one week. No one likes changing the battery so often. This article describes how to run the Arduino pro mini on batteries for long time. It is easy to use sleep mode with watchdog timer, but you need to shut down the green power led that consumes about 10 mA. After the second pro mini board was destroyed in attempt to cut the led wire, I have decided to find out another solution to decrease the power consumption.
The idea is to build own Arduino without any led! Here is the good tutorial about building own Arduino on the breadboard. The only thing you need is atmeta328p-pu chip. Second, you can decrease the controller frequency to decrease a little bit power consumption. In this forum you can find the great tutorial about running the Atmega controller at 1 MHz. The power consumption of this system is about 5 micro Amps!
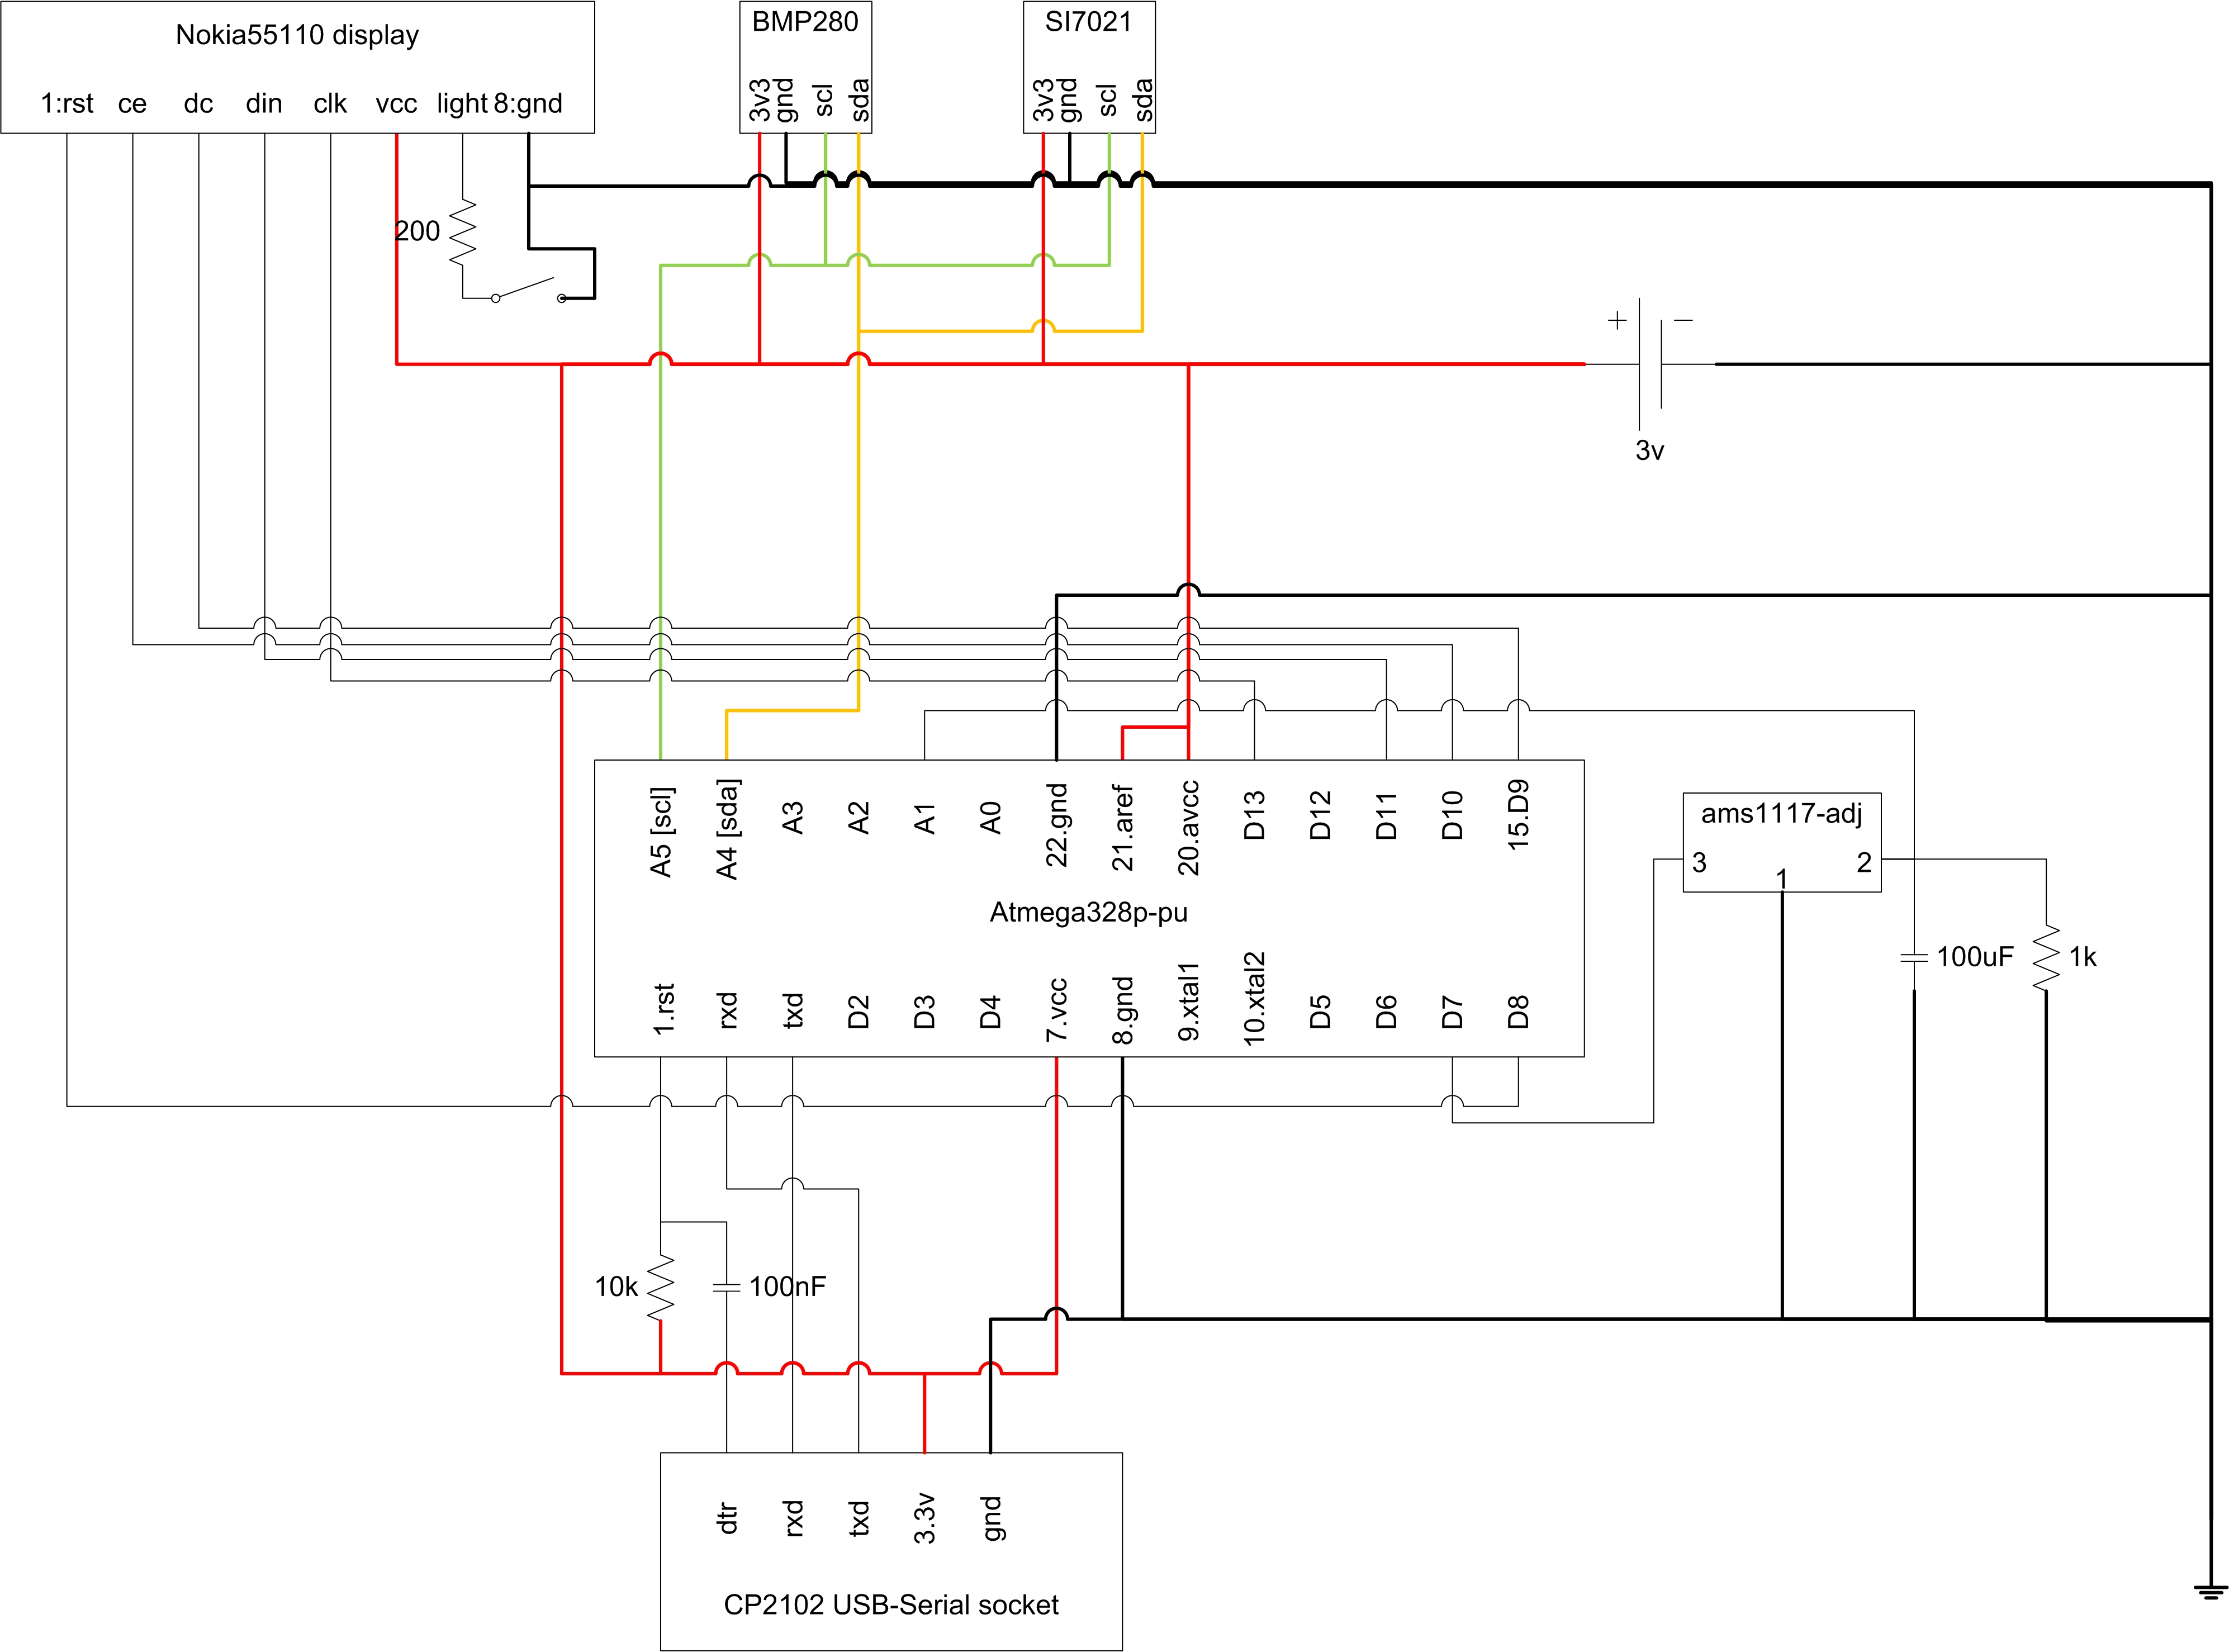
The thermometer is powered by 2 AA size batteries. The fuse settings of the Atmega controller disable the voltage limit so the thermometer can run on the batteries for long time. In many devices that run on batteries there is an indicator of the remaining battery capacity. This thermometer implements this feature also. To check the current battery voltage the reference voltage required. The ams1117-adj voltage regulator is used to provide reference voltage of 1.24V to the pin A1. The readings from A1 pin depends on the main battery voltage.
The main criteria for the sensor was the accuracy. Playing with the sensors I have found the couple of high accuracy sensors that can be recommended. Si7021 - the great temperature/humidity sensor. It has high accuracy, small form factor and implements I2C bus. This sensor can be connected to the thermometer by the long wire and placed outside. Another sensor, bme280, is used to measure the pressure. It is not necessary to put this sensor outside, because the pressure is the same.
The main criteria for the display is low power consumption to make battery life longer. The 0.96" Oled display looked nice especially in the dark, but it ate the battery in one week! Old Nokia 5110 display is the good choice. It is a little bigger than Oled display so more easy to read and it requires less power (without backlight). The u8glib library is used to show the information on the display.
ConclusionThe algorithm of the thermometer is very simple. It has no menu or buttons, only display and sensors. Watchdog timer wakes up every 8 seconds, every 5-th time the information from the sensors read and print on the display. The external sensor installed to the small box to keep it dry in case of the rain. The sensor is small and heats not much on the direct sunlight.


_3u05Tpwasz.png?auto=compress%2Cformat&w=40&h=40&fit=fillmax&bg=fff&dpr=2)
Comments
Please log in or sign up to comment.