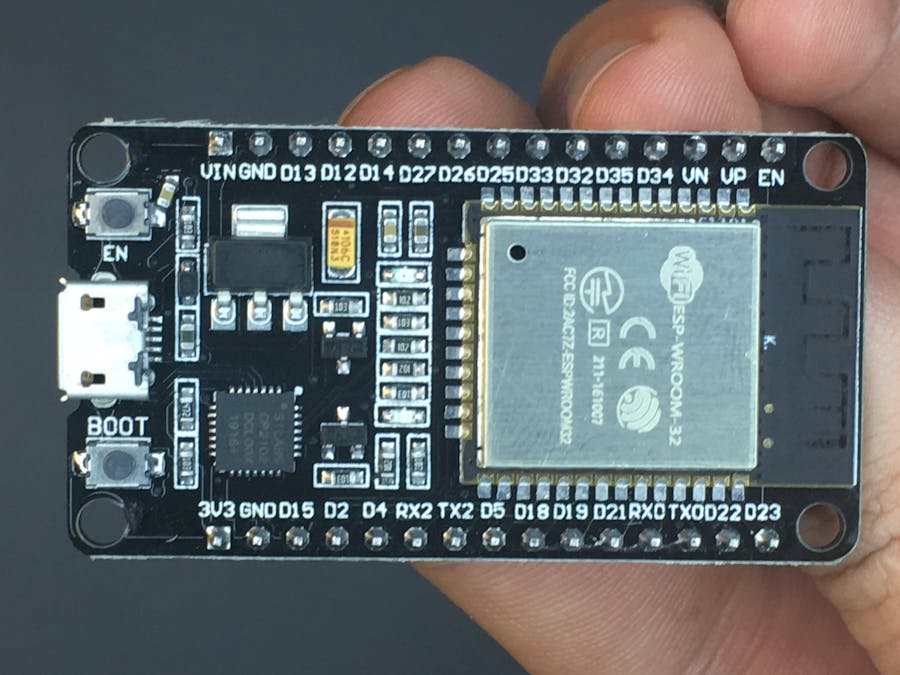
ESP32 is created and developed by Espressif Systems, a Shanghai-based Chinese company, and is manufactured by TSMC using their 40nm process.
ESP32 includes the following features:
- Dual core Xtensa microprocessor (LX6), running at 160 or 240MHz
- 520KB of SRAM
- 802.11b/g/n/e/i
- Bluetooth v4.2 BR/EDR and BLE
- 12-bit ADC with up to 18 channels
- 2x 8-bit DACs
- 10x touch sensors
- Temperature sensor
- 4x SPI
- 2x I2S
- 2x I2C
- 3x UART
- SD/SDIO/MMC host
- Slave (SDIO/SPI)
- Ethernet MAC
- CAN bus 2.0
- IR (RX/TX)
- Motor PWM
- LED PWM with up to 16 channels
- Hall effect sensor
- Cryptographic hardware acceleration (RNG, ECC, RSA, SHA-2, AES)
- 5uA deep sleep current
ESP32 Development Board will be used to blink an embedded LED infinitely.
Materials Required:- ESP32 Module
- Arduino IDE
- Programming cable (micro USB cable)
- Breadboard (optional)
- Install the driver in order to communicate UART through USB.
- Go to Preferences/Security & Privacy and allow the driver to run, and restart the Mac.
- Connect your Micro USB to your ESP32 Board.
- Run $ ls /dev/cu.* and you should now see /dev/cu.SLAB_USBtoUART.
Before starting the next step make sure you have the latest version of the Arduino IDE installed in your computer. It can be found by the following link.
Installing ESP32 Add-on in Arduino IDE- In your Arduino IDE, go to File> Preferences
- Enter https://dl.espressif.com/dl/package_esp32_index.json into the “Additional Board Manager URLs” field. Then, click the “OK” button.
- Go to Tools > Board > Boards Manage.
- Search for ESP32 and press install button for the “ESP32 by Espressif Systems“.
- Close a window
Plug the ESP32 board to your computer. Open Arduino IDE, follow these steps:
- Select your Board in Tools > Board menu (in my case it’s the ESP32 DevModule)
- Select the Port /dev/cu.SLAB_USBtoUART.
- Write down the following code
/*
* ESP32 LED Blink Example
*/
#define LED 2
void setup() {
 // Set pin mode
 pinMode(LED,OUTPUT);
}
void loop() {
 delay(500); // 500ms
 digitalWrite(LED,HIGH); // Turn on LED
 delay(500); // 500ms
 digitalWrite(LED,LOW); // Turn off LED
}
- Press the Upload button in the Arduino IDE. Wait a few seconds while the code compiles and uploads to your board.
- After uploading program you will find on board BLUE LED will start Blinking.
This is the end of the first module in a series of tutorials regarding the use of the ESP32 Development Board. Thanks for attention.


Comments
Please log in or sign up to comment.