


Hardware components | ||||||
 |
| × | 1 | |||
| × | 1 | ||||
| × | 1 | ||||
One of the most popular docks for the Omega is the standard Expansion Dock which breaks out almost all of the hardware goodies from the main Omega module. One of the things it doesn't breakout, however, is the serial port in the form of the RX and TX lines. It's not because they forgot but instead those lines run to a module which converts them to a serial USB connection so the dock can connect to and communicate with your computer. That connection is what enables serial terminal access. But if you're like me you may find that SSH access over WiFi is sufficient and therefore don't have a need for serial access over USB and want access to those serial lines for other things. In this post I'll show you how you can still tap into the serial lines by attaching a simple serial LCD display.
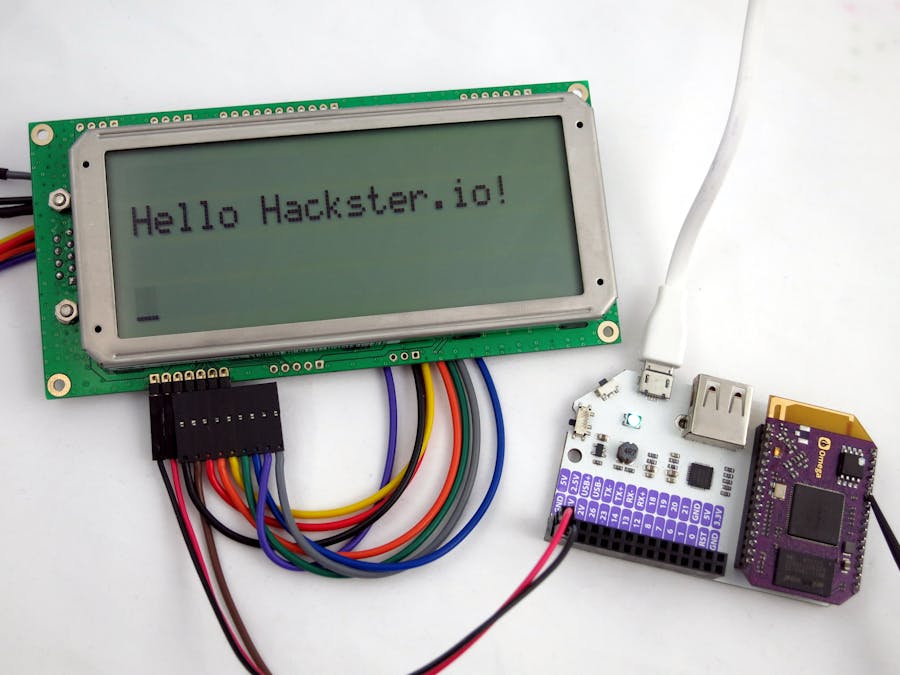
The DisplayThe display I used in this project is the CFA634 Serial Character LCD from Crystalfontz. It's a 20x4 character display that can accept a range of protocols including basic serial. While this post covers interacting with a display you can certainly use the information found here to communicate with other serial devices via the TX pin on the Omega. The display simply accepts a serial character stream and shows it to the user while also handling everything from wrapping text to autoscrolling. It has a 5V operating voltage with very minimal current draw so it can easily be powered directly from the expansion dock.
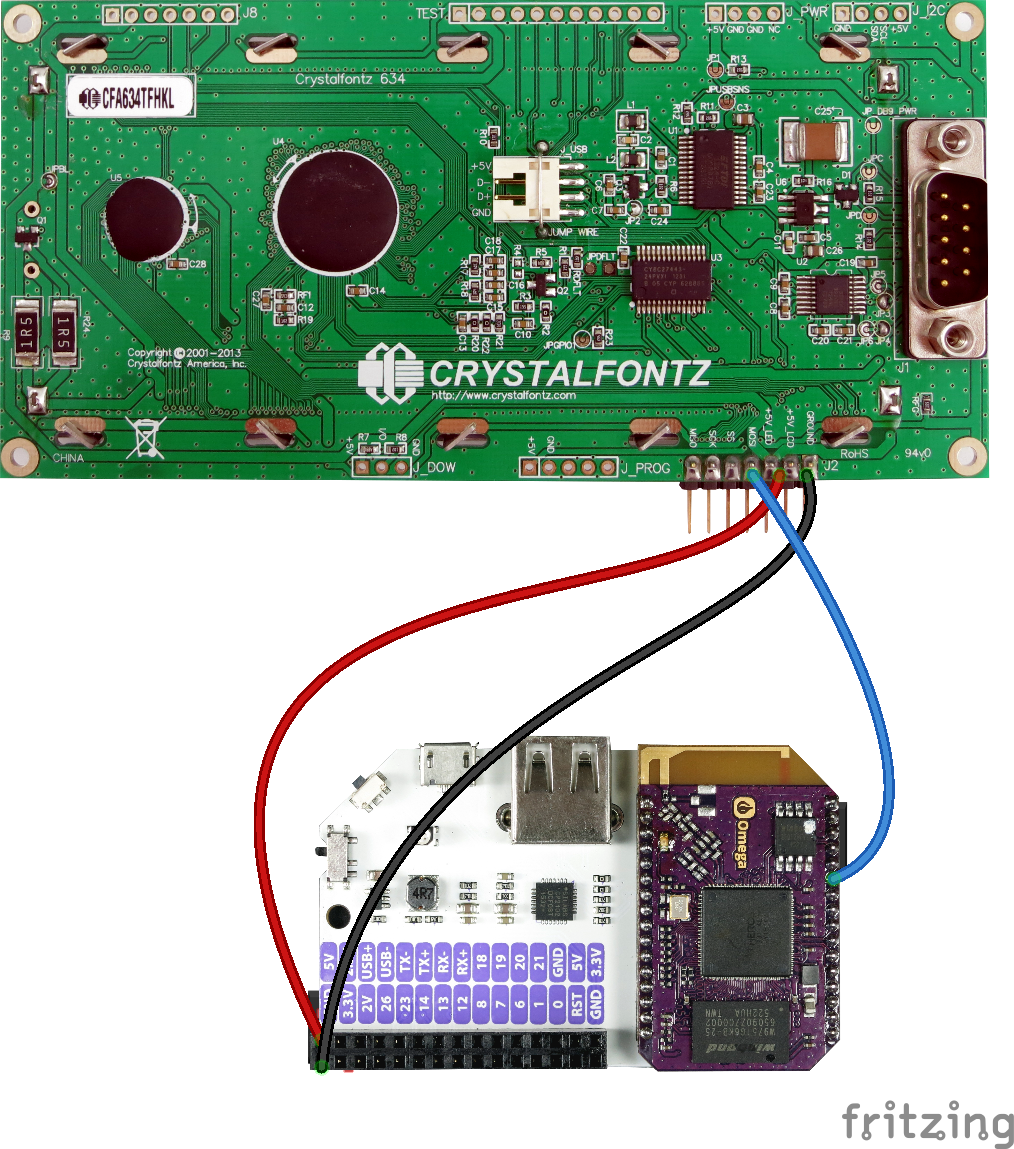
Making the ConnectionsThe power connections to the display are trivial as 5V and GND are both broken out on the expansion dock header so we just connect those over to the 5V LCD (LED is for the display backlight) and GND connections on the display.
The only other connection we need is to get the TX pin from the Omega to the MOSI pin on the LCD. There are a couple of options here. For a more permanent solution it's best to just solder a wire to the TX pin (and RX if you need it as well). In my case I used a temporary solution of using the test lead connector from my Saleae Logic 4 to clip onto the TX pin as seen here.
Note in the image above that the logic analyzer test connector is too big for the lcd header connection but only the brown wire in that harness is connected. This was just a hack to get it connected quickly. The red and black wires on the far right connect to 5V and GND on the expansion dock respectively.
Taking Advantage of OpenWRTOne of the best things about the Omega is that it runs OpenWRT which ultimately means it's just Linux under the hood. That means that we don't have to learn some proprietary way to interact with the onboard serial port. We don't even need to write any code to get started. By default the Omega's boot output is piped to the TX pin so to see if things are working after making the connections we just have to turn it on and you should see something like this.
The Echo HackAt this point you know the connections are good and that the data is flowing correctly. A super simple way to put custom text on the screen can be accomplished from the command line by echo'ing commands to the serial port. You can run an ls command from an Omega terminal window to see what serial options are available.
root@Omega-1ACD:~# ls /dev/tty*
/dev/tty      /dev/ttyATH0  /dev/ttyS0
/dev/ttyATH0 is the one that corresponds to the RX and TX pins on the Omega. Let's try it out.
echo "Hello Hackster.io!" > /dev/ttyATH0
Thanks to the recent release of the Onion Cloud this can even be accomplished remotely.
1. Follow the instructions for setting up an Onion Cloud account and log in.
2. Click on the Device Explorer option.
3. In the left panel select the file option and then write.
4. For the path put /dev/ttyATH0 and for the data any string you want.
5. Click on the send button next to the text "Interactive Command"
You will get an error that says "invalid ubus parameter data" but the command does get sent and should display the text you entered on the LCD.
If you don't want to use the web interface you could also run the curl command shown from the Device Explorer window. Don't forget to replace <Your_Api_Key> with your actual key which can be found in the Key Manager app from the Onion Cloud dashboard.
curl -H "Content-Type: application/json" -H "X-API-KEY: <Your_Api_Key>" -X POST -d '{"path":"/dev/ttyATH0","data":"Hello from curl\n","append":"","mode":"","base64":""}' https://api.onion.io/v1/devices/8ee5ed42-d2bb-44ff-9f23-72cd66b3ad1b/file/write
So even though the serial pins aren't technically broken out on the Expansion Dock it doesn't mean you can't use them in your project. If you want to take this concept even further you can start digging into how to programmatically access the serial port in applications that run natively on the device. In the meantime you can use this simple hack to get your project off the ground.


Comments
Please log in or sign up to comment.