


Hardware components | ||||||
| × | 1 | ||||
| × | 1 | ||||
 |
| × | 1 | |||
Hand tools and fabrication machines | ||||||
| ||||||
| ||||||
Have you ordered your Tessel 2 and can’t wait for it to ship later this year? Have you messed around with the virtual image and maybe even started on a DIY Module for it but are still looking for ways to pass the time before it arrives? Why not make a case for it?
DISCLAIMER: I have not run the Tessel for extended periods inside of these cases so I have no idea if they will overheat. To be safe you may want to carve some sweet ventilation holes to help with air circulation.
Assembly Instructions
1. Download It, Print It, Cut It
You have a couple of options here. The .dwg file should open in pretty much any CAD application (I used DraftSight) and is great if you want to modify the design a bit or adapt it to another project. For everyone else I’d recommend just downloading the PDF version. The case is to scale but you have to print it that way so make sure any autoscaling is turned off or else the dimensions won’t be quite right. The bottom portion of the case printout should be exactly 60mm wide if you want to check it with a ruler.
Once you’ve printed out the plan it’s time to cut it out. Take your time on this part. The folding dimensions are pretty exact and since you’ll be transferring it in the next step you want this master template to be as accurate as possible.
2. Transfer It and Cut It
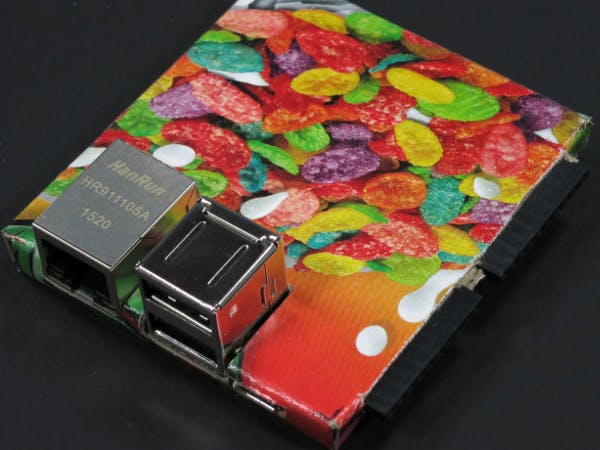
Once you have your template you can transfer the design to any medium that’s not too thick. My mediums of choice are empty cereal boxes and other food boxes because they have designs built-in and the cardboard is just right but you can use anything you want.
IMPORTANT: Make sure you have the template facing the right way. Too many times I’ve had it flipped over and once it’s folded the cool design you are trying to transfer is on the inside of the case instead of the outside. Right side up is with the port slits on the right. So you want to trace it with the template on the box like this:
Again, it’s important to take your time on this step and get the template trace as accurate as possible so the case fits your Tessel properly. Once it’s traced it’s time to cut it out again. At this point just cut out the outline of the case. DO NOT cut out the internal pieces (power, USB, ethernet, ports) just yet. I recommend scissors for the outline cut and then a utility knife for the internal cutouts when you get that far.
3. Fold It
Before we cut out the holes we want to fold the case first. The reason for this is because the power and port slits are so close to a fold line that once the holes are there the folds can be difficult to get right as the case is flimsy at those points.
The fold lines are on your template but they need to be transferred to the back of your cutout. The blank side. This is what mine looks like.
The best way I’ve found to do this is by using a ruler or even a piece of printed circuit board. Place the ruler or PCB along a fold line to help you get a straight fold edge.
4. Cut It Again and Vent It
To finish things up use a utility knife to cut out the port, power, USB, and ethernet holes. You can now add some ventilation slits/holes if you wish. If you plan on running your Tessel for extended periods I highly recommend venting it in some way.
5. Wait
I know September isn’t coming fast enough but put your case in a safe place and wait for the arrival of your Tessel.
6. Install the Tessel
Once your Tessel does arrive getting the case on is very easy. Slide the two ports into their slits while making sure the Tessel is oriented correctly so the power, USB, and ethernet will line up with their respective knockouts. Once the ports are snug in the case you can just fold the top of the case over while lining up the front knockouts. All of the outer tabs are meant to fold under the Tessel and be held in place by the bottom of the case. A single piece of tape at the back is normally plenty to hold the entire thing together.
Share Your Case
That’s all there is to it. It’s a very inexpensive way to have a sweet looking case on your Tessel. If you make a case for your Tessel 2 I’d love to hear about it. If you find a cool medium to use please share it in the comments.


Comments
Please log in or sign up to comment.