ESP8266 is a microchip of low cost that is produced by a company by the name of ESPPRESSIF stems. It has been used in the revolution of cloud communication systems in the field of electronics as it has Wi-Fi and Bluetooth communications capabilities. The microcontroller has several pinouts. In this article, we are going to focus on the 3v3 pin which is where the powering of the ESP8266occurss. This 3V3 means that the ESP8266 is powered by the use of the 3.3V and therefore we need to ensure that before we power this system we are doing it with the right voltages or else we might end up creating more damage.
Now let us have a look at how to design our 3v3 output by use of the 5v DC output voltage:
AN_SY8088First, I had to start by choosing the right DC to DC voltage regulator for the system. I had to settle for the AN_SY8088, which is a high-frequency synchronous DC to DC step down voltage regulator with an operating current of about 1A and an input voltage of about 2.5 to 5V which was good for my system that required a 5V DC to stepped down to 3V3 DC. Check the datasheet for more information.
I did the design the schematic in KiCAD EDA by following all the necessary design rules and procedures. The AN_SY8088 schematic was somehow simple to be achieved since the datasheet provided had the necessary schematic and I only needed to do the calculation of the various resistors, capacitors, and many other components. Check the schematic below:
The PCB layout was also done in the same KiCAD which allows room for routing and arrangement of the components according to the given schematics. The routing outcome is attached below:
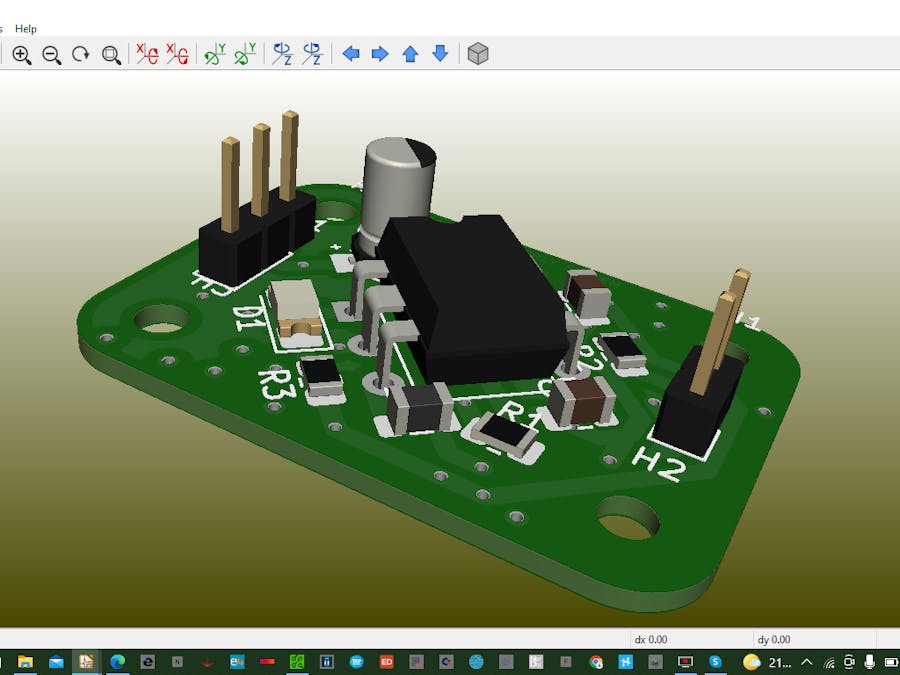
After routing, the process moved to the 3D view and here we could be able to have our PCB in 3D. Also, we had to generate design files that could enable us to order for manufacturing and I will guide you on how you can order for the manufacturing with simple and easy steps. Below is the 3D view of our power supply design:
First, you need to get to PCBWAY and sign up through the embedded link. Click on the instant quote which will lead you to the below interface and select the necessary dimensions which could be collected by a team of engineers if you choose the wrong one.
Select the quantity thickness and the color of every aspect of your printed circuit board
Calculate the cost of your printed circuit board and save it on the cart:
Upload your CSV Gerber files and now the engineers will check your exact dimensions as per the design. They will also check the type of the board and give you the final quote for you to pay.
Just check out and you will get your PCB at home within seven days.


_4YUDWziWQ8.png?auto=compress%2Cformat&w=48&h=48&fit=fill&bg=ffffff)
_zGQQrVPffU.png)


_Ujn5WoVOOu.png?auto=compress%2Cformat&w=40&h=40&fit=fillmax&bg=fff&dpr=2)
Comments
Please log in or sign up to comment.