The environment of a modern city is always changing and with it so does the ambient sound. A lot of people nowadays use headphones to listen to a wide variety of content on the go. When entering a busy street or a metro station, you constantly have to adjust your volume to cover everything going on around you. Even after you find the perfect volume, the music you were listening to suddenly changes to another genre, and the volume can become uncomfortable.
Constantly adjusting the volume is bothersome when you are navigating the streets. So instead of doing all of this manually, you can let an AI learn your preferences and do it instead.
SmartWave is an AI-powered solution that will learn from your preferences and adapt to your surroundings based on the content you are listening to. The system uses microphones in combination with machine learning to constantly readjust your volume for a pleasant and seamless listening experience. The neural network is notified every time you change your volume and learns to provide the best volume for everyone's ears.
2. HardwareThe PSoC 62S2 Wi-Fi BT Pioneer Board is built around a PSoC 6 MCU. The PSoC™ 6 MCU is an ultra-low-power PSoC™ device specifically designed for wearables and IoT products. PSoC 6 MCU is a true programmable embedded system-on-chip, integrating an Arm® Cortex®-M4 as the primary application processor, supporting SD/SDIO/eMMC interfaces, CapSense® touch-sensing, and programmable analog and digital peripherals that allow higher flexibility.
The PSoC 62S2 Wi-Fi BT Pioneer Board main features are:
- PSoC 6 MCU with a 150-MHz Arm® Cortex®-M4
- 512-Mbit external Quad SPI NOR Flash
- 4-Mbit Quad SPI F-RAM
- KitProg3 onboard SWD programmer/debugger
- CapSense touch-sensing slider with 5 elements
- A micro-B connector for USB device interface for PSoC 6 MCU
- A microSD Card holder
CY8CKIT-028-SENSE IoT sense expansion kit is intended as a companion to add common sensors, audio components, and a user interface to an Arduino™ UNO - based baseboard.
SensorsThe CY8CKIT-028-SENSE IoT sense expansion kit main features are:
- High-precision XENSIV™ digital barometric air pressure sensor and temperature sensor
- Two high-performance XENSIV™ MEMS digital microphones
- 3-axis accelerometer, gyroscope, and geomagnetic sensor
- Low-power stereo audio codec
- I2C-based 124 x 64 OLED display
- Arduino™ UNO compatible headers
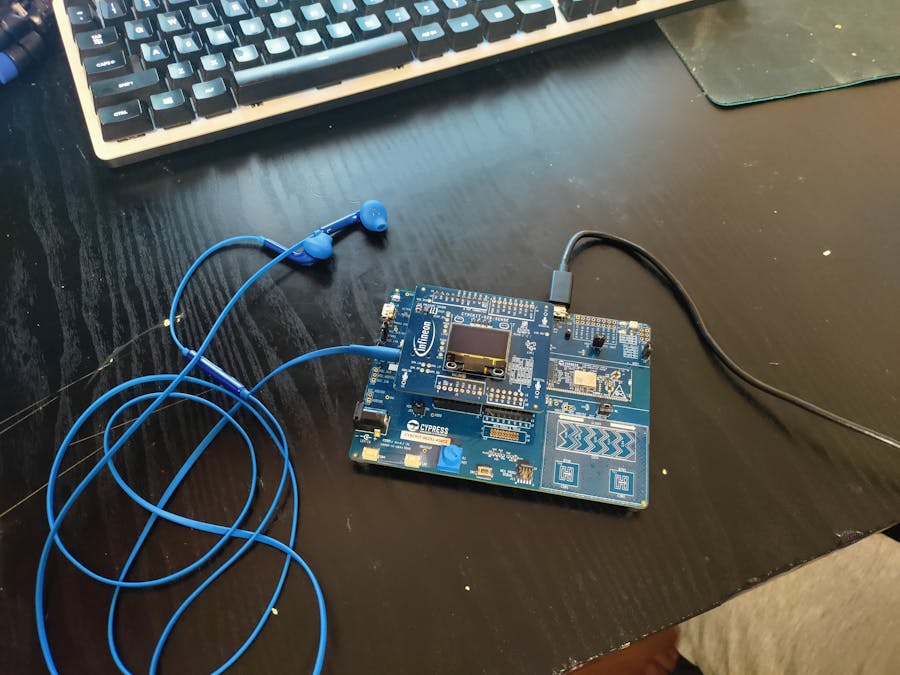
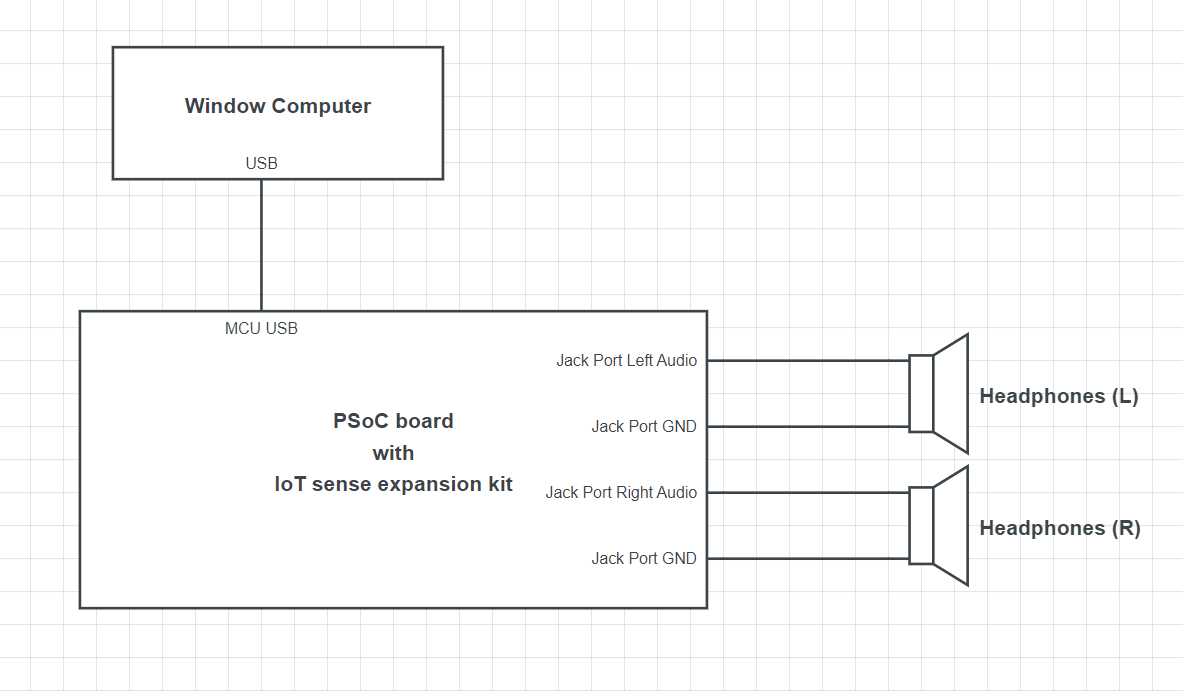
Our device is able to playback music to any headphones as long as they are connected to the board with a 3.5mm auxiliary cable. The sound is coming from a device with a USB interface.
4. SoftwareThe board uses FreeRTOS (Real-time operating system), which is used to launch five tasks:
Audio App Task
- Audio App Task
Task that initializes the USB port communication for the source device and the audio application.
- Audio in Task
Task that receives the volume and the audio feed from the source device via USB port.
- Audio Out Task
Task that sends data back to the source device like the current volume and the microphone audio feed.
- Touch Task
The touch task manages the touch controls that are located on the board. These are used for controlling the volume of the sound that is currently played.
- AI Task
The AI component that automatically adjusts the audio volume.
Basic functionalityThe board can be connected to any normal Windows computer, and it will appear as a USB speaker and microphone. Using a pair of headphones, you can listen to the sound being send to the board. You can also record the sound being captured on the board. While the AI is off, changing the volume on the computer also change the volume of the audio codec.
Modulus toolboxModus toolbox is a piece of software that contains the tools necessary for the development of Infineon MCUs. It covers a large array of domains and it was the best candidate for programming our microcontroller.
Configuration and loading code on the machineThe project has a number of libraries included, the most important being audio-codec-wm8960, ml-inference, the freeRTOS operating system and the PSoC™ 6 auxiliary library. The machine learning model has been loaded using the tool ML Configurator 1.2. The code is loaded into the machine by connecting the PSoC™ 6 board into the computer and using its KitProg3 functionality and the options available în ModusToolbox.
AI ComponentThe code that generated the AI model is written in Python 3.6 and uses deep neural networks and Keras 2.4 to analyze the audio data it receives. With inputs from multiple subjects and data engineering methods such as modifying the volume or adding different types of noise, the number of training data sets reached 2400.
The input data represents audio data in raw format, 32-bit PCM that is normalized in the interval of [-1, 1].
The result is a number in the interval [0, 1], representing the automatic adjusted volume of the audio. It also uses early checkpoint to obtain the best model from all the simulations.
6. Conclusions (also the story)
Starting, we were quite ambitious about the potential of our project. Our initial project included audio transmitted through Bluetooth and an AI that could take into account a wide variety of situations. We had to overcome a lot of obstacles and this is the story of how we did so.
Our first objective was to play audio on the board. An example project which demonstrated this already existed, but we soon learned that it was written from a different codec than the one we had. We did struggle at first to determine exactly what we must do. Hopefully, it was quite easy to install the audio-codec-wm8960 library using the Library Manager and the comments included in the library itself were enough to get audio playing on the board and to record audio.
We then started thinking about how we can get our audio signal on the board from a PC. We tried using Bluetooth(BR/EDR) in order to stream audio from a computer to the board, but the documentation for doing so was very scarce. We did use Bluetooth Configurator and an example project, but all the information we found was geared towards Bluetooth (LE) and transmitting a small amount of data. We decided to abandon using Bluetooth.
We then started over from the example project USB Audio Device FreeRTOS. We decided that FreeRTOS was the best way to handle both the AI and the audio streaming.
When creating the AI, we tried to take into account both the environmental sound recorded by the board and the desired volume level of the user. The idea was for the AI functionality to be non intrusive and seamless. However ML Configurator kept returning a number of vague python exceptions. It took a lot of trial and error to discover that a model with multiple inputs was not supported. Eventually we decided to scale back our idea and only use one input, the environmental sound.
After we loaded the AI into the project, we also created a task for it and hooked it up with the audio and volume data. It seems that the many tasks and the USB audio streaming made debugging very hard and unpredictable so we struggled to test the code we had written.
The current configuration is this: the board records the environmental sound and sends it to the AI, the AI decides a volume value and sends that value to both the audio codec and the PC. The board also appears as a USB speaker on our computer and plays sound properly. The user has no control over his volume for now. We also found out that the AI is rather unpredictable. In most cases it prefers to completely mute the volume or choose an arbitrary value. One way we could have improved the AI was to train the AI with values recorded by the board's microphone. There are many other things to improve and change but this is what we managed to do so far.
The complexity of the project was often overwhelming for us. We found out that it's important to test things in isolation but also as a whole. We learned more about machine learning, embedded programming, audio codecs, USB communication and real time operating systems. We thank you for your support and for this opportunity.
7. Documents and references


Comments
Please log in or sign up to comment.